
 Lessons: 12Length: 1.2 hours
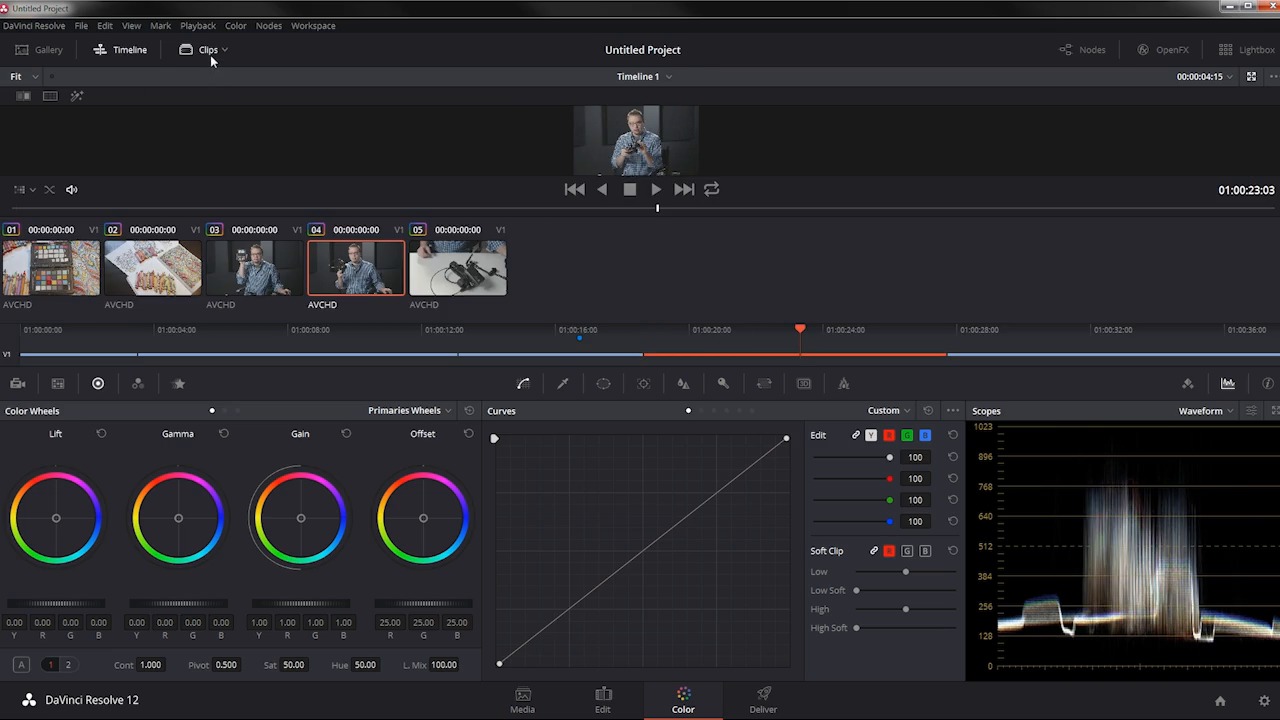
- Overview
- Transcript
4.3 Tweak Individual Clips
Depending on the composition of the shot, you may have to make minor adjustments to your clips, and in this lesson you will learn how it’s done!
1.Introduction
1.1Introduction01:12
1.2What You Need05:05
2.Getting Started
2.1What Is Color Correction?06:14
2.2When to Correct06:02
3.The Process
3.1Resolve Interface05:53
3.2Scope Basics07:01
3.3Import08:47
4.Color Correction
4.1Match Color06:37
4.2Copy the Adjustment and Apply02:59
4.3Tweak Individual Clips05:46
4.4Export08:12
5.Conclusion
5.1Conclusion06:26
4.3 Tweak Individual Clips
Depending on the composition of this shot, you may have to make minor adjustments to your clips. And in this lesson, you will learn how it's done. So let's say, that you've done your color matching, and you want to make a little adjustment. For whatever reason, it didn't look quite right. Maybe the target was pointed at a colored wall, and that's skewing the results. For whatever reason, you need to make a small adjustment. This is fairly simple to do and probably the easiest way to do it is to use this Lift, Gamma, Gain which is in the Color Wheels portion of the color page. So before we were on the Color Match, and right next to the Color Match, are the Color Wheels. Now, there's other settings in here. There's these Primary Bars, which essentially do a very similar thing as the Color Wheels. It's just a different way to look at it, and then there's this log section over here, which is not something you need to worry about right now. Almost everything that you're going to need to do can be done right here with these color wheels. Now you can think of Lift, Gamma, and Gain as the Shadows, the Midtones, and the Highlights. That's not exactly how it works because these are a little bit more broad than the Shadow, Midtone and Highlights that you see here in the log area. So for example, the Gamma has a really big range of what it affects, the Lift is mostly the blacks in the shadows, but it goes up through the spectrum, so this is very good for making subtle adjustments. So I'm gonna click my Clips here, and let's take this clip right here, for example. Maybe I want to take these midtones and maybe I wanna warm them back up just a little bit because, for whatever reason, they don't look quite right. So I'm gonna come over here to the Gamma, and I'm just gonna push that towards orange a little bit. Now just be aware that moving this little target here all the way will make huge adjustments, and that's probably not what you wanna do. You wanna make very, very small adjustments. You can see even just that much is making a pretty big difference in what the picture looks like. So maybe I wanna warm up the midtones a little bit, maybe the highlights, maybe warm them up a little bit. You can see that's extremely sensitive because most of this white area here falls in this Gain range here, so that's gonna make a really big difference. So maybe I just move that just a tiny bit. You can use this to make any other corrections that you may need to do, very, very quickly, very easily. If I wanted to take this clip right here, and I wanted to make an adjustment, say, the shadows look okay, but maybe they would look better if they were just a hair more blue. So I might take this and just pull this down ever so slightly, just the tiniest bit towards cyan. That's it right there. And you can see you can make a really quick adjustment. If you want it be more drastic, you can move these all over the place to do whatever you want. That's not really in the realm of color correction. That's more kind of color grading where it's a little bit more stylistic. Now there are a number of other adjustments you can take, this master wheel here for the Lift and adjust the black point. You can do the same thing with the master wheel for the Gain to adjust the white point and with the Gamma to adjust the distribution of the midtones. In an offset, this is kind of the master control for everything. You can see that everything in the scope here is being pushed up where if I make an adjustment on the Gain, it's mostly this top kind of portion here that's being expanded. Same thing with the shadows, if I push those and pull those down, it's not so much affecting this middle area, but it's mostly affecting this area down here. You can also come down here and adjust the Contrast more or less. The Pivot point, the Saturation, the Hue, and many other adjustments, Highlights, Color Boost, Shadows, Midtone detail. And then there's all these other adjustments here which you can explore even further. But for quick, fast adjustments, pretty much all you're going to need to do is to use this Color Match here along with your Color Target. Again, I'm using the X-Rite ColorChecker and then making any subtle tweaks to the picture with the Color Wheels here using Lift, Gamma, Gain, maybe making a few small adjustments to Saturation. But again for color correction, we're trying to make this as neutral and as normal looking as possible. We're not trying to create a cinematic look here or do something wacky. You're trying to neutralize the footage so that it matches all of the rest of the clips in your sequence. And again, if I wanted to copy these changes over to this clip, all I have to do is middle click, and that's it. Now if I open up the Nodes here, you can see that I have an adjustment and a color match here, on both of these clips, and so they are now matched. Coming up in the next lesson, you're gonna learn how to take your color matched clips and relink them, so that they can be used in your editor. So check that out, coming up next.


