
 Lessons: 11Length: 55 minutes
- Overview
- Transcript
2.3 Apply the Preset
Now that you have a solid starting image, it's time to apply the preset. The Kodak Gold preset is a starting point: in this lesson you'll learn how to reassess the image and decide what it needs to fully express your desired look.
1.Introduction
1.1Introduction01:29
1.2What You'll Need02:26
1.3The Kodak Gold 100 Look04:41
1.4Intention and Consistency04:30
2.Lightroom, VSCO and Emulation
2.1Assess the Image04:33
2.2Bring the Image to Neutral05:54
2.3Apply the Preset05:26
2.4Local Adjustments12:30
2.5Finishing Off08:16
2.6Consistency in Lightroom03:10
3.Conclusion
3.1Conclusion01:51
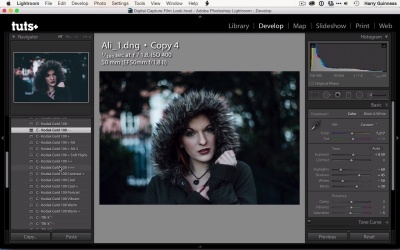
2.3 Apply the Preset
Hi and welcome back. In the previous movie we created this neutral exposure to help us understand what data we had in the file to work with. As before, I don't actually want to lose this exposure. So I'm gonna create a virtual copy before we apply the preset so that we can revisit this and see what data we lose once we start to mess around with all the other sliders and settings in Lightroom with the VSCO Film preset. Once I apply the preset, I'm gonna lose all the work I did in the previous film. These presets work by changing all these sliders and settings in Lightroom to closely emulate the classic films. So all that work I did to bring this image to neutral is gonna be lost, but because I'm using the virtual copy, I can still revisit it and see what I have to work with. On the left you can see I've got the VSCO Film 00-Canon pack pulled open. As I said, you need this installed to follow this tutorial, but it's available for free from the VSCO Cam website. So I'm gonna use the Kodak Gold 100 preset. In the VSCO Cam pack there are a couple of different variations on strengths of the preset. You can see over on the left you've got the Kodak Gold 100, and if you look in the Navigator panel you can actually see a preview of what would happen if I applied that preset. Because the VSCO Cam presets are well designed, they also reset each other so I can actually just click on Kodak Gold 100 to see it applied to the main image. If you're working with less well-designed presets, this can be a good way to preview what changes we've made without having to constantly reset everything. So I'm just gonna click on Kodak Gold 100 and see what effect it has. So just looking at the sliders, I can see that it's changed the settings I made, other than the exposure contrast and white balance changes which the VSCO Cam presets ignore. It's darkened up everything and it's killing a lot of the texture. So just look at the histogram. I can see that we've got quite a bit of pure black and a lot of things that go almost to pure black. So if I was to use this one, that is something I would definitely have to address. Clicking on down, Kodak gold 100- is a slightly less intensive version of the preset applied. The -- is an even less intense version. As you can see, we're recovering some of the texture back into the image, so this might be a really good one to use as our starting point. If, on the other hand, I was to look at the +++ one, you can see that it's really amping everything up. It's killing the blacks, interestingly, and introducing a bit of noise. This isn't the look I really want to go down. The Kodak Gold 100 Portrait might also be worth a look, but I don't think it's any better than In fact, I think it's slightly worse. This image was underexposed enough that we don't need to pull it back anymore in the baseline, whereas the Portrait does just that. Now this is far from the final image. A lot of people think that once you apply a preset you're done and that you'd export this out and save it. This is just the starting point. There's a lot more work to do with this image. If you click back to our plan, you can see that we have all these things we've got to do. We've got to keep the vignette, we've got to brighten up Ally's face, do the dodging and burning, the local adjustments, and make sure to keep all the texture in everything. So this preset has done practically none of it. It's kept the vignette a bit, and it has allowed some texture still there, but certainly not enough. So the first thing we're gonna do is gonna work with the sliders in the basic panel. I'm gonna pull the contrast back, and that will give us a bit more texture in Ally's hood and hair. Somewhere around -52 I think is doing quite well. I'm not too fussed about the background because I know I'll be adding the vignette in which will darken that up a little bit more. I also think that the white balance is now off again. The preset really amps up the greens and it adds a bit of orange. Because this image was so green and cool already, I think it needs to be warmed up a little more just to bring it back up to where we were working with. And somewhere around there is quite good. If I click over to our neutral exposure, you can see that we're losing a little bit of texture in the hood here, and I can fix that with a local adjustment rather than a global one. But on the whole, we're looking quite good. And that this is a really interesting emulation of the Kodak Gold 100 look in Lightroom. And it's a really good place to start doing our local adjustments, which are really gonna bring this image to life. And in the next movie we're gonna do just that.


