
 Lessons: 18Length: 1.8 hours
- Overview
- Transcript
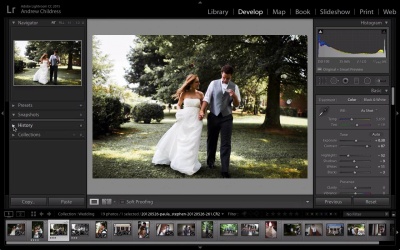
3.4 Batch Processes Made Easy
When you’re processing images, it’s incredibly time-consuming to work on them one by one. In this lesson you’ll learn about batch tools such as presets, how to synchronize settings, and how to manage versions with snapshots.
Related Links
1.Consolidate and Import
1.1Introduction01:00
1.2The Ideal Configuration03:05
1.3Import Your Images11:00
1.4Customize Lightroom's Appearance09:17
1.5A Flexible Workflow06:35
2.Manage Your Collection
2.1Collections and Culling10:18
2.2Star Ratings and Color Labels04:31
2.3Keyword Tagging05:39
2.4People Tags02:56
2.5Find and Filter04:07
3.Correct and Perfect
3.1Essentials of Image Correction06:45
3.2Image Adjustment10:02
3.3Correct Your Crop04:15
3.4Batch Processes Made Easy06:13
3.5Photomerge: HDR and Panorama04:43
3.6Spot Correction08:43
4.Out of Lightroom
4.1Concluding the Edit05:43
5.A Holistic Workflow
5.1Make Lightroom Work for You04:06
3.4 Batch Processes Made Easy
One of the best parts of the digital workflow is being able to experiment with your edit styles as much as you want. So when you come to a fork in the road about how you want to edit a photo, how can you manage multiple versions of that same image? The best way in Lightroom is with virtual copies. Let's go ahead and create our first virtual copy. Let's say that I have this image that we've been editing on, and I'm quite happy with the way it looks. But maybe I want to try it in black and white. If I come down to the film strip and Control Click on the image. And choose Create Virtual Copy, the image will be instantly duplicated. So now we have two images on our film strip that are exactly the same. But what happens is, is that when I create this second image, I can work on it independently of the other one. So if I click black and white, the original image is preserved in this edit style while the new one takes a completely different route. And we can adjust any of the sliders we want with it and preserve both of those copies. Again this doesn't create an additional file on our hard drive, it doesn't copy and paste the original image But instead it just gives us a fork in the road about how we can edit our photos. In the digital workflow you shouldn't be restricted to just one version of the image. So try using virtual copies when you're a bit indecisive about where to take an image. Now, next up, I wanna talk about a time saving trick that you can use to kinda take one visual style and move it to another image, and that's by synching our settings. So, what I have here is this image that we've been working on throughout this part of the lesson, and I wanna take the settings I've applied to it and use it with other images. So if I have this image selected and I want to take this same visual style to other images, I can hold command on my keyboard or control on Window's and choose some additional images. I've now got three selected. If I press sync at the bottom of the panels on the right side, Lightroom will bring up some boxes that allow me to choose which settings I want to carry forward. Think of this box as copying and pasting your image edit onto other images. What I recommend leaving here is a lot of the settings that don't apply on an image specific basis. For example, you wouldn't want to copy and paste your crop because it's gonna vary from one image to the next. or spot removal for that matter. But in general the default settings are good ones to move, such as the basic tone, the color, the treatment, the white balance. If I press synchronize, Lightroom will carry those same settings forward to the other images. Let's click one to see how it looks. Now you can see here that it's not perfect after we copy and paste the settings. That's because the exposure and the settings you'll need for each image can vary slightly. But it is a great starting point that allows us to tweak a few more basic sliders and get basically the same look as the original. I'm a big fan of syncing setting so that you can preserve your visual style throughout an edit and make sure that it has a cohesive feel to it. And this image carries through the same muted greens that we looked at with the image we made earlier. As we discussed throughout this course, Lightroom's a nondestructive image editor. And we can jump back to any stage of the edit that we want to use. If I view the History panel on the left side, I could see all of the changes I've made to this image. And you'll recognize a lot of the changes we've made over the course of this tutorial. If I hover over any of these, you can see in the navigator, a preview of what that stage looks like. And I can simply click it, to jump back to that stage. And this is really the power of the nondestructive editor. If we want to jump back to a much earlier version, it just takes one click from the history panel. And I'll revert to the final version of the image by clicking the top entry on the history panel. Now one other option we have about how we can move our settings from one image to another is to create a preset. Presets are great. They're basically just one click edit settings that we can apply to other images. Let's click the plus button from the presets panel to get started with creating our first preset. So the preset panel has expanded here, and you can see that Lightroom comes with some default ones that are grouped into some various folders. But we are gonna create our own and put it user presets as you see here. So I'm gonna call this preset muted greens because I think that's the most present part of the image. And much like the sync settings options, we can basically pick what we want to include as part of the preset. So things like the basic tone and the color are included but we might want to skip things like the lens corrections. You can create presets that do a singular thing such as increase or decrease the clarity or sharpening. And save those as individualized one-click presets. But because I want to go for an overall feel for the image I'll leave most of the default options checked. If I click create you'll see it added to the user's presets. Clicking on another image and then choosing the user preset, will apply it with just one click. So syncing settings is really helpful for a single shoot you're work on, but if you want to preserve a look and feel of an image forever, you can always save it as a preset. Now last up, I want to talk about Snapshot. So lets go back to an earlier image that we worked on. Snapshots are in a panel just below presets. And if I press the plus button it's basically gonna save a version of the image that we can come back to later. This is really similar to virtual copies, and the history panel kind of gives us basically the same functionality, but if you like one really solid look for the image and if you know that that's maybe the point you want to come back to later, Snapshots are really handy. So, I just created a snapshot of the starting point and if we tweak the sliders a bunch and drag them around. We can always come back to that earlier version by simply clicking the snapshot. So the functionality is really similar to just somewhere on the history panel. But if you're making lots of changes to an image and you have one key spot that you may want to come back to, a snapshot makes that functionality a lot easier. So there you have it. You've got virtual copies. You've got sync settings, presets, snapshots and history. And all of these tools help us manage and edit. If you're anything like me you're all way coming to a lot of different decision points about how you want to edit an image. And you shouldn't be limited by them. And with some of these tools it really allows you to think of the edit as a process. With different stages that you can jump back and forth, without any loss of quality.


