
 Lessons: 18Length: 1.8 hours
- Overview
- Transcript
3.6 Spot Correction
Lightroom is more than just a basic correction tool. Lightroom features a variety of "spot" tools that allow you to apply local adjustments to the image. In this lesson you'll learn each of the Lightroom local correction tools, which enable adjustments to partial areas of an image.
1.Consolidate and Import
1.1Introduction01:00
1.2The Ideal Configuration03:05
1.3Import Your Images11:00
1.4Customize Lightroom's Appearance09:17
1.5A Flexible Workflow06:35
2.Manage Your Collection
2.1Collections and Culling10:18
2.2Star Ratings and Color Labels04:31
2.3Keyword Tagging05:39
2.4People Tags02:56
2.5Find and Filter04:07
3.Correct and Perfect
3.1Essentials of Image Correction06:45
3.2Image Adjustment10:02
3.3Correct Your Crop04:15
3.4Batch Processes Made Easy06:13
3.5Photomerge: HDR and Panorama04:43
3.6Spot Correction08:43
4.Out of Lightroom
4.1Concluding the Edit05:43
5.A Holistic Workflow
5.1Make Lightroom Work for You04:06
3.6 Spot Correction
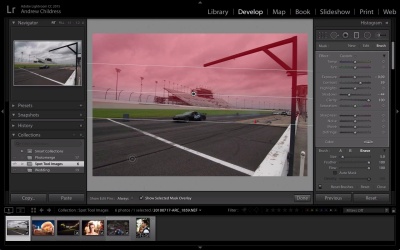
As we wrap up our walk-through of the develop module, I wanna talk about one of the most important features of it, and that's the spot adjustment tools. Now Lightroom has long been knocked as an image editor that isn't perfect for making local adjustments. A lot of people think it's perfect for getting the basic sliders right, but they don't like it for localized adjustments. But with each version, Lightroom has gotten better with these spot tools and I think it's a nearly mature application in that respect. So let me show you what I'm talking about. So this is a night time image with something in the background that I want to remove. And to do that we can use the spot removal tool. So making sure that we're in the develop module, let's click the spot removal tool which is just under the histogram. So what pops up is basically a circle that we can click somewhere on our image to remove part of it. I usually will use the heal brush, and in this case I'm going to need to increase the size just a bit. And when I click on part of the image that I wanna remove, Lightroom takes a guess as to which pixels to substitute in for it. Now, if we don't like the guess that Lightroom makes, we can always click and drag to change the part of the image that's being copied. And our key sliders here are size, which changes the size of the area that we want to heal out, feather, which modifies the edge. Do we want a real hard edge of where we're cloning out or do we want it kinda feathered? And opacity which is basically the transparency of the slider and if I pull it back, you can see that part of the original comes back. So, once I hit close you can see that that tool disappears and we've removed that area of the photo that I wanted to. Now, if we want to make any changes later on we can always re-enter the spot remove tool and click and modify it. So again, all of the nondestructive greatness of Lightroom comes through even with these spot removal tools. Let's talk next about something that you'll probably face at some point, and that's red eye. Now in this image I used flash and you can see here in the subject's eyes just a bit that there is some red eye. But, it's really easy to remove in Lightroom. If I click on the eye, Lightroom takes a guess at where the eye's located and simply kind of places a black patch over it. If it doesn't get it perfect, we can always click and drag on exactly the area we wanna apply it to. And we can adjust the pupil size in darken settings. And brand new with Lightroom CC is the pet eye feature that can help remove some of those crazy eyes you might get in photos of your pets. So if you have red eye issues, they're just pretty much a one click fix in Lightroom with the red eye correction tool. Let's talk next about the graduated filter. So if I have an image like this that has a sky and then a foreground element, let's say that we only wanna modify what's in the sky. Maybe we wanna bring some more detail out, with the clarity slider. If I pick the graduated filter, what this does is apply a filter to just a rectangular area of the photo. Let me show you what I mean. If I click and start dragging, you can see here that it's applying to the part of the image that I'm dragging it over. And it's really helpful to have the mask overlay showing, so take this box or press O on your keyboard. That pink area is just a temporary placeholder that shows you which part of the image your filter's applying to, and it helps us adjust and get right as to where we'll cover it. As I pull the clarity slider, for example, up, there's gonna be more detail that shows in the sky. And if I pull other sliders, such as contrast, you can see it coming out in the sky, alone. So, in that way, a graduated filter is just like a graduated filter you would put on the front of your lens, except we can apply it totally in the digital workflow. Use this when you wanna apply an effect to just a part of an image. So what if we wanna really fine-tune the part of the image that that graduated filter applies to? That brings me to the new brush option that's a part of the graduated and radial filters. On the right side of this panel, there's an option called Brush when we're working with graduated or radial filters. And if I press brush it's gonna allow me to really fine tune the part of the image that I'm applying to. Let's turn our mask overlay back on by ticking this box or pressing O on our keyboard. Again, this pink area is just a simulation of where that graduated filter applies to. So again, let's say that we don't want any part of this graduated filter to apply to the grass. And you can see here, it's just very finely affected. If I click Erase down here and start brushing, it's actually gonna totally remove that. You can just barely see that pink part of the mask brushing off. So in this way, we can start with a graduated filter and then really fine tune it with a brush. If we wanna add to the part of the image that's impacted, we can pick a, for example, and then brush it to any part of the image we want to add. So this totally is a game changer on how graduated and radial filters work. Think of the graduated filter as just the starting point. And then we can use the brush option to really refine the part of the image that it applies to. So, next up I want to talk a little bit about the radial filter I've been alluding to. This is another selective filter area that we can apply to our images. I'm gonna choose this image, and then enter the radial filter by clicking on the menu. It's the fifth from the left. When I enter the radial filter option the best way to think about this is basically the part of the image that you don't want to be impacted by the radial filter. So, let's say that I want to increase the clarity of the moss in the background. I'm gonna draw a circle and then place it over my subjects. Again, I've got the mask overlay turned on here. Keyboard shortcut is O to turn that off and on. I'm going to decrease the feather just a little bit so the subjects are less impacted by the filter. Now if I wanna reposition this, I can click and drag as I just showed you. And we can increase or decrease it by grabbing the handles and pulling them in and out. So this kind of creates the safe area of where the radial filter is not going to impact our subjects. I'm gonna turn the mask overlay off with O so that I can see the part of the image that I'm impacting. Now we can reset the effects of the brush by double clicking effect, which we'll wanna do. If I pull the clarity slider up, you can see if starts impacting the image in the background but not on the subjects. Now just like with the graduated filter, I can always turn the mask back on, click brush, and then refine the parts of the image that are affected. So that if there's this halo around the subjects that kind of obvious that it's not being impacted, we can always fine tune it later so that the clarity impacts it as well. If I click close, you can see here that the subjects still look natural. You know their skin hasn't been overly affected by the clarity. And the background is really kind of brought out in terms of detail. So these are some of the key tools that allow us to make these refined adjustments. And in viewing the before and after, you can see that the detail really comes out a lot sharper. So to wrap the adjustments, I wanna show you kind of the end all tool for doing this, and that's the adjustment brush. It's the last tool on this panel and if I click it, we basically get a whole new set of sliders. These sliders work just like any of the other sliders do in the other panels but they're just for part of the image. So let's try one of these on for size. So if we click this drop down next to effect there's some built in presets. Let's try out iris enhanced for example. If I zoom into one to one on the image and zoom in over the subject's eyes, I can start painting over the subject's eyes and you can see there that some of the details are coming out. After I've painted in the part of the image that I want to affect I can always use the sliders to pull them up and impact them however I want. Just like with any other effect, you'll not wanna over do this, but it's a really powerful tool and it really is as big as your mind can imagine. The adjustment brush can basically apply any tweak to any part of an image. And all those tools that we been looking at so far, apply as well. We can turn on a mask to see which part of the image is being affected and paint it in and out. We can increase and decrease the size of the brush. And ultimately, this is an entirely new set of sliders that you can apply to just a selected part of an image. Let's take a look at one more application for the adjustment brush. Now in the top part of this frame I have some background detail that I don't want, and it's a large area so it may not lend itself well to just using the heal tool. So, if I reopen the adjustment brush, and this time chose burn from the drop down, I can simply paint into those areas. And once I turn the mask overlay off you can see here I basically almost darkened the detail out, and if I pull the exposure down a little more that part completely disappears. So the adjustment brush really can be used for those spot-level retouches and adjustments. It you've been hesitating switching to Lightroom based on the need for these spot-level adjustments, try to keep these tools in mind as possibilities that keep you out of Photoshop.


