
 Lessons: 18Length: 1.8 hours
- Overview
- Transcript
2.1 Collections and Culling
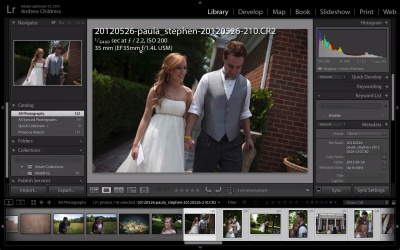
Collections are powerful virtual folders used to organize our images in Lightroom. Combine these with the culling tips in this lesson and you’ll learn to photo-edit your images with ease.
Related Links
1.Consolidate and Import
1.1Introduction01:00
1.2The Ideal Configuration03:05
1.3Import Your Images11:00
1.4Customize Lightroom's Appearance09:17
1.5A Flexible Workflow06:35
2.Manage Your Collection
2.1Collections and Culling10:18
2.2Star Ratings and Color Labels04:31
2.3Keyword Tagging05:39
2.4People Tags02:56
2.5Find and Filter04:07
3.Correct and Perfect
3.1Essentials of Image Correction06:45
3.2Image Adjustment10:02
3.3Correct Your Crop04:15
3.4Batch Processes Made Easy06:13
3.5Photomerge: HDR and Panorama04:43
3.6Spot Correction08:43
4.Out of Lightroom
4.1Concluding the Edit05:43
5.A Holistic Workflow
5.1Make Lightroom Work for You04:06
2.1 Collections and Culling
So far, we've spent time getting images loaded in our computer and into the Lightroom catalog. Now, it's time to start thinking about making our catalogs explorable and scalable. Your image collection may go to tens of thousands, or even hundreds of thousands, of images. As it scales, you have to think about how to keep it explorable. The best way to do this is with metadata. We use the metadata options in Lightroom to add data to our images and make sure we can always find the images we need at a moment's notice. This is the lesson that every photographer wishes that they had taken before they started building their collection now. It's never too early to add that crucial metadata to your image collection. The simple data hygiene practices in this lesson will pay dividends in the long term in the form of searchability and scalability. We're going to move into section two of Lightroom for photographers now. And I call this section Controlling Your Collection. The most important part of building out a digital archive is getting it organized in a way that helps you make sure it can grow. What good is a large collection of images, if we can't find the one's that we're looking for. So this section is gonna focus mainly on getting organize, building out tags and basically working through editing as a process. So that your ending collection is organized and you can always find what you're looking for. The first thing that I want to talk about is using collections, because I think it's one of the most important and sometimes overlooked possibilities that Lightroom offers. Collections are like virtual folders for our images. They aren't real folders on our hard drive, where images are stored, but instead they're Lightroom constructs that allow us to group images in a way that matters. To get started with your first collection press the plus button to the right of the collections panel and choose create collection. Now when we create a collection all we're doing is creating a virtual folder that allows us to put images inside. The collections feature is really powerful way to group images that have something in common together. So for this I might call the collection wedding. I'm going to choose some of the images that come from my friend's wedding, and drop them all into the same collection so that I can think of that as kind of one work space. I'll call it Wedding, and choose include selected photos because I've already got the first photo selected. and I can leave sync with Lightroom mobile ticked if we're using Lightroom CC When I click Create, you can see here that we're now working in the weddings collection and it's put our first image inside of it. Now, to get back to all of our images, I can come back to catalog and choose all photographs. If I wanna add more images to that collection, what I'll do is go ahead and select all of the other images that I want by clicking on the first image and then, holding Shift and clicking on the last image in the series. And if I click one of these images and drag and drop it, and drop it onto Wedding, then it gets all of those images inside that collection. So, it's really easy to go ahead and add all of those images to the collection. Now, collections are very fluid and if we find more images that we want to add later, we can always drag and drop them, put them inside. So this is one of the key features that I like to teach new users about how to organize your images. Sometimes they don't feel that Lightroom offers enough tools about how to group and they want to think of things as real folders on our hard drive, but I think it's much better to create these virtual folders or collections that allow us to group our images basically however we want. I'm gonna come back over to the all photographs menu. And I wanna talk a little bit now about how metadata works. I'm gonna go ahead and select a single image and go ahead and show the metadata overlay by pressing I on my keyboard. Now, you may be wondering what metadata is, and there are several different types of metadata. The first kind I want to talk about is metadata that your camera adds when capturing the image. You can see here that I have basically the date and the time that the image was captured, as well as the resolution of the image. That kind of metadata is really helpful for helping us explore our collection. You can think of camera metadata as these bits of data that your camera interjects in to the image file itself and Lightroom as a tool that helps us read that metadata and interact with our images based on it. So that's one set of metadata that our camera adds and if I press i again you can see another set. As long as you have a supported camera it'll actually add bits of data to our image that tells us what shutter speed our image was captured at the aperture, the ISO and even down to the lens that's being used as well as the camera that was used to capture it. So these types of metadata are ones that help us kind of explore our images based on technical details. But there are other types of metadata that we add to our images that's really helpful for kind of helping choose our favorite images and I want to talk a little bit about editing as a process. Now when you bring images into Lightroom you're working through your edit in a very structured way hopefully. You're trying to take the images you bring in and whittle it down to the keepers. And them work through your edit as a process of refining and polishing them. And eventually delivering them to clients or printing them out. So when you start with a big batch of images it can be a little overwhelming about how you want to get them down to your favorites. So I want to talk a little bit about the culling process. Now, culling is a process that helps us basically choose which images are worth keeping and which images we may not want to keep in our collection. I'm gonna go ahead and come back to the start of my catalogue. So one of my favorite ways that I cull my collection and choose the ones that I wanna keep is with the flag system. Now Lightroom allows us to flag images, and that is exactly what it sounds like. They're just adding little flags that say keep this image or don't use this image. And I wanna show you how to apply those. When we're looking at a single image we can flag an image as a pick by pressing P on our keyboard. And you can see there that Lightroom gives us a flagged as pick notice and also puts this little tiny icon on the thumbnail on the film strip. Those are images we might want to mark as one's that we're keeping. Or ones that are worthy of further editing. As we move to the next image, if I decide I don't wanna keep this, or it's not worth using, I might press X on it to set it as rejected. When I set it as rejected it will gray out a little bit and we'll get this negative flag status on it. We can also not flag images at all or remove any flag status by pressing U on our keyboard. Whether it has a pick or unpick status on it, that'll remove any flag status attached to the image. So our key shortcuts here on our keyboard are gonna be P for pick, U for remove flag or X for reject an image. We can also apply any of these to the image by clicking on our keyboard. We can either control, click an image and choose set flag in the flag status, or if the tool bar is shown below the image we can simply click on our flag choice right here. If you toolbar is not already showing you can toggle it off and on by pressing T. I'm going to go ahead and hide it. I would always recommend working from your keyboard as much as possible, so try to remember those key shortcuts there. P to flag, U to unflag and X to reject. Now what if we're trying to move through our images really quickly. Let's say that we start with a lot of images and we're trying to get through them as quickly as possible. One of my favorite speed shortcuts is to press caps lock on your keyboard and then when we press our flag statuses it automatically advances to the next image. So if I'm trying to work through the coloring process more quickly, I'm gonna turn on caps lock to auto advance the images and then I can flag really quickly as I'm doing here. That's one of my favorite shortcuts and it definitely helps me progress through my culling process a lot more quickly. So I think the key thing here is that Lightroom is all about giving us tools that helps us to execute our vision as photographers. This is a pretty common scenario we all have. We start with a lot of images and we wanna get it down to our very best. And I think that flags are the most efficient way to do this. So after you've taken the time to flag your images and choose the ones that you want to keep working with, it's time to use the power of filtering for flags. And this is a key kinda workflow that we're gonna use throughout this Lightroom course. We're going to add some bit of metadata and then we're gonna filter for it. And that's where the power of metadata really starts to shine. It allows us to tag our images in a certain way and then find those exact images really quickly. And there are a number of ways to go ahead and filter to the images that are flagged. Now, the first way is from this drop down menu that you see in the lower right corner. If we click this menu and choose flagged, it's gonna select only the images that we've added the flagged status to. So probably the easiest and quickest way to get to that. I'm gonna go ahead and undo that, I'm going to hit Cmd+Z on my Mac you can hit Ctrl+Z on Windows computer. And look at another way that we can filter for images. That's a little more advanced. Now these filtering options you may not see by default. If you don't already see them make sure you click Filter. And they'll expand out. We talk about all of the options that this allows you to do soon, but for now let's look at the filtering section. Now what if we want to find the images that we've rejected? This menu actually allows us to do that. So each of these stands for one of the flag statuses that we've already talked about. If I click the second icon for example it's going to show the images that we haven't added any flag status to. So you could easily filter to this to find out which images you still need to call if you're using the pick and reject options. If we want to look at the images that are rejected we can click the last icon in the series and quickly see that there's one image that we flagged as a reject. Now also we can stack these. And if we click the third and second icon, for example, we can see all photos that are either not flagged at all or flagged rejected. So it's filtering tools like these that really help us harvest the power of metadata. We don't just add metadata for fun or because it helps us feel like our image collection is organized, but because it helps us find the images we need at a later time. So you can imagine a workflow like this that you use flags for your first pass on your images. And once you're done with that initial pass, filter to it and continue working to the next part of your process.


