
 Lessons: 18Length: 1.8 hours
- Overview
- Transcript
1.2 The Ideal Configuration
Welcome to Adobe Lightroom’s non-destructive catalog system. In this lesson you’ll learn about the advantages of keeping your work in a catalog and how to store your catalog in the cloud, and I’ll also give some suggestions on data setup.
Related Links
1.Consolidate and Import
1.1Introduction01:00
1.2The Ideal Configuration03:05
1.3Import Your Images11:00
1.4Customize Lightroom's Appearance09:17
1.5A Flexible Workflow06:35
2.Manage Your Collection
2.1Collections and Culling10:18
2.2Star Ratings and Color Labels04:31
2.3Keyword Tagging05:39
2.4People Tags02:56
2.5Find and Filter04:07
3.Correct and Perfect
3.1Essentials of Image Correction06:45
3.2Image Adjustment10:02
3.3Correct Your Crop04:15
3.4Batch Processes Made Easy06:13
3.5Photomerge: HDR and Panorama04:43
3.6Spot Correction08:43
4.Out of Lightroom
4.1Concluding the Edit05:43
5.A Holistic Workflow
5.1Make Lightroom Work for You04:06
1.2 The Ideal Configuration
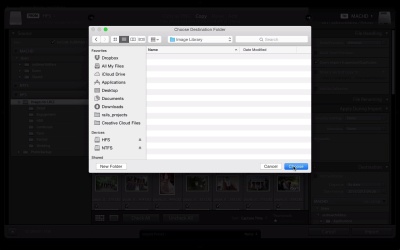
I've just launched Lightroom CC for the first time and you can see here that I've got a blank catalog to work with. If you've never used Lightroom before, the concept of catalogs may be a little different than what you're accustomed to. Basically, a catalog is like a database of all the edits and modifications that we apply to our images and it's separate and apart from the image files themself. We'll talk a little bit more about this as we proceed through but just know that it's a non-destructive model. The original image files remain untouched. Any time we're working in Lightroom, we're always working in a catalog. You can here at the top of the menu of the application that I'm working in a catalog titled Lightroom CC Catalog, that I've created just for this course. Now if you don't know where your catalog's stored, one thing you can do is come up to Lightroom and choose catalog settings and it'll show you the path of where the catalog is stored. If you click show, it'll actually show you where it's stored in the FInder, basically in your file system. Now, one thing I'm gonna advocate for the purpose of this course, is that you go ahead and put your catalog in the cloud. If you have a service like Dropbox or Box that you lean on for cloud storage, it's a great place to store your catalog. You can get to it from anywhere and it automatically stays backed up. Probably, it won't grow to a size that exceeds your cloud storage limitations because the images aren't stored in the catalog itself, the catalog probably won't ever grow to an unruly size. Now, this lesson is gonna cover a little bit about how we configure Lightroom. One of the ways that I wanna show you how we can configure Lightroom is to go ahead and go full screen. I'm going to go to Window > Screen Mode > Full Screen. That'll give you the best view of Lightroom as we proceed through this course. Now that we've opened Lightroom and have it in full screen mode, it's time to start thinking about how to store images, as well. Now this is a big area where many photographers get hung up. They don't know where and how to store their images and how to actually organize them on the hard drive. The first recommendation that I wanna make to you is that the images live on an external hard drive just as I've done for the purpose of this course. Now, I've dumped all of my images in a special folder where they'll all reside throughout this course but we're gonna get them organized and you can apply this same kind of workflow to your own image collection. The big reason that I really advocate keeping images on an external drive is so that if your computer is lost or stolen, your images are in more than one place. Also, your image collection's always gonna be growing, and it may exceed the storage of your computer's internal hard drive. External drives are fairly inexpensive and they're always growing in size, so I'd highly recommend making that your primary destination where your images are stored. Now your fear may be that if your images aren't stored on an internal drive, you can't get to them easily, or you'll always have to carry the external drive with you. But with a feature called Smart Previews we're actually gonna overcome that. Again, while the choice is yours about where to store your images, I'd highly recommend keeping them on an external drive.


