
 Lessons: 18Length: 1.7 hours
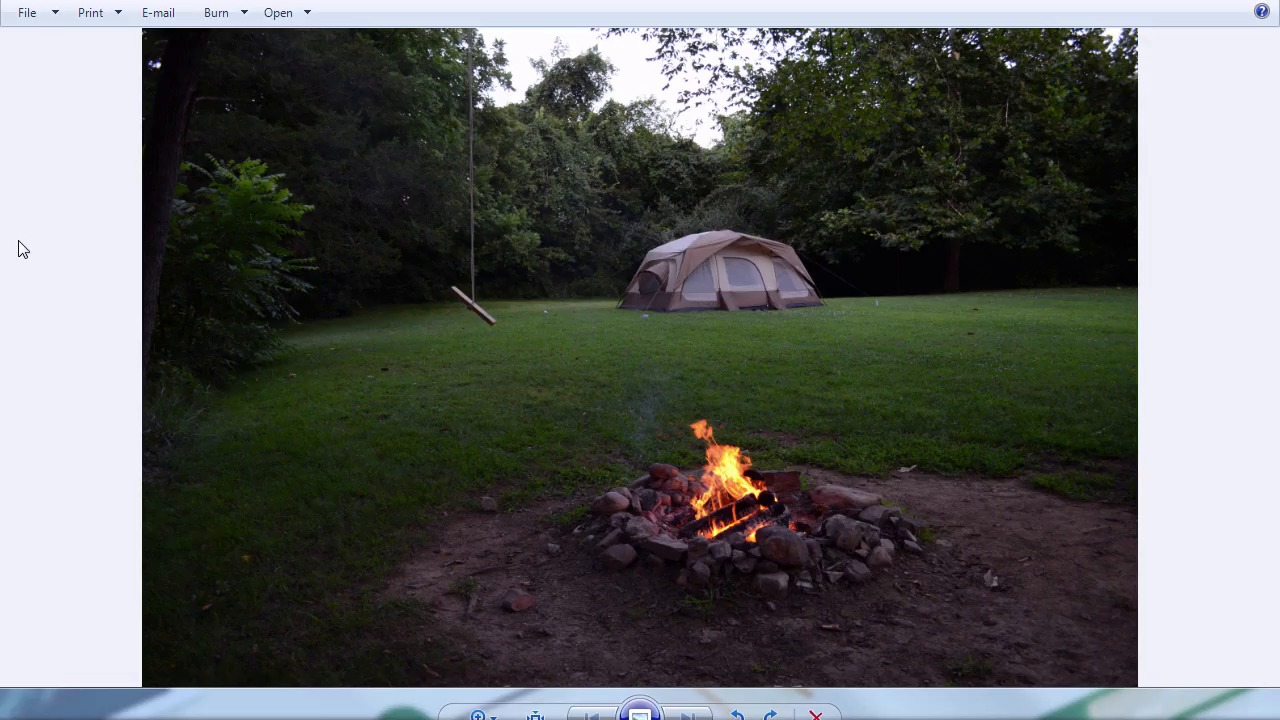
- Overview
- Transcript
3.1 Capturing the Video
In this lesson you'll learn what makes for a good cinemagraph and how to choose the right subject and video to use.
1.Introduction
1.1Introduction01:42
1.2Tools and Resources01:36
2.Video Editing Basics
2.1Importing Video Files09:19
2.2Video Layers and Video Groups06:37
2.3Photo Editing on Videos07:52
2.4Working With Transitions08:31
2.5Designing a Lower-Third10:23
2.6Rendering05:49
3.Create a Cinemagraph
3.1Capturing the Video04:09
3.2Setting Up07:07
3.3Seamless Movement06:25
3.4Exporting the Animation04:02
3.5Frame Animation03:59
4.Time-Lapse Video
4.1Importing Numbered Frames05:44
4.2Photo Retouching04:27
4.3Adjustment Layers05:14
4.4Special Effects05:27
5.Conclusion
5.1Conclusion00:53
3.1 Capturing the Video
Hello everybody. Welcome back to video editing in Photoshop. We are now launching off on our third chapter of this course and this is the chapter where we create a cinema-graph. This is lesson 3.1 where we talk about how to capture the video elements that's necessary. Let's first talk about what a cinema-graph is. At its foundation, a cinema-graph is basically just an animated GIF but it's not your traditional animated GIF, it's an animated GIF that's set up in such a way that it's supposed to look like a still image but there's an aspect or element of it that unexpectedly animates. If you can imagine a photograph that's set up in a way so that something moves within that photograph. That's the whole idea behind a cinema-graph, and this is the cinema-graph that we are going to be creating in this project. Now this differs from a simple video clip in that the background elements are not moving. You'll see in the actual video that I used to create this, this swing had a little bit of motion to it. There was a bit of breeze so that the trees and the leaves in the background are swaying a little bit, but here they're all frozen in time. The only thing moving is the fire. In the source files for this lesson, you'll find two distinct files. One is a simple photograph and the other is a video clip. And these are the two files that I use to create the cinema-graph in this project. Now you may be wondering why you can't make one just from a simple video file, and many time people do that. But I wanna discuss my workflow here first. Let's take a look at the video file. Now clearly, I had this video shot by mounting my camera on a tripod, so there is no ambient movement of the camera. And it's sitting perfectly, completely still. So something I want you to pay attention to is look at the difference in the lighting and the other elements when compared to the still image. I find at least with my DSLR, which is what I used to shoot the video, I can get much more control over the lighting and exposure and a much richer shot out of the still photographs than I can out of the video. If you were able to shoot video that has some really nice lighting and you really like the way that looks, I would fully encourage you to use just the video file. But for my tastes, I find not only does the photograph look better, not only is the lighting more appealing in this, but it's also a higher resolution. I'm able to shoot this at a much higher quality level than I am with the video. Now, the photograph was taken using the exact same tripod position and focal range within the camera as the video was just to make sure everything matches up. But I want you to take a look at the properties of this file. The dimensions of it are 4,928 by 3,264. That's a much larger resolution than anything I could possibly get with the video feature. And that means the pre-editing of the image, I'm gonna have a lot more pixels to work with. I can get some much nicer effects using that much resolution than I can with a much smaller image. Now, true, this will be scaled down later on, but I like working with larger images to begin with. I find that I get much better results that way. iIf you're wondering what my camera settings were, my f stop was at f over 3.8. My exposure time was 1/160. And the ISO was set at 500. The 1/160, provided a little bit of blur, with this fire, but was still able to detect the fading light in the background. Now the video on the other hand, is only got a frame width of 1,920, so that´s 1,920, which is a fraction of what the still image has. So whenever I'm setting up to shoot for cinema-graph, that's the process I use. I mount my camera on a tripod, I frame the shot, I try to get a good photograph out of it and then I use those settings of that camera to still-shoot a video in video mode as well and I use both of them together to create a single cinema-graph. I would encourage you to try that method too. I think you'll find that it works really well. If you do find you can capture a video with much better lighting and resolution than what I've done here, I'll talk about how to use that in the main project without having to use a still image. But with that, let's move on to lesson 3.2 where we set up the image in the video.


