
 Lessons: 18Length: 1.7 hours
- Overview
- Transcript
4.1 Importing Numbered Frames
Let’s find out how to turn a series of photos into a single project file.
1.Introduction
1.1Introduction01:42
1.2Tools and Resources01:36
2.Video Editing Basics
2.1Importing Video Files09:19
2.2Video Layers and Video Groups06:37
2.3Photo Editing on Videos07:52
2.4Working With Transitions08:31
2.5Designing a Lower-Third10:23
2.6Rendering05:49
3.Create a Cinemagraph
3.1Capturing the Video04:09
3.2Setting Up07:07
3.3Seamless Movement06:25
3.4Exporting the Animation04:02
3.5Frame Animation03:59
4.Time-Lapse Video
4.1Importing Numbered Frames05:44
4.2Photo Retouching04:27
4.3Adjustment Layers05:14
4.4Special Effects05:27
5.Conclusion
5.1Conclusion00:53
4.1 Importing Numbered Frames
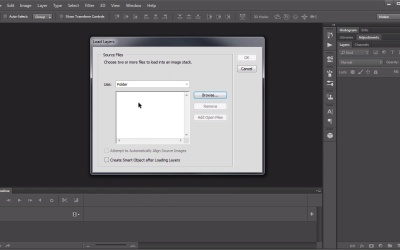
Hello everybody, and welcome back to video editing and Photoshop. We are launching out on the fourth chapter of this course, which is about creating and editing time lapse video. The main project for this course is going to be to create this very cool time lapse sunset at the national harbor. This is lesson 4.1, which is about importing numbered frames. In the course files for this lesson it is a JPEG folder that has 171 photos in here. These were photos that I took during sunset at the national harbor just outside of DC. I set my camera up on a tripod, and I set the auto timer to fire off every 30 seconds I allowed the camera to do this for well over two hours, to make sure I've got plenty of frames to work with. Now the resolution I shot at was much larger than the files that you have here. I've sized them down intentionally, just so the source files would not be a burden to download. So with Photoshop open now, let's discuss ways of getting that series of numbered images into a video that we can work with. Now, surprisingly, there's more than one way to do this. The first way I'm gonna show you is actually my preferred method, and that is simply going to File, Open, and then navigate to that folder containing those images. When you select the first one in the series there is a check box down here that becomes available, called Image Sequence. Checking this tells Photoshop that this is the first image in a series, and Photoshop will automatically detect the number of it and try to fill out the rest of the series by looking for consecutive numbers within that folder. You don't need to select all the files, just the first one. Then we click Open, and we designate a frame rate, I'm actually gonna give this a frame rate of 15 frames per second. Click OK and Photoshop opens this up as a video layer. Let's go back to our motion desktop, and we can see the video layer down here in the timeline panel. As we hit play, we can see it playing through all of those images together at 15 frames per second to create a very basic time lapse. And you can even scrub through, and see this play, forwards and backwards. This is my preferred method for loading those image sequences into a video in Photoshop, and this is the method that I'm going to use for the rest of this project, but I want to show you the alternate method as well. This time, with nothing open, I'm going to File, Scripts, Load Files into Stack. And when the dialogue box comes up, I'm gonna change the use to folder, and then navigate to that folder that contains all of those JPEGs. Photoshop will automatically populate this use box once it finds all those files within that folder. And my tripod held up pretty well. And I was able to use the timer so I didn't actually have to touch the shutter button on my camera. Therefore I'm not actually very worried about any type of camera shake. But if you are concerned about that at all, it's wise to check this Attempt to Automatically Align Source Images box. That way Photoshop will automatically try to line up those images to remove any type of minor movement between the images. When you're all set, click the OK button, and Photoshop loads each of those images into its own layer within the same Photoshop file. Now this can be a somewhat lengthy process, as Photoshop pulls in all 171 of those images, and if you did select the align images option it will take even longer. So it is still working, you just have to be patient with it. And once it's done loading all of those images up, go down here to the timeline and change this to Create Frame Animation and click the button to create a single frame animation here. Now it's only gonna use one frame at the moment. You have to use this pull out menu, and say Make Frames From Layers. And so Photoshop then creates a new frame for each layer in the stack. The problem we have at this point is that it's backwards. It starts out dark, and gets lighter, almost as if we were going from early morning to dawn. That's not what we want. Let's select all the frames, the first frame was already selected. I'm gonna hold down the shift key, and click on the last frame, use the fly out menu again to say Reverse Frames. So now the first one is the light frame before the sun has set. And it goes through to the sunset. We can hit the play button, and see how that looks there. The way Photoshop has made this work is that each frame has one visible layer in it. If you prefer to work this way, and this feels more natural to you, it's a perfectly legitimate way of approaching this. It just, as an interesting aside, if you select all the frames again and change this to video layers, that's this little button down here where we can convert to a video timeline. The video is preserved. The way Photoshop has interpolated this is each individual layer has its own video timeline where the opacity is actually key framed. So that's kind of a fascinating approach that Photoshop automatically does for you if you wish to do it that way. Now if you wish to use it as one single video layer, just use the file open technique that I showed at the beginning of this lesson. So now that we've imported the time lapse photographs into Photoshop for this time lapse video, next lesson, Lesson 4.2 will talk about some basic photo correction.


