
 Lessons: 18Length: 1.7 hours
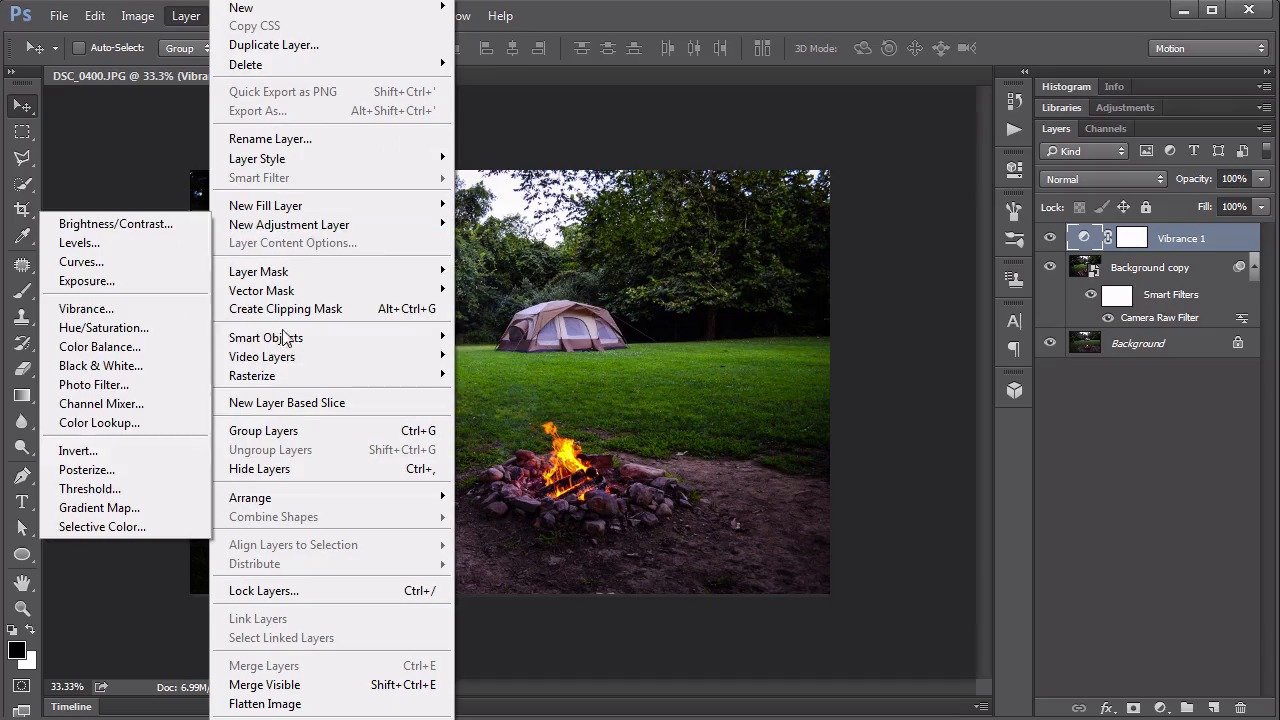
- Overview
- Transcript
3.2 Setting Up
In this lesson we gather the resources needed for developing the cinemagraph and discuss the approach to creating it.
1.Introduction
1.1Introduction01:42
1.2Tools and Resources01:36
2.Video Editing Basics
2.1Importing Video Files09:19
2.2Video Layers and Video Groups06:37
2.3Photo Editing on Videos07:52
2.4Working With Transitions08:31
2.5Designing a Lower-Third10:23
2.6Rendering05:49
3.Create a Cinemagraph
3.1Capturing the Video04:09
3.2Setting Up07:07
3.3Seamless Movement06:25
3.4Exporting the Animation04:02
3.5Frame Animation03:59
4.Time-Lapse Video
4.1Importing Numbered Frames05:44
4.2Photo Retouching04:27
4.3Adjustment Layers05:14
4.4Special Effects05:27
5.Conclusion
5.1Conclusion00:53
3.2 Setting Up
Hello everybody and welcome back to Video Editing in Photoshop. We are working on our cinema graph, which is the third chapter of this course. We find ourselves now on lesson 3.2 where we set up the video files. So I'm back here in Photoshop again and I've got our base image open. Now I want to make some adjustments to this image before we being with the cinema graphics. I wanna make this look a little bit richer and more eye catching. First thing I wanna do is go in and make any type of touch ups or adjustments that I need to make like with the cone stamp tool or the spot healing brush. Before I do that, I'm gonna make a copy of the background layer. And as I look in, there's a couple things that, I think, could be improved slightly. There's these little flags at the edges of the lines of the tent, that I remember putting up so nobody tripped over these lines. But, they're a little bit unsightly So I'm just going to create quick selections around those. Quick taps of shift and backspace to pull up the fill dialogue box set to content aware and get rid of those. Move on to the next one and do the same thing. And then I'm looking at the campfire here. I'm a little concerned about this little puff of smoke that we have coming off of it. Because I do plan on animating the campfire, but this little bit of smoke I don't plan on animating that and I think it's gonna look a little bit strange if that's just out here by itself and it's not moving. So I'm going to create a quick selection around that, and this time, I'm gonna use the patch tool, and I will set the patch tool to normal for this, and just drag over to another portion of the grass to completely remove that. That looks pretty good. So let's turn this into a smart object by right-clicking and selecting Convert to Smart Object. And let's run the camera raw filter. Now the Camera Raw filter is a great means of adding some additional color and contrast to an image. My favorite slider in here is this Clarity slider. I'm gonna take this and I'm gonna pump this up to almost 60 or so. And that adds some sharpening and a little bit of color saturation in there, too. But let's increase the vibrance as well. And that gives us some really nice green tones in that grass. But we can still pump up that saturation just a little bit. And then let's switch over to the Effects tab and give it a little bit of Post Crop Vignetting just to darken those corners. That looks good. We'll hit OK and let Photoshop apply that. And then back here in Photoshop Proper, I think I might try adding a little bit of vibrance with an adjustment layer. So, add a vibrance adjustment layer, and seeing if we can get a little boost to the color in here that way. There we go, I like the way that's looking. That's a very rich in color. It looks almost surrealistic by just how vibrant that grass is, and how beautifully orange and yellowish that that fire is. This is looking good. My next task is to make sure this fits with the video layer that we're going to put over it. Now I know I purposely shot this as a much higher resolution but since I've converted that to a smart object, we're not really going to have to worry much about sizing it down. Because even though we're decreasing the resolution, we can get it back if we need to and that's always a better path than trying to pull resolution out of an image that can't support it. So if you remember, our video had a resolution with a pixel width of 1920. So that's what we're going to size our image to so that it fits. Go to Image > Image size, the width to 1920. It's always better to try to size the image to fit the video than the other way around. Photoshop doesn't like scaling video very much. And so now we pull that video in and layer it on top here. That's through Layer > Video Layers > New Video Layer from File, and we'll pick that source video clip. And it brings it in and it aligns it to the top. Technically, I think it pops it to the top left, but because the width is the same, it's just putting it right up at the top. And you can see it doesn't quite fit. It's a little bit too high, so we need to move it down. I'm holding down the shift key, and using my arrows to just nudge it downwards. Here's a good trick to help figure out exactly how to make this line up. Change the blending mode to difference, then zoom in really close and you continue nudging this down until things align. And pixels are identical when they're set to a difference like that they will turn black. Now because of the lighting difference you probably won't get a solid black out of this but it will be quite easy to line it up close enough so you can see whether is any differences. Put back to normal and then toggle the opacity on and off to make sure everything looks at least like it's setup right, and it does. Now this video clip contains of a lot of other movement that we don't need. For instance that swing is moving a little bit and there's some subtle shifting within the trees back here. We really only want it for the fire, so we need to mask that out. We can use the rectangular marquee tool and just draw a quick rectangle around the fire area. We don't need to get the entire fire pit, just enough of it so that any of the red and orange-ish glow from that fire is included. And then we use that as a mask on this video layer. Now it's far too bright, clearly that does not fit with the rest of the image. So how do we fix that? Well, let's use a curves adjustment layer, and for the time being, let's clip it to that video layer, and start making things darker. So that look pretty good. I ended up adding a deep central point to this curve, and adjusting the far left point of it too, by bringing that in some. So things match up pretty well. Now, I did say before that this is my preferred method of using an image first and then layering a video on top of it. If you find that your video clip can support the type of resolution in the lighting capture that you think that in itself will make a good backdrop. Then what you would do is use a still shot from the video as the background image and you would not need the photograph like what I used. And the way to get that, you would have this video layer already in here, you would duplicate it by going to right-click duplicate layer and I've got the mask disabled there. You would use the time line to scroll through and find the frame that you want as the background. And then you would right-click and just rasterize layer. And that changes it from a video to a flat still image. But that's only if you're wanting to use a still from your video for the background. As i mentioned before we're not doing it that way because I like using a photograph instead. So back to the task at hand here. We just clipped in this curves adjustment layer and I clipped it in here right now just to make sure that it works as far as its settings go. Ultimately, it cannot be clipped because we are going to have a video group that we want it to affect, not just a single video layer. So we need to unclip it for right now, which makes things look a little bit weird. But if we copy this same mask that we used on the video to the curve's adjustment layer, things will come back into sync. We do that by holding down the alt, the option key, grabbing this mask and just dragging it up to the adjustment layer. Saying yes, I want to replace that mask. And now everything is happy once more. And that brings lesson 3.2 to a close.. We've got everything set up here within Photoshop to start creating our Cinemagraph. Next lesson, lesson 3.3, we talk about seamless movement.


