
 Lessons: 18Length: 1.7 hours
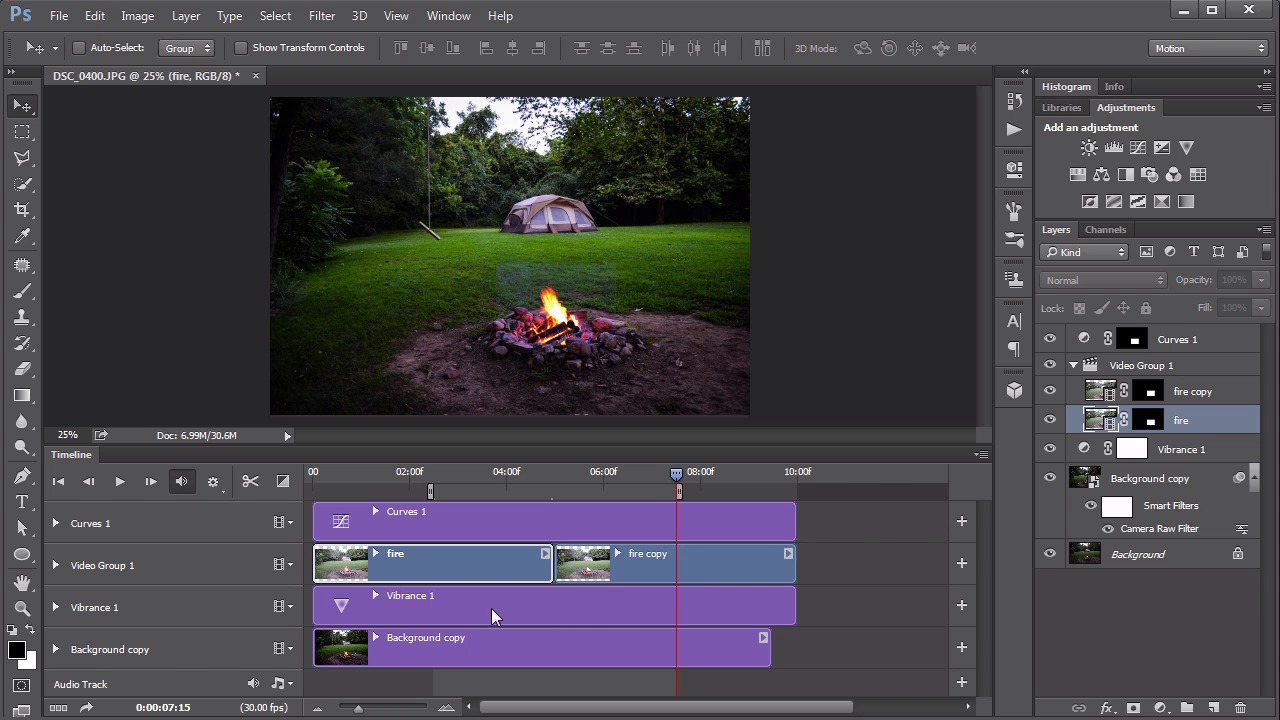
- Overview
- Transcript
3.3 Seamless Movement
The magic of a good cinemagraph is that it appears endless. To accomplish this, the movement needs to loop seamlessly. In this lesson we explore approaches for making that happen.
1.Introduction
1.1Introduction01:42
1.2Tools and Resources01:36
2.Video Editing Basics
2.1Importing Video Files09:19
2.2Video Layers and Video Groups06:37
2.3Photo Editing on Videos07:52
2.4Working With Transitions08:31
2.5Designing a Lower-Third10:23
2.6Rendering05:49
3.Create a Cinemagraph
3.1Capturing the Video04:09
3.2Setting Up07:07
3.3Seamless Movement06:25
3.4Exporting the Animation04:02
3.5Frame Animation03:59
4.Time-Lapse Video
4.1Importing Numbered Frames05:44
4.2Photo Retouching04:27
4.3Adjustment Layers05:14
4.4Special Effects05:27
5.Conclusion
5.1Conclusion00:53
3.3 Seamless Movement
Hello everybody welcome back to Video Editing in Photoshop. This is lesson 3.3 where we talk about creating seamless movement for our cinemagraph. So here's where we last left our project. We just created some filters on the basic background image to make it look more appealing. We added the video layer, we sized it up and we added a curves adjustment layer to make sure the video layer look seamless to the background. Now let's open up the timeline so we can see what's going on here. As we scrub this we can see that fire moving. That's exactly what we're going to want to animate within our cinemagraph. Now how'd we get that strange effect, as I scrubbed through it. That's because of the adjustment layer. That is trying to render the adjustment layer in real time, and it's not doing a great job at it. So once you let up on scrubbing on the timeline, then it re-renders the frame appropriately. So our task in this video is to make this motion appear completely seamless, like this is going eternally and you don't notice the looping of it. You may notice the repeating of movement but you should not notice a jarring jump between the first and last frames as the animation resets. And it's a little bit technical, as to how to make that work. But it's very important that you understand the concept behind it, so that you can make the motion seamless within your own cinemagraphs. Especially for something like fire, or water or anything that's a continuous movement. And the way I'm gonna start by doing this is trimming down this video layer to 5 seconds exactly. So first of all, I'm going to double-click on my time code down here and say go exactly to the 5 second mark. I know precisely where to trim this to, because the trim will pop right through that current frame. So I've got 5 seconds here of this fire playing through. What I want to do then is copy these exact 5 seconds, and place them behind it so I have two copies of the same five second clip. Do that by right-clicking on the video clip over here in the layers panel and saying Duplicate Layer. And then this copied clip I will move over and drop right next to the original one. So now I've got ten seconds of two identical five second clips. And if you think about it, this is going to be right here in the middle where the obvious seam is going to be. So the point now is that we need to make sure that the first frame and the last frame are at the same point. And here's how we do that. We know the first clip is five seconds, let's go to the exact middle of it, so that's two and a half seconds. Our time code down here. Let's say 2, it's not .5, it's 15. Because there's 30 frames per second, so the half second mark is at the 15 frames. So, that's 2 seconds and 15 frames. Our marker jumps right to that point. Now I'm going to move my work area to be that exact front part there. So now let's think about where this point resides in the second copy. Well it's two and a half seconds past where it starts. It starts at five, so that would be five plus two and a half. Seven and a half. Double-click here and go to 7:15 and that's going to be the end point. Now it's important that you understand why we're doing this. Because this guarantees that the ending frame matches up with the beginning frame. So when the animation restarts, there's no visible jump between those two frames. The only visible jump is right here in the middle, where it transitions from one clip into the next. Now there's a very old and elegant animator's trick to cover over this scene. And I wanna show you an older method of doing this and then also a method that I feel works a little bit better. First of all, I'm gonna make yet another copy of this five second clip. But this time I'm gonna hold down the Alt key. And drag it up out of the video group, so it's on its own timeline here. And essentially, the idea would be to take this copy and drag it over to cover up that seam. >> And then you would fade both ends of it, fade the front and fade the back. So this top copy serves almost like a patch to cover that visible jump or seam and you slowly fade it into visibility, to cover it up, and after it covers it you slowly fade it out. We did it that way for many years. And depending on the type of video editing program you're using, you may have to do that in something else. But, I feel that there's an even better solution here. So, I'm going to delete this patch layer that we created before, and I'm actually going to create a cross fade between these two layers. Before I do that, though, I want to make sure the duration is set to two seconds. Because that creates it slow enough that it's not really noticeable that we're crossfading between two instances of the same thing. Now when I do that, you may have noticed the whole timeline jumps forward. How far forward does it jump? Well, it jumps forward by two seconds. Because it's overlapping, two seconds here of the end of the first clip with the beginning of the second clip. Which means we need to shorten our entire work area also by two seconds. So if was at seven and a half seconds before, now we need to put it at five and a half seconds. Which would be right there. And then that will create a perfect, seamless transition between both of those clips. Not only does the end frame align perfectly with the first frame, but that middle transition area is a nice crossfade, so it's not even visible. But something you always want to check is to go right here at the middle of that fade which is exactly where that transition would be at its peak and looking close and make sure that the seams are not visible at all. Now we are seeing a bit of visible evidence of that masking from before. You can sort of see that rectangle and it will kind of glow as it's playing through too, you can see that there. The solution for that is to take both of these video layers and the curves adjustment layer. Grab all of these and group them together. And do that by pressing Ctrl or Cmd+G. And then adding a mask to that group. And on this mask we will use a soft brush set to black and very slightly and gently fade out those edges. All right, you wanna be careful with this, though. You don't want to accidentally mask out any area that the fire's gonna be visible. But you wanna conceal any hard edges that might be seen, sorta like that. And that brings lesson 3.3 to a close. Next lesson, lesson 3.4 we talk about actually exporting this as an animated gif.


