
 Lessons: 18Length: 1.7 hours
- Overview
- Transcript
4.2 Photo Retouching
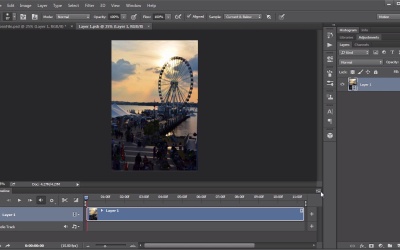
The series of photos is now a video layer. Luckily, you can still use Photoshop’s photo editing features!
1.Introduction
1.1Introduction01:42
1.2Tools and Resources01:36
2.Video Editing Basics
2.1Importing Video Files09:19
2.2Video Layers and Video Groups06:37
2.3Photo Editing on Videos07:52
2.4Working With Transitions08:31
2.5Designing a Lower-Third10:23
2.6Rendering05:49
3.Create a Cinemagraph
3.1Capturing the Video04:09
3.2Setting Up07:07
3.3Seamless Movement06:25
3.4Exporting the Animation04:02
3.5Frame Animation03:59
4.Time-Lapse Video
4.1Importing Numbered Frames05:44
4.2Photo Retouching04:27
4.3Adjustment Layers05:14
4.4Special Effects05:27
5.Conclusion
5.1Conclusion00:53
4.2 Photo Retouching
Hello everybody, and welcome back to video editing in Photoshop. This is now lesson 4.2, on basic photo editing for our time-lapse video. We're back here in Photoshop again, and there's just some basic edits that I wanted to do to this video layer, before we moved on with the project. If you'll notice, I'm using the video layer as opposed to the individual frame animation. The first thing I really wanna take care of is the fact that this horizon is not flat. My camera was obviously at a very slight angle, that I didn't notice at all while I was shooting these. But now that I have them here in Photoshop, it's quite obvious to me. Best way to fix that is with the crop tool. There's this wonderful feature in the crop tool known as the straighten feature. That's this icon up here that resembles a small little ruler. You click on that and then you trace that across what should be completely horizontal. So I'll click over here by the edge of this river line and go to the other side. Photoshop automatically straightens the image and pulls in the cropped corners, so that we don't have empty space around it. I'll click the check mark to apply that. Photoshop asks about transforming the video layer to a smart object, and I'm fine with that. And as I scrub through this animation, there's a couple of issues that I noticed that I think are worth fixing. One of the things that pops out to me immediately is the fact that every now and then, we get a random plane visible in the shot. The harbor is near an airport, so this isn't really surprising. But it's rather disconcerting to see them just randomly pop in the frame and then in the very next frame, they're not there. That's because the time lapse takes a photo every 30 seconds. And that's plenty of time for a plane to enter and then exit the frame. And so we get this very strange occurrence of planes randomly showing up, and I'd like to remove those from the scene, cuz I find them rather distracting when they happen. To do that, it's best to edit those individual frames using something like Content Aware Fill or maybe the Clone Stamp tool. Now, because we converted this to a smart object, we can't do that here. If we try to we'll get the no symbol which means, nope that is not allowed. But what that means is we just have to reopen that smart object and start going through and retouching it on this side. Now something that's really helpful for working with individual frames like this is to make sure that you enable the timeline shortcut keys. That way just tapping on the right arrow, will advance it one frame at a time. And we just keep tapping until we find a plane, and then we can go in there and paint that out. Let's use our lasso tool, and content-aware fill. Again, that's found through the Edit, Fill dialog. So to content-aware and click okay. And cancel the selection with control or command D. And then just continue through, tapping that right-arrow button until you find more planes to take care of. The Content Aware Fill does a fantastic job for tasks like this, especially when there's just clouds in the background. Because they're not a uniform size or shape or necessarily color. And it makes it very easy to fill in without it being visibly distracting. And as I was going through and removing those planes, I did notice something right about here. Do you see it? The camera tends to struggle with this exposure. Right about there it gets very dark and then very bright on either side of that frame. So what I'd like to do is find anomalies like that and treat those frames individually. What I'm gonna do is use a curves command to actually increase the shadows of this frame. Through Image, Adjustment, Curves. Then I can grab the onscreen adjustment tool here, to click and drag within those shadow areas. Just to help bring those up a little bit. Now it did bring up the rest of the midtones and the highlights too, so I'll reclick on the highlights grid and then even on the midtones grid. So those stay the same. Click okay, and that helps to even things out. And so let's go back to the beginning and hit the play button and preview this. That looks pretty good. All the planes are gone and that blinking spot where it got really dark all of a sudden, has been taken care of too. Now, that was just some basic photo editing features that you can use on videos in Photoshop. Next lesson, lesson 4.3, we talk about some additional lighting and color adjustments.


