
 Lessons: 22Length: 3.6 hours
- Overview
- Transcript
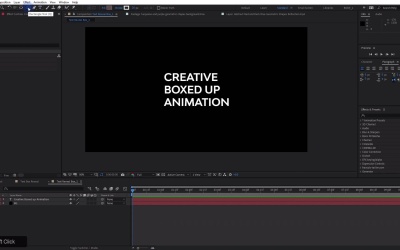
2.3 Basic Text Box Reveal
In this lesson, you'll learn how to create a basic text box reveal with an animating shape layer bounding box.
Related Links
- Creative Titles Package for Premiere Pro on Envato Elements
- Fonts on Envato Elements
- BW Modelica is no longer available, find alternative grotesque fonts on Envato Elements
1.Introduction
1.1Introduction02:55
2.Basics
2.1Keyframe Basics14:03
2.2Reveal Text With Masks and Shape Layers12:08
2.3Basic Text Box Reveal08:57
2.4Bounding Box Reveal11:48
2.5Text Reveal Rectangles: Part 113:02
2.6Text Reveal Rectangles: Part 208:44
3.Burger Logo Reveal
3.1Burger Logo: Prepare the Artwork11:54
3.2Burger Logo: Animate the Layers11:04
3.3Burger Logo: Final Touches10:46
4.Outer Space Intro
4.1Outer Space: Animate With CC Lens09:53
4.2Outer Space: Animating Strokes & Glow Effects13:42
4.3Outer Space: Lens Flares08:44
4.4Outer Space: Noise & Grain12:14
5.Boutique Text Effect
5.1Boutique Text: Prepare the Artwork06:59
5.2Boutique Text: Create the Layout06:14
5.3Boutique Text: Inertial Bounce Expression11:20
5.4Boutique Text: Wiggle Expression06:06
5.5Boutique Text: Layer Control06:07
5.6Boutique Text: Handwritten Text13:07
5.7Boutique Text: Final Touches11:38
6.Conclusion
6.1Conclusion02:09
2.3 Basic Text Box Reveal
[MUSIC] In this lesson, you are going to learn how to create a very simple text animation that looks just like this. [MUSIC] Like I mentioned in the last lesson, I'm gonna be using this template here found on Envato elements. For showing, you how to do some very simple text animations and building them out with multiple layers and mats and shapes and things in After Effects as well as a few more advanced things down the line. So let's check out this first one here and just kind of analyze what's going on. So we start with this shape box here that starts kind of flat with a very thin strock It goes skinny, the stroke it's bigger. So already we know that we need probably a shape layer, and we need to animate the size and the stroke on that shape. And then it gets wider, and we have this text kind of sliding in from the left side. So we need some kind of way to mat out the texts so that it's not revealed over here. And then is revealed inside this box right here. And also if you look very closely, the text comes in, not all at the same time. In fact, in my example comp when I tried to recreate this, I didn't notice that right away, but I'm seeing it right now. So I'm gonna show you how to do this as well to get the text to come in kind of like line one, line two and three, and it's very nice and smooth way. I'll play it one more time, so you can see how that works there. It's very subtle, but I think it looks really classy. All right, so let's jump into After Effects. I'm goinna make a new composition. And then I'm just going to throw a temporary background in my example comp. I'm using a video background from Envato elements. But I'm just gonna throw a black solid in here and if you don't have a black solid in your solids folder. You can just come down here in your comp and hit Ctrl+Y to create a new black solid or you can right-click down here, choose New and then solid is right here. Some of my menu is going of the screen a little bit. No worries though multiple ways to do that. I'm just gonna hit enter here and rename this BG for background and then I'm just going to lock it so it doesn't get in my way. I'm also gonna change some things here with this layout here because we got a few things that we don't need. and I like to have my character and my paragraph kind of easily assessable, and not in kind of, I don't like the standard layout where it puts the paragraph down here, that's not really what I like. So, I think the best way to go about building these types of animations is to work backwards from the final state of your animation. So, that's what I'm gonna do here. Now the font that I'm gonna be using is not exactly the same one that they're using in the original. But it's another nice one that I found on envato elements is called Mode Delica. So I'm just gonna click inside my comp with the type tool and I'm gonna type three lines of text will call this CREATIVE, BOXED UP, ANIMATION. Doesn't really matter what it is but there we go. If you look I have the paragraph here and it is aligned to the left and I'm just gonna move that right in the middle of my comp here. In fact, even though this is aligned left, I can go ahead and recenter this anchor point here with the keyboard shortcut Ctrl+Alt home. And then just hit Ctrl+M to center up the layer that's gonna help me a little bit It looks like my Caps Lock was on when I created that. So it's given in a really weird name, and that's gonna bug me. So I'm just gonna re do that really quick Caps Lock off, okay? CREATIVE BOXED UP. ANIMATION, good enough There we go Right back to where we were a second ago. All right I'm gonna deselect everything down here in the layers so that I can grab the rectangle tool And with the rectangle tool, I'm gonna create a shape. I'm gonna just create a basic box around my text. I'll make sure that the fill is set to none. And just give this a little bit of stroke about you can change those things afterwards if you want. I also went ahead and changed in the preferences. If you go to preferences general there is an option to center anchor point In new shape layers. So to save me like 100 steps by creating a shape layer and then re centering the anchor point. You can just enable that and then every time you create a shape layer, it will center the anchor point in that shape layer. So now with the anchor point center, I can just hit Ctrl+Home and that will center up my box here. Now I'm just gonna make some small adjustments to the shape layer. By going down into contents rectangle, rectangle path. I'm going to deselect the constrain proportions here Or disable that and just tighten up this box a little bit in the horizontal and vertical, maybe something like that. Maybe I will make it a little bit wider, and then move my text kind of on just this one side. It's more similar to how the original design was. I'm also going to rename this so I'm going to select shape layer one, press Enter on the keyboard. Is rename it box, just whatever makes sense to you, that makes sense to me. So this is kind of the end state of the animation, more or less, you can tweak it to your heart's delight, but this is gonna work for me. A couple of things we need to solve. One is we need some way to map the text, so that, when we slide the text in from the left here, We don't see it kind of overhanging like this, that's not gonna work and we could do that with a mask, but I'm going to show you a more clever way to do it. We're going to take my box layer. I'm going to duplicate it and drag it down below this box here. I'm also going to change the color to fuchsia. Press Enter on the keyboard. In name it text Matt. I'm gonna go down into the contents of this layer here. I'm gonna get rid of the stroke just by selecting it and then deleting it and I'm going to turn on the fill. Now I'm going to set my now I can see that's getting in the way there. I'm going to set my creative boxed up animation text here to an alpha mat. So if you don't have this track mat option available, hit f4 on your keyboard and select alpha mat. And now if I move this outside you can see all right, we are really getting there now. Now it's just a matter of tweaking a few things and in animating this essentially one thing that I wanna do is I want to link the size of the rectangle, the rectangle path here and my text mat. I wanna link that to the size Have my rectangle in my box because I'm going to be animating the shape of this. And I want to make sure that if I animate that my text is not going to peek out in a weird way. So that's really easy to do. I'm just gonna take the size here and I'm gonna use this pick whip. And I'm going to click and drag all the way up to the size on my box layer. And that will link those properties. So now if I adjust this here you can see 684-684 717 717 it's all linked up. We're good to go there. I'm also going to take my entire layer here, and I'm going to parent it with this pick whip right here. In this just makes sure that if I move this box layer anywhere, it's going to also move the map. If I scale it, if I rotate it, it's gonna basically make this text map follow along exactly. I'm just gonna select my box layer and hit Ctrl+Home to center that backup with those two things parentid or pick whipped together. That's really all I need to do. And now we can start kind of animating this out. And that's a good place to start for this lesson. If you've been following along really good job keeping up I know we've gone in a lot of different directions and looked at a lot of different things. So congratulations for following along. Now coming up in the next lesson, you're going to see how the rest of this animation gets put together. So check that out coming up next [MUSIC]


