
 Lessons: 22Length: 3.6 hours
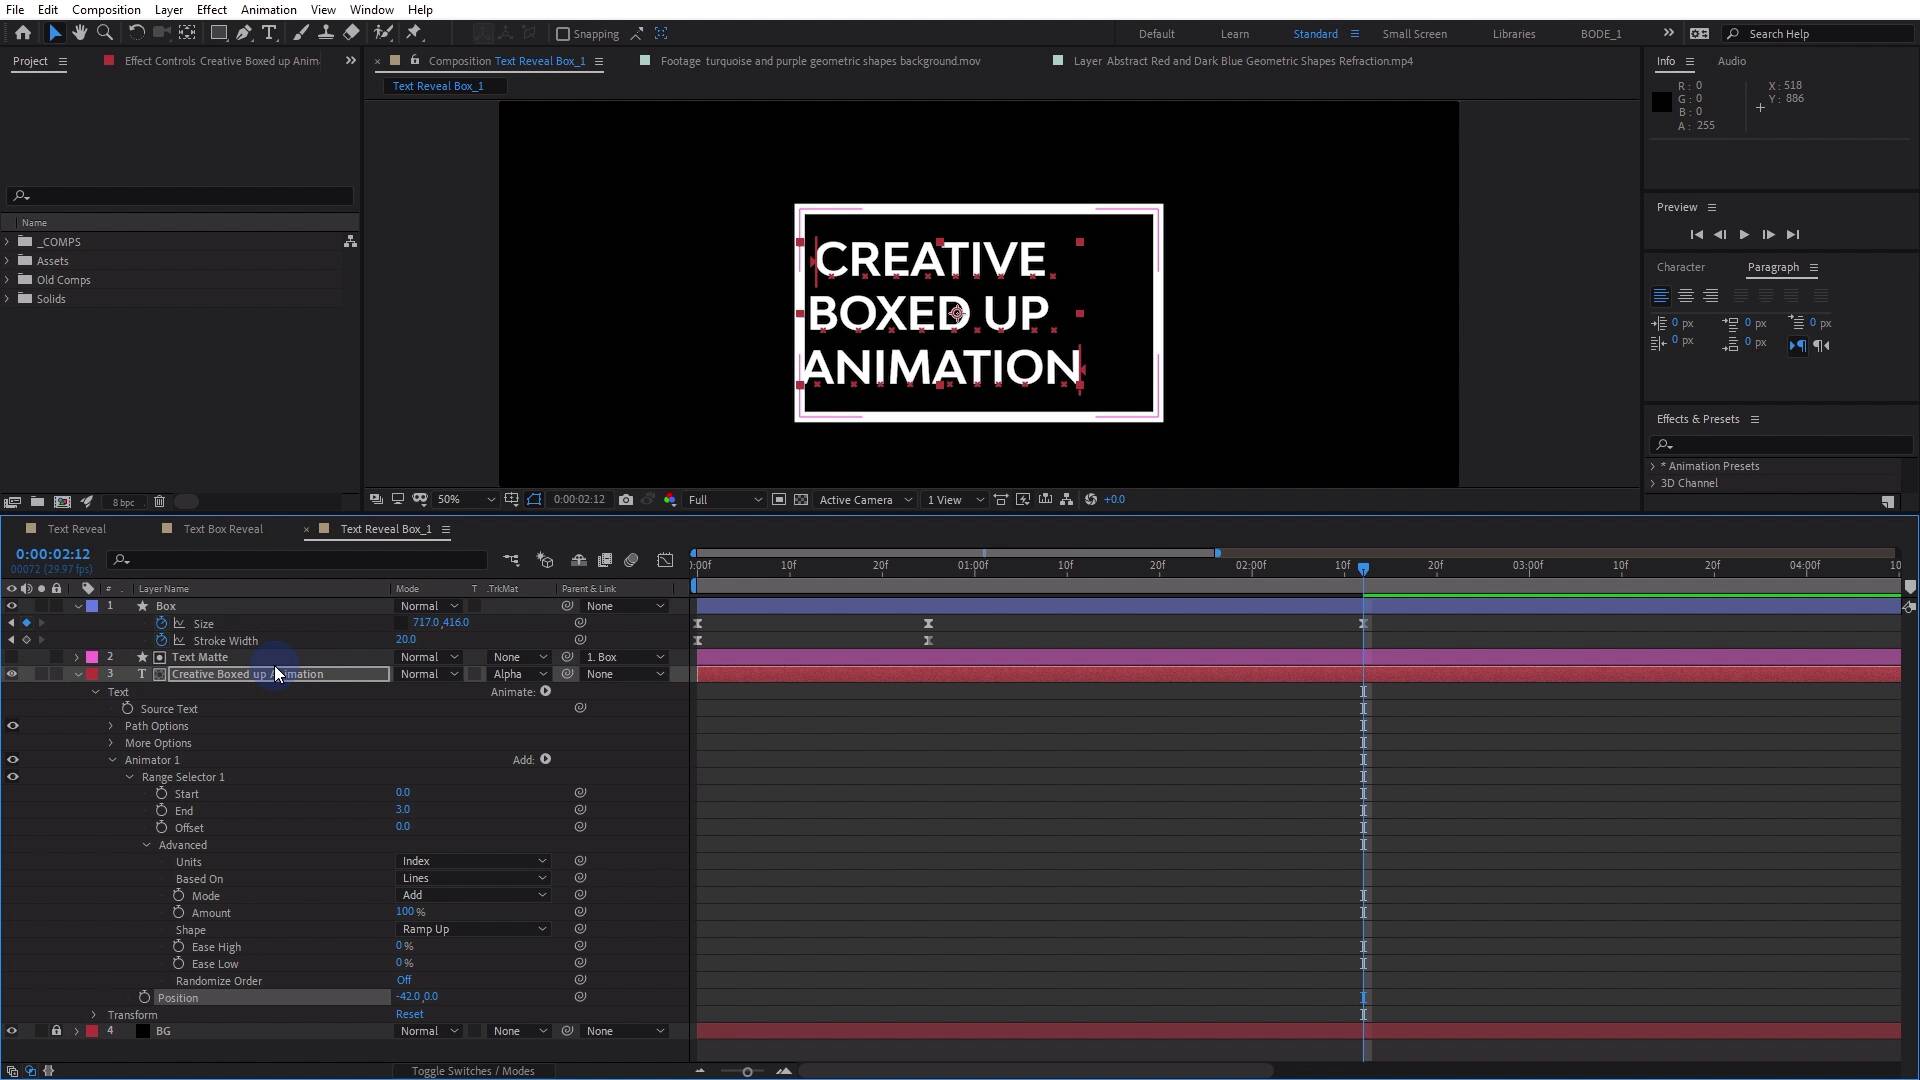
- Overview
- Transcript
2.4 Bounding Box Reveal
In this lesson, you will learn how to finish up this text box reveal by picking up where we left off in the last lesson and animating the bounding box.
Related Links
- Creative Titles Package for Premiere Pro on Envato Elements
1.Introduction
1.1Introduction02:55
2.Basics
2.1Keyframe Basics14:03
2.2Reveal Text With Masks and Shape Layers12:08
2.3Basic Text Box Reveal08:57
2.4Bounding Box Reveal11:48
2.5Text Reveal Rectangles: Part 113:02
2.6Text Reveal Rectangles: Part 208:44
3.Burger Logo Reveal
3.1Burger Logo: Prepare the Artwork11:54
3.2Burger Logo: Animate the Layers11:04
3.3Burger Logo: Final Touches10:46
4.Outer Space Intro
4.1Outer Space: Animate With CC Lens09:53
4.2Outer Space: Animating Strokes & Glow Effects13:42
4.3Outer Space: Lens Flares08:44
4.4Outer Space: Noise & Grain12:14
5.Boutique Text Effect
5.1Boutique Text: Prepare the Artwork06:59
5.2Boutique Text: Create the Layout06:14
5.3Boutique Text: Inertial Bounce Expression11:20
5.4Boutique Text: Wiggle Expression06:06
5.5Boutique Text: Layer Control06:07
5.6Boutique Text: Handwritten Text13:07
5.7Boutique Text: Final Touches11:38
6.Conclusion
6.1Conclusion02:09
2.4 Bounding Box Reveal
[MUSIC] In this lesson, we're gonna pick up right where we left off in the last lesson and you're gonna see how the rest of this animation gets put together. [MUSIC] So I'll pull down this original animation one more time, and let's just take a look at what that box does. Okay, so we start from kind of a small, skinny line here. It's already kind of a little bit wider and then it grows up in skinny. And then from that point it grows out wider. All right, so let's try and replicate that really quick. So I'm gonna go to about two and a half seconds up here when a drill down in my box and I'm going to set a key frame for size. So this is gonna be the final kind of width of my box here. I can adjust this later, but I think this works okay, right about here it should be good. Then I'm gonna go back to, I don't know, somewhere in this neighborhood timings not really super important at this point. And I'm going to make this skinny like it was. I'm gonna move back a little bit further and I'm going to make this wide. Oops wanna make this wide again, but. I'm gonna reduce the height a little bit and then actually, I need to see it one more time, but forget exactly what it did. It's so it's pretty close. Okay, so we go it starts kind of wide and then it goes from there. Okay, so it's really kind of three moves. We go from that's kind of the second move. And then right here, we're kind of all the way skinny like this, but actually, I'm not gonna make this zero because if you look what happens if I make the y value zero, we lose this. Stroke on the end and if I animate that it's gonna have this kind of bump out effect here. So I'm gonna I'm actually gonna leave this at a value of one right here. I'll probably pull that all the way to the beginning and then I'm also going to drill down on the stroke and I'm going to animate the stroke with. If I'm pressing you on the keyboard, I can just work with these key frames here in these properties because those are the ones that I have modified. I'm gonna pull out this stroke with the value of 22 here and at the beginning here, I'm just gonna change the stroke to 0. So let's see what we have so far. Okay, those are kinda the bones of the Box Animation there, and it does not look great. And that's because these are all linear key frames. If we select, all those key frames and hit f9, we're gonna be more in the neighborhood. Let's see it now. Okay. So yes, we're getting there. That is looking better. However, we need to adjust the curve. Have the speed graph here. So I'm gonna select that set of keyframes or it's just one keyframe there, and this keyframe here, and then pull these handles out. It looks like I missed a handle here, which is sometimes an issue when you're trying to modify these. I'm just going to grab the handle that I missed here and kind of match it up. And I think it's probably a shape, something like this, where we have kind of a quick move here and then it kind of slows down into the next thing. Let's check this out. Yes, that looks, that looks very close to the original. I'm not gonna AB them side by side, but I'm just take my word for it. It's pretty close. Very nice. If we wanna slow this down, maybe a little bit more, we can drag that out like that. We can also perhaps tighten up this bit of the animation, just like that. Very good. Okay. So I'd say we're more than halfway there with the animation portion of this little treatment here. The next thing we need to do is get the text in here. And like I showed you the text does two things. It slides in from the left, but the top line is moving then the middle line and then finally the third line kind of slides in. You can accomplish that a number of different ways. We can break this into three separate layers and animate them all separately. You can do them by hand or we can use one of these animate properties that is special to text layers. Now, text layers and after effects have a whole bunch of extra animation properties that you can enable or disable. You can even enable per character 3D for some really cool effects. But I think all we need to do to accomplish this layer offset in the lines is to animate the position. This position animation can by its default is gonna move all the characters and then we can actually offset these to kind of do something like this, where we're moving individual characters. Or we can change the shape to move like this. There's a ton of options here, and if I go through all of them, we're talking about a big, long lesson. I'm just gonna show you how it's actually done. And how has actually done is like this. If you drill down underneath the range selector in advanced. We're gonna change the based on parameter here, instead of characters, we're gonna select lines and that's, that means it's going to basically move this as line 1, line 2 line 3. In fact, you can see that if we change this to index, this is basically looking at this layer in three lines. Very good, okay? And so really simply, we can just do a very easy animation like this, where we're just animating the position from here to hear. Which doesn't look like it's right, but we're gona combine that with moving the position of the entire layer. And it's gonna look right so just kinda follow along and when it's done, you're gonna say, okay, now I get it [LAUGH]. So, right at about this point when the box reaches its final size I'm gonna insert a position keyframe and again, this is not the position of the entire layer. It's just kind of modifying the position of each one of these lines. I'm gonna move back to this point right here, and I'm just gonna offset them. So they make kind of this diagonal line. You can see these little Xs here represent where all the characters are and that's really all I need to do. I'm gonna go back to this point here and I'm going to insert a position key frame. Again, this is the position of the entire layer. And then I'm gonna go back to this point right here again with these two key frames. And I'm gonna push this off this way, and then if I play from this point you gonna say, okay I see, right? It's kind of doing the same thing as the original reference animation that we were looking at before. And so to kind of finish this off all we need to do selected these key frames here, hit f9 and we're gonna maybe adjust this maybe to like 90% of this incoming influence here. And I think that should get it really close. Yeah, look at that. Now we are looking really nice. Let's preview the whole thing here. We'll set this to fit up to 100%, turn off the graph editor. Very nice, I think that is really good. It's just that easy. Now I know we ran into a little bit of sort of complicated ideas with the position. But when it comes to the text animation properties, these are something that can take a little bit of experimentation to get them to do what you want them to do. Is really sort of impossible to understand in one sitting but the more you use it, the more you kind of understand how to manipulate it to get the results that you want. In fact, the first time that I recorded this lesson, I did it a slightly different way and it didn't have the exact right look. So I re-recorded it once I figured out what I did wrong there. It does take a little bit of experimentation, but if you're willing to do a little experimentation, you can get some great looking results. The final step to this is to put a nice looking background in here. Now I've downloaded some really cool looking backgrounds from Envato Elements, and I've found one that was I think it was this one, right here. So I'm gonna use this as a background here. I'm gonna pull this in and just put it above my black background. And this looks like it's a Ultra HD. So I'm just gonna hit Ctrl + Alt + Shift + G. That's a keyboard shortcut that you should memorize. That's gonna resize that to the layer in the I believe vertical. So if we go to right click on this we go to transform Ctrl + Alt + Shift + G fit to comp height. I always forget which one that is, but it's a little counterintuitive because Ctrl + Alt + Shift +H fits to comp width and you would think H has height but that's not the way it works. But those are two that are really handy to memorize Ctrl + Alt + Shift + G, Control + Alt + Shift + H. Anyway, now that we have the background in here, you can see that it does look pretty cool the way it is right now. However, it's a little bit sharp for a background. So a couple different ways we can deal with that how I dealt with that when I was building this the first time is I threw a blur layer on here. I used a box blur, fast box blur, if we throw them on here and we just crank that up a little bit we're gonna get a really nice effect, that's not going to compete with the contrast of our text layer here, that was pretty good. Another effect that looks even better is the camera Lens Blur. This effect looks a lot better. However, this is kind of a beast to render and will crush the life out of your system. You can see it does have a cooler look in fact, I'll show you how to add details here. I'll just take a picture right here. And so this is with Box Blur. This is with Camera Lens Blur. Box Blur, Camera Lens Blur. Actually, let me adjust this to make it a little more similar in terms of the level of blur. Yeah, that's probably it, all right? So here we have Box Blur, Camera Lens Blur. Camera Lens Blur looks cooler. It's very, similar to how well a camera would blur it. [SOUND] But it takes forever to render. So fast Box Blur is kind of a nice alternative and if it's too bright for you, if you find that it's kind of competing, no worries, we can just throw a curves effect on here good old classic curves and just. Maybe drop it down a little bit give it a little bit of a curve. And if you wanna find this background, it's called abstract red in dark blue geometric shapes refraction. A little bit of a mouthful, but you can find that on Envato elements. Let's check out how the whole thing looks here. [MUSIC] Very cool. All right, thanks for sticking with me for this lesson. Coming up in the next lesson, I'm gonna show you how to create this text animation right here. So check that out coming up next. [MUSIC]


