
 Lessons: 22Length: 3.6 hours
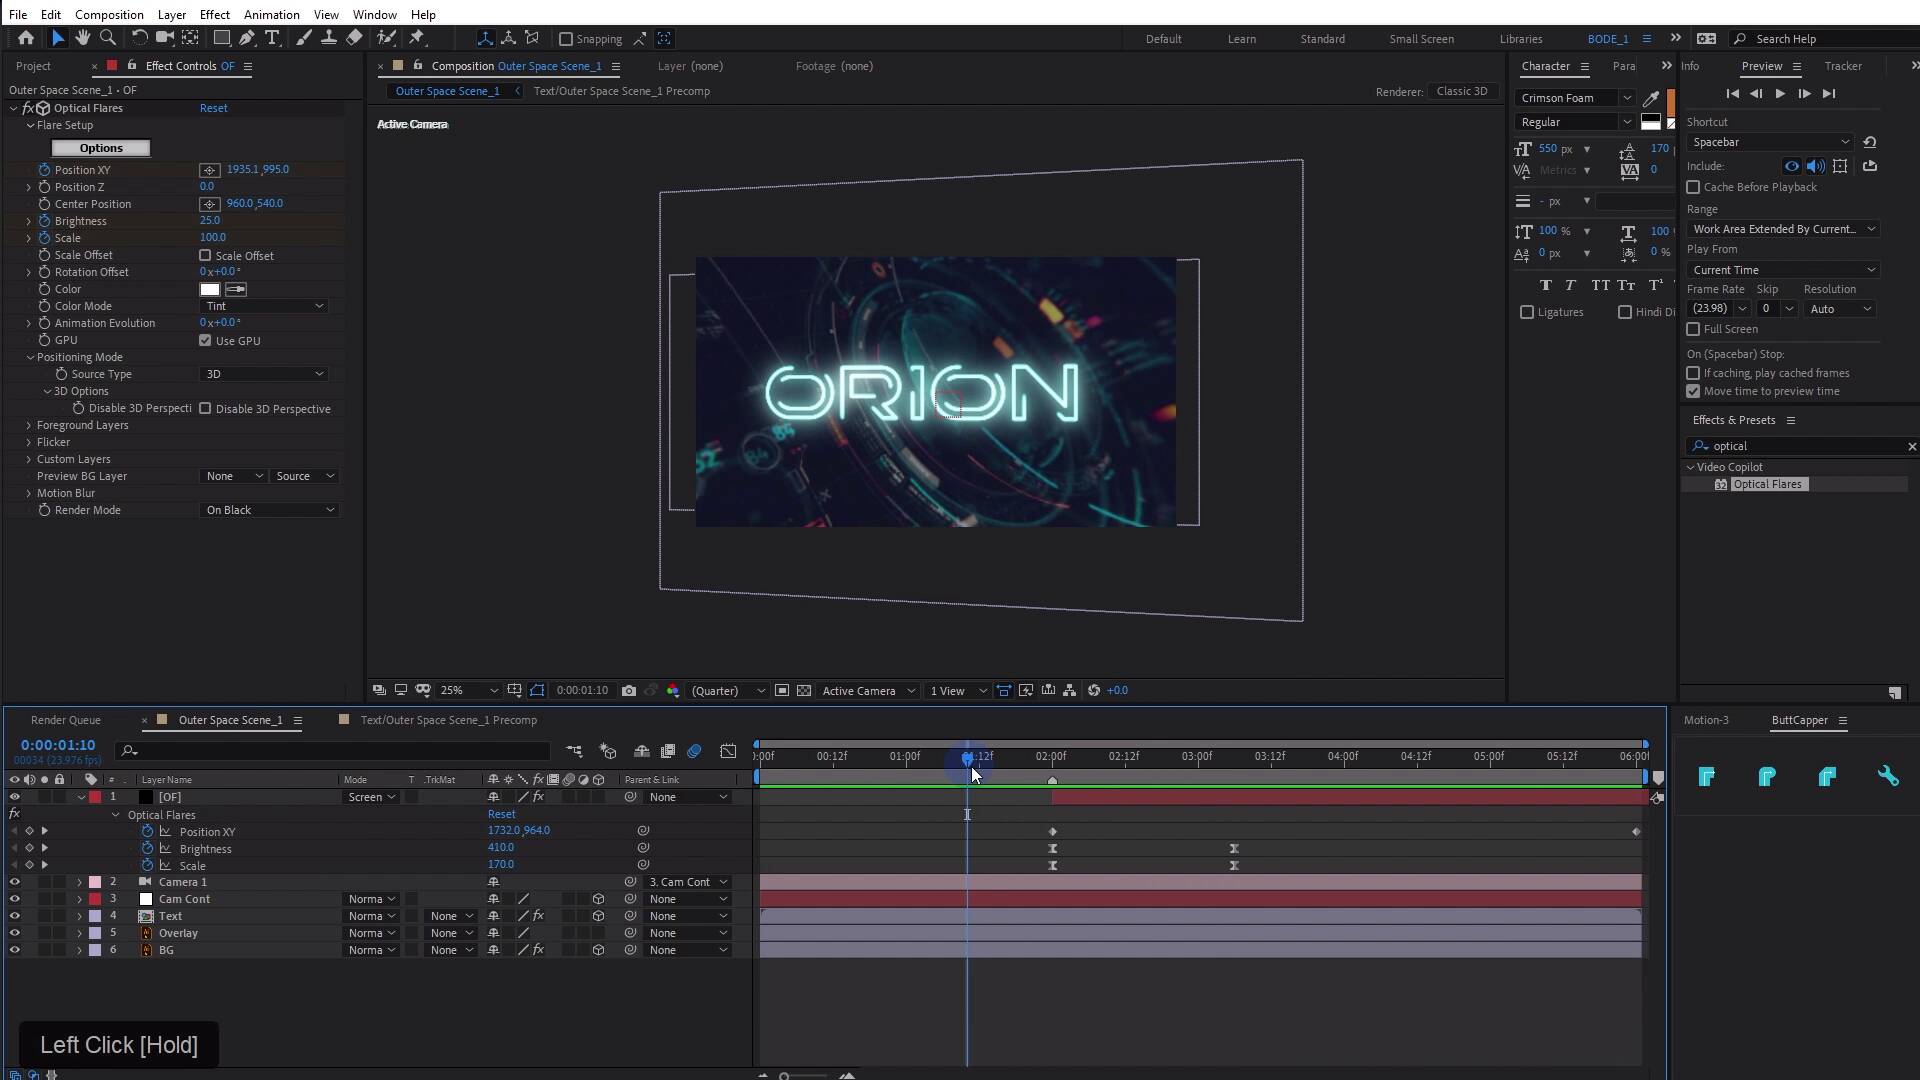
- Overview
- Transcript
4.3 Outer Space: Lens Flares
In this lesson, you will learn how to add some lens flares using Video Copilot’s Optical Flares!
Related Links
1.Introduction
1.1Introduction02:55
2.Basics
2.1Keyframe Basics14:03
2.2Reveal Text With Masks and Shape Layers12:08
2.3Basic Text Box Reveal08:57
2.4Bounding Box Reveal11:48
2.5Text Reveal Rectangles: Part 113:02
2.6Text Reveal Rectangles: Part 208:44
3.Burger Logo Reveal
3.1Burger Logo: Prepare the Artwork11:54
3.2Burger Logo: Animate the Layers11:04
3.3Burger Logo: Final Touches10:46
4.Outer Space Intro
4.1Outer Space: Animate With CC Lens09:53
4.2Outer Space: Animating Strokes & Glow Effects13:42
4.3Outer Space: Lens Flares08:44
4.4Outer Space: Noise & Grain12:14
5.Boutique Text Effect
5.1Boutique Text: Prepare the Artwork06:59
5.2Boutique Text: Create the Layout06:14
5.3Boutique Text: Inertial Bounce Expression11:20
5.4Boutique Text: Wiggle Expression06:06
5.5Boutique Text: Layer Control06:07
5.6Boutique Text: Handwritten Text13:07
5.7Boutique Text: Final Touches11:38
6.Conclusion
6.1Conclusion02:09
4.3 Outer Space: Lens Flares
[MUSIC] In this lesson, we're going to pick up where we left off in the last lesson working on this animation here. We're going to be checking out some lens flares. [MUSIC] I don't know how you feel about lens flares, but if someone were to ask me, I would say I love lens flares and I really do. They're just the right thing when you need a little bit of flash and pizzazz to stuff like this. This kind of has almost a kind of retro future vibe here. And I really wanna make this punch of the text here, when we go from just the stroke and the fill comes in And I'm just gonna drop a marker here with the Asterix so I can figure out where that is but when that Phil punches in, I want some lens flares. I want to have this whole thing light up nice and bright. I think the effect that it will have is that the text is much brighter than it actually is. So to accomplish this, I'm going to use a third party effect called optical flares. This is by video co-pilot. It's probably one of the best lens flare plugins out there. So to apply optical flares, I'm going to create a solid. I'm just gonna name this OF for optical flares, and then I will add. Optical [SOUND] flares to that. It's gonna load in here. I'm gonna set this to screen for now. Then I'm going to jump into the options and I'm gonna customize my flare. Now, optical flares comes with some default flares and then it has kind of a pro presets and It's got a bunch of different preset packages that it comes with. I have all of them and I think I want to use one that looks like either this Illuminati or something very long and stretchy. Ooh subzero. Yeah, this is I like this one. This will be a good lens flare. Now I like everything about the look of this except for this jazz right here, this angley stuff. And thankfully I can come right down here and just hide any of the bits that I don't like. I like that, I like that, I don't like this blue thing here. Just let me find where that is, there we go, that's it. And then, I think that and that have to go as well. So this is really gonna be a simple sort of lens flare, cool. I'm also going to change the positioning mode to 3D, which will help it track, I think, a little better with the camera. And then I'm going to position it just on the edge of the frame here when this hits and I will also trim up the beginning of the layer here with begin bracket so that lens flares start right here and I'm going to animate the position. So when we come to rest here, we're basically what I'm going to do is just move this over and probably down just a little bit like that. And then I'm also going to animate the scale and the brightness and I'm going to jack the scale way up, and the brightness way up. And that's going to just look Wow, it's gonna look awesome. Maybe too much scale there. Maybe a little more brightness. There we go. That's what I'm looking for. I'll probably see you on the keyboard to bring up those key frames. And maybe I'll go like two there and I'll reset the brightness, reset the scale. Maybe turn the brightness down a little more Like that cool. Let's see what that looks like. Yeah, I like that. I think I'd probably take these easy ease them jump into the graph editor and let's look at the speed graph. And then give it kind of a shape like this where it. I wanted to hit income an exponential curve. I want to fit this to the view here. There we go fit all graphs to view. I want this to really hit and then bam. See if I go to value graph, what does that do? There we go. That's looking all right. It's gonna really look like a flash essentially, if the curve is that exponential sort of shape, bam. Now optical flares also has a flicker section down here and I'm gonna change the type to sharp. I'm going to turn up the speed and the amount because I like flickery lens flares. I like that. That may be a little bit too much. Maybe let's try smooth, and then I'll turn this down a little bit, the amount. I do like sharp. But maybe let's just turn down the speed a little bit. Let's try that. Very cool. Whoo. You know what, actually, I want my lens flare to stop moving right here and I'll probably have to easy ease that. Because if it keeps moving once the camera stops, that's not going to look so hot. Very cool. Okay. I like that. I think the only thing that I would do in addition to this is maybe give the background a little bit of an RGB split. Look to it. I don't know. It might work it might not. So I'm gonna come to the background layer here. I'm going to right click on it and she is replaced with pre comp. And that's going to pre comp my background layer. I'm going to double click that go on into my background layer. Weirdly it has this strange crop here, then that's fine. But I'm gonna apply another third party effect, this one is from Red Giant Universe and that's called RGB Separation. Universe is a collection of all kinds of different, very useful effects for after effects and premiere. And one of them that I'm very fond of is this RGB split. Now, RGB split is this effect and we'll kind of zoom in here so that you can see this. Let's see RGB separation. We just push it out just a little bit. It just kind of separates the red, blue and green channels in space and it has this really cool looking effect that I just love. I think it looks really neat. Now they actually have a couple of different variations on this. So this is one of them. In fact, they have a preset browser here that will open up and you can choose a bunch of different looks. So some things have a little bit of distortion. We have heavy, I think maybe Subtle distortion might work. Let's try that. Yeah, so this is without, this is with Okay, I can see that I may just pull the radius in just a touch let's see what that looks like. Now, you could, if you wanted to take this optical flares layer, duplicate it, jump into the position and then just move this up here to duplicate the effect. And then of course, we're going to have to change the end position here, maybe up here, something like that. Let's see what this looks like. Yes, oftentimes I like to have somewhat symmetrical lens flares. There's one on the bottom. I think one on the top kind of works but it's up to you. That looks pretty cool. And if this is just a little bit too washed out, because I think, yeah, I think that's adding just a little bit too much. Kind of wash there. You could. Add a curves effect to this. And maybe just tighten that up a little bit. [SOUND] It's up to you. Or you can just turn down the brightness or the scale, probably the scale would need to come down a little bit more, yeah, something like that. [MUSIC] Coming up in the next lesson you're gonna learn about a pro tip that will really help these lens flares and these fine gradations look great when you export. [MUSIC]


