
 Lessons: 22Length: 3.6 hours
- Overview
- Transcript
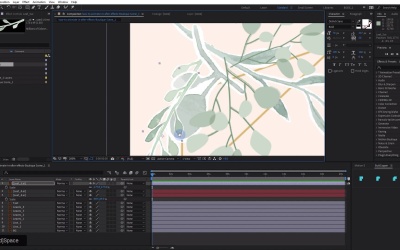
5.2 Boutique Text: Create the Layout
In this lesson, you will learn how to import and lay out all the assets in After Effects to match the original art.
Related Links
1.Introduction
1.1Introduction02:55
2.Basics
2.1Keyframe Basics14:03
2.2Reveal Text With Masks and Shape Layers12:08
2.3Basic Text Box Reveal08:57
2.4Bounding Box Reveal11:48
2.5Text Reveal Rectangles: Part 113:02
2.6Text Reveal Rectangles: Part 208:44
3.Burger Logo Reveal
3.1Burger Logo: Prepare the Artwork11:54
3.2Burger Logo: Animate the Layers11:04
3.3Burger Logo: Final Touches10:46
4.Outer Space Intro
4.1Outer Space: Animate With CC Lens09:53
4.2Outer Space: Animating Strokes & Glow Effects13:42
4.3Outer Space: Lens Flares08:44
4.4Outer Space: Noise & Grain12:14
5.Boutique Text Effect
5.1Boutique Text: Prepare the Artwork06:59
5.2Boutique Text: Create the Layout06:14
5.3Boutique Text: Inertial Bounce Expression11:20
5.4Boutique Text: Wiggle Expression06:06
5.5Boutique Text: Layer Control06:07
5.6Boutique Text: Handwritten Text13:07
5.7Boutique Text: Final Touches11:38
6.Conclusion
6.1Conclusion02:09
5.2 Boutique Text: Create the Layout
In this lesson, you're gonna learn how to pull all of these things into After Effects. So we can begin the process of animating this design. [MUSIC] Okay, I'm over in After Effects here. First thing that I will do is I will save this here and I believe this is my boutique kind of artwork. All right, now I'm gonna import my graphics here. And I'm going to import my How to Animate in After Effects boutique scene_1. That was the one that I saved with all the individual layers. Click Import and I wanna import it as a composition and I'm gonna keep the footage dimension set to layer size. All right, if I double click to open that up, hey, check that out, it's looking fantastic. I have my lines here, my leaves, my text, everything is looking pretty good. The only thing that I need is those individual leaf elements. So I'm gonna double click to open up those, jump into my leaf folder here and actually I think I can just grab this and say Import Folder, perfect. And now I have my individual leaf layers. So now what I might do is take these leaf layers here and just kind of lay them out and try to match them up with what I'm seeing here. And it looks like some of these have been flipped in one dimension or another. I'm just going to reverse the x dimension there by putting a negative or a minus sign in front of the x scale which will flip it in the horizontal. I can just lock those back together there. And I'll just kind of rotate it around to figure out, yeah, okay. So that kind of goes right there. Kinda shrink that down and move that around until it's about the same size. How exactly you wanna go with this really depends on what you're doing. If this is client work, you're gonna really wanna make sure that it's very, very precise but I think that'll actually work fine for now. I'm gonna change the color on this leaf here to red, I'm gonna duplicate it Ctrl + D on the keyboard. And I'm gonna rotate it around and try and align it here with this leaf. Very good, now that's close enough. All right, let's check out this third leaf here. It's also looks like it's been no, no, no, okay. That goes over here actually. And is that in the right orientation? It is not. So I'm gonna jump into the scale and I'm gonna flip the scale again like that. Rotate that around, yes, that looks correct. I'm gonna have to increase the scale on this, no big deal. And I can just enable the continuously rasterized button there and then I'll ensure that I can scale this up to ridiculous proportions. And it won't lose any of that delicious detail that is in this Illustrator file here. Now it's just a matter of just kind of aligning this. Sometimes it can be easier to align these if you can see where the end is here. If you hit Y and just put the anchor point on the end of the leaf and then you can just kind of align it here. That way when you scale, it's gonna scale right from that point. It's gonna be super easy to get that aligned, perfect just like that. All right, now I have this third element here and that looks like this one right here. Again, I'm just going to throw the anchor point right on the end of the leaf just like that, enable continuously rasterized, oops. I didn't get that exactly where I wanted it. Very good, scale that up. It looks like all of these have actually been flipped in one of the dimensions for one reason or another. And we'll just kind of align that, looks like it starts right here. Very good and just scale that up, rotate it around, maybe push it back down a little bit. There we go, perfect. And then what is the final leaf that we have here? Okay, yes, it's this guy right here. And I don't really know how this is oriented but let's see if we can figure this out here. Is it like this? No, it actually looks like this is flipped as well, and I can strain those so it doesn't get all crazy. There we go and then I will also continuously rasterize that. Make sure that's looking good. Sometimes if you grab a handle like the transform handles on the corner. And you try and scale it, it will do like a weird thing once you move the mouse kind of over in this direction, it'll flip the scale. So if you hold Shift while you're scaling with one of these four transform handles, it'll go a lot easier. Okay, that is great. I'm going to change the label to red on all of these. And the final thing that I'm gonna do is just adjust the stacking order. So it looks like one, two, three, and then those are in the bottom orientation. And I've re-enabled those, okay, so it's the roundy leaf, and I'll just disable these leaves so I can see, okay. It looks like I've done it kind of inadvertently but that was very good. I guess the final thing I need to do is just adjust the opacity perhaps on these layers right here. And then I'll just enable one of these other leaves here just for reference. Let's see. [MUSIC] Cool, I think that looks really pretty close. All right, that's about it for this lesson. So coming up in the next lesson, we're gonna look at how to duplicate these. And then we're gonna start to animate them in a really fun way. So check that out, coming up next. [MUSIC]


