
 Lessons: 22Length: 3.6 hours
- Overview
- Transcript
2.5 Text Reveal Rectangles: Part 1
In this lesson, you will learn how to create another text reveal using shape layers. You'll also learn how to set up the comp so that you can resize to fit changing text lengths.
Related Links
- Text Reveal Video Templates on Envato Elements
1.Introduction
1.1Introduction02:55
2.Basics
2.1Keyframe Basics14:03
2.2Reveal Text With Masks and Shape Layers12:08
2.3Basic Text Box Reveal08:57
2.4Bounding Box Reveal11:48
2.5Text Reveal Rectangles: Part 113:02
2.6Text Reveal Rectangles: Part 208:44
3.Burger Logo Reveal
3.1Burger Logo: Prepare the Artwork11:54
3.2Burger Logo: Animate the Layers11:04
3.3Burger Logo: Final Touches10:46
4.Outer Space Intro
4.1Outer Space: Animate With CC Lens09:53
4.2Outer Space: Animating Strokes & Glow Effects13:42
4.3Outer Space: Lens Flares08:44
4.4Outer Space: Noise & Grain12:14
5.Boutique Text Effect
5.1Boutique Text: Prepare the Artwork06:59
5.2Boutique Text: Create the Layout06:14
5.3Boutique Text: Inertial Bounce Expression11:20
5.4Boutique Text: Wiggle Expression06:06
5.5Boutique Text: Layer Control06:07
5.6Boutique Text: Handwritten Text13:07
5.7Boutique Text: Final Touches11:38
6.Conclusion
6.1Conclusion02:09
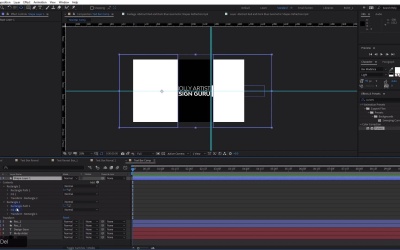
2.5 Text Reveal Rectangles: Part 1
[MUSIC] In this lesson, I'm gonna show you how to build another great looking text treatment that looks something like this. [MUSIC] This looks pretty simple, and this is another idea that I was inspired to create from that template that I showed you earlier. And what we have here are kind of two bars that slide across the screen, that at some point start to reveal the text. So, these are positioned above in the layer stack, these text items here, and the text seems to kind of originate from this point in space right here. Now there's a few different ways that you can go about building something like this. In my mind, you can do it kind of the quick and dirty way, which is very fast but not as easy to modify down the line. And then, you can do it in a different way that takes a little bit more work up front, but it's a little bit more modular down the road. For example, let's say that I wanted to change the text here, and I wanted to do something like. Like this. Just to make this a little bit bigger. You can see right off the bat here, well, I got some problems because now my matte is kind of messed up, but I built this in such a way that I can just resize my matte and almost everything works. Just have to adjust the position of this rectangle here, and then this rectangle here. And with those changes, check this out. I got a whole new thing and it totally fits my text. If I want this kind of ending rectangle here to be fatter, no problem. One little change there. Super easy. So, I'm gonna show you how to build this as quickly as I can. And to do it, I already have a comp set up right here. 1920 by 1080, ten seconds long. I have a background solid in here that is locked, so that I can't mess with. The first thing I want to do is kind of lay out my text, right? I want to kind of build this out. So, I'm going to be using Modelica again, in this example, MOLLY ARTIST, and I'm going to make sure that is right aligned. And actually, I will pull out a guide, somewhere around there, just so I can pop that right there. I'm gonna duplicate my text and. DESIGN SUPERSTAR. Maybe, what did I put in the other one? DESIGN GURU. That works. There we go. And then I'm gonna change this to maybe regular or light. Looks great. Then the next thing that I wanna do is I wanna build out those rectangles, and I want to make them nice and long. And I want to find maybe the spot that's right in between these two layers. I'm just gonna eyeball it, something like that. I'm gonna deselect my layers here, grab the rectangle tool, and I'm just gonna draw a rectangle. I do not need a stroke on this, and I'm thinking I may actually need a longer rectangle, but not to worry. I'm just going to jump into the shape properties here and just adjust this to get it down to where I need it to be. As long as I have this guide here, this will more or less kind of snap for me. I'm just kind of positioning this, I just wanted to get kind of an equal padding on the top and the bottom. It's a little bit fiddly to do here, maybe like probably 97 will work. And I think I can pull this down just a hair, that feels about right. Okay, very good. So, I'm gonna slide this over here. I'm gonna set another guide maybe right here to just this kind of give me some spacing here. And then, I'll name this Rec_1, and I'll duplicate this, set this right down here, and that's pretty much it. That should work perfectly. Okay. The next step is I need to design a matte that will kind of do what I need it to do. I need it to matte on this side, I need it to mat on this side, so that it kind of blocks the text and it cuts off my little rectangles here. So, to do that, I'm going to use a shape layer. And I think I'll just create one kind of like this, and then I'm just gonna slide this over on this side, that'll give me a little wiggle room over here, and I'm going to duplicate this and put it over here, and I'll align this to be right about there. Very good. Now, in order to change the shape of these layers, what I Ideally would like is for some kind of control where I can make it scale from this point right here, so that I can push it in without kind of losing the mat on this side. And then the same thing for over here, I want it to kind of push in from this side without losing my matte over on this side. I probably don't need to stick out quite that far. But to do that the easiest way I think is to grab the pan behind our anchor point tool, and then grab the anchor point of this shape, so not the layer and just kind of eyeball that and put it right over here. It doesn't have to be exact, but If you put it right on the line there, it'll be plenty good enough. I would do the same thing to this shape over here. I don't think I need it quite that big, but it doesn't really matter. I'm just gonna grab the pan behind tool and put that anchor point. There we go. And get it right over there. Now if I dive down into. The properties here, rectangle number one, I'm just gonna delete the stroke rectangle. Actually, I'm gonna delete the stroke on rectangle one and two. I don't need those. And I also want to put an effect on here, if I go over to my effect and preset, I'm just gonna put a slider control. And if you haven't used this before, don't worry. I'm gonna call this Right Side, and then I'm gonna duplicate this Left Side. This is all gonna make total sense in just a minute. I'm gonna set both of these to 100. And then what I'm gonna do is I'm going to come down here to the scale. And this is the scale, again, of my rectangles. So, it's not the scale of the entire layer, it's just the scale of these shapes. And what I'm gonna do is I'm gonna use a little bit of an expression. I'm gonna create an expression that looks like this, x =, and then I'm gonna use this pick whip here, and I'm going to pick whip this right side up here. Then I'm gonna put a semicolon, hit enter, y equals, and then I'm just gonna pick whip the value right here, and that's just gonna lock it to 100%. Then I'm gonna hit semicolon, I'm gonna hit enter, begin bracket, and because this newer version of after effects kind of, it's a little bit smarter, it's gonna create the end bracket for me, and all I have to do is hit x, y. So, if that doesn't make sense, essentially, what I am doing, and I'll click away here, you'll see nothing has changed. But this expression basically says that I wanna set the x parameter to whatever the slider control is, and that way I'll be able to modify it without having to jump down into the layer properties and go right to the scale every time. So, it's saying x equals this, and y equals whatever this is, and I'm not going to modify it. So, I'm just gonna leave it to 100. Everything is going to work out perfectly. So, I'm gonna do the same thing. In fact, I can just copy this. I'm gonna do the same thing to the transform controls of this rectangle right here. When I alt click on scale and just paste this, and then I just need to modify a few things. I need to change the name here to left. And then, right down here, I need to change the rectangle because I don't want it to be Rectangle 2, I want it to be Rectangle 1 because this rectangle here is Rectangle 1. And this will allow me to be able to modify all of my matte in this composition with this one matte control layer. Check that out, very cool. So, I'm going to change the color of this to fuchsia by clicking right here. And then I'm gonna duplicate it. And I'm gonna call this Rec Matte_1. I'm gonna use this for my rectangle number one. In fact, I'm gonna pull Rectangle 2 down here, so that they are in order. Before I go any further though, I want to link a few of these properties, so that when I make adjustments to my master matte control, everything is reflected because right now, if you look at what's happening on Rec Matte_1, I also have controls on rec matte number one here, and I don't want those. So, I'm going to delete those, it's gonna come up with an error, no worries. I'm also gonna make this full screen here, and I'm gonna click down in my comp timeline and then press the tilde key, so that I can see what I'm doing. So, let's select Rec Matt_1 here, press U, U on the keyboard, we can just scroll down, and then you can click in here where this expression is, and just delete it. And then all we need to do is very simple. Rec number two here, rectangle number two, you wanna go down to the scale right here, pick whip that all the way up to the scale of rectangle number two on the matte control layer. Okay, now those two are linked. I'm going to do the same thing here to rectangle number one. Take the scale, pick whip that to rectangle number one's scale. That's it. We got a little bit into the widths there with the expressions, but really, it was pretty simple. And now, I'm gonna disable the visibility on this switch, take rec number one here and make that alpha inverted. And check this out. Now, when I adjust this matte, its also adjusting this matte down here. If I take this and I duplicate it, I'm gonna pull this down above rec number two, set this to alpha matte inverted, I don't have to change anything on that layer because it's duplicated from this first rec matte layer, and so now this also linked. So, if I make an adjustment here, check that out, it's also adjusting these two mattes. I'm going to duplicate this one more time, and reorder these text layers. So, Molly's on top, design's on bottom, and I'll call this Text Matte_1. I'm gonna change this to alpha inverted, duplicate this, Text Matte_2, pull that above design guru here, change that to alpha matte inverted. Finally, to make sure that none of these matte here move or scale or do anything weird, I'm going to link them all to my matte control layer, and then I'm going to lock them, so that the only one that I can actually move is this layer up here and because it's not visible, it's going to be pretty tricky to move. So, this kind of takes a lot of the variability out of the equation, and it prevents you from kind of moving anything around in an undesirable way. So, I'm gonna get rid of my guides here, I'm just gonna turn those off. Also turn off the rulers, set this back to fit up to 100%. So, now it's time to do the animation, and we're gonna jump into that coming up in the next lesson. [MUSIC]


