
 Lessons: 22Length: 3.6 hours
- Overview
- Transcript
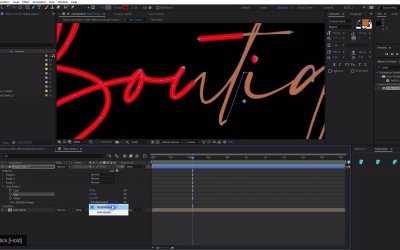
5.6 Boutique Text: Handwritten Text
In this lesson, you will learn how to create the write-on text effect using a shape layer as a track matte.
Related Links
1.Introduction
1.1Introduction02:55
2.Basics
2.1Keyframe Basics14:03
2.2Reveal Text With Masks and Shape Layers12:08
2.3Basic Text Box Reveal08:57
2.4Bounding Box Reveal11:48
2.5Text Reveal Rectangles: Part 113:02
2.6Text Reveal Rectangles: Part 208:44
3.Burger Logo Reveal
3.1Burger Logo: Prepare the Artwork11:54
3.2Burger Logo: Animate the Layers11:04
3.3Burger Logo: Final Touches10:46
4.Outer Space Intro
4.1Outer Space: Animate With CC Lens09:53
4.2Outer Space: Animating Strokes & Glow Effects13:42
4.3Outer Space: Lens Flares08:44
4.4Outer Space: Noise & Grain12:14
5.Boutique Text Effect
5.1Boutique Text: Prepare the Artwork06:59
5.2Boutique Text: Create the Layout06:14
5.3Boutique Text: Inertial Bounce Expression11:20
5.4Boutique Text: Wiggle Expression06:06
5.5Boutique Text: Layer Control06:07
5.6Boutique Text: Handwritten Text13:07
5.7Boutique Text: Final Touches11:38
6.Conclusion
6.1Conclusion02:09
5.6 Boutique Text: Handwritten Text
[MUSIC] In this lesson, you're gonna pick up right where we left off in the last lesson, and you're gonna learn about the write-on technique. [MUSIC] So to get started, I'm gonna jump down here, find my text layer, it's right here, and I'm gonna pre-compose this. So I'm gonna right-click on it and choose Pre-compose. I'm gonna leave all the attributes. You can also use the keyboard shortcut Ctrl+Shift+C. I'm gonna double-click that text pre-comp to open it up here. And you may have noticed that this layer here looks a little bit different than the Illustrator layer over here. The end of the e is just a little bit funky. I'm not 100% sure why that is. I think that has to do with some of the character properties that are available in Illustrator that may not be available in After Effects. For whatever reason, it looks just slightly different. So if you wanted to what you could do, we could just grab this e character here, jump back into After Effects, grab the text tool, and paste that e. And that should line up very, very closely with this e right here. In fact, sometimes what I like to do is just change the color to some more different color, and then align this up with this layer, just like that. I'll change it back to the text color here, and then make my comp just a little bit wider. I'm just gonna hit Ctrl+K on the keyboard, over to the Advanced tab, and select the arrow so that it grows out to the right here. And maybe add just, I don't know, 20 more pixels to this so that I get this little bit hanging off the end here. And then, I can just put a mask on this bottom Illustrator layer right here to just mask out the e that I don't want. And if you hold the S key while you're creating the mask, it will select the subtract mask mode, which is what I want. I want it to remove the e from the original here. And just like that now I have that line back there, perfect. So I'm gonna actually pre-compose these and I'm gonna call this Text Fixed, there we go. And that's gonna very slightly change the alignment here, but no big deal. I'll just move it back a couple of pixels and that should be fine. So let's talk about how to do the text write-on effect, it's actually quite easy. So I'm gonna deselect down here in my sequence panel, and I'm gonna come up and grab the pen tool. And if I start clicking and dragging to create a shape in my composition here, it's going to create a shape layer, which is what I want. But before it does that, I'm just gonna change some of the properties here. So I don't need any fill, and I'm just gonna give it a nominal sort of stroke width. And then what I'm gonna do is, I'm gonna start where I would start if I were to draw this cursive text out, and I'm gonna trace this. So I'm gonna put a point right here, and I'm gonna lick and drag down here and just make some lines here. And the idea is, I want my shape layer, oops, I want my shape layer to completely cover, My text layer, but only just barely. It's very easy to cover if you just jack up the stroke to an absurd amount. But I really want it to be just barely there covering it, because that's gonna give me the best result. And the idea is, I essentially want to put this stroke here dead center in the text. So you could actually make this without a stroke. I like to do it with a stroke, and then I can kind of see how it's working here. And I'll just get it a little bit of the way, and then I'll adjust the stroke to a value that just barely covers the text. And I think I was actually pretty close before, I think that ought to do it. That's pretty darn close, we can go back and refine this. But I'm just gonna pick it up here and I'm gonna keep going, creating my line here. Now, this is a bit of a tedious process. There isn't really a faster way to do this. This is pretty labor intensive, but it's not tremendously difficult. I think the key to getting a very convincing-looking write-on effect is to draw the line how you would go about drawing this with a pen. So you're going to move along in the same direction that you would, and take all of the same strokes. For instance, when we get to this t here, you wouldn't draw this t in real life by coming up here and stopping halfway and then doing the cross mark. No, we'd hit that at the end of the word, which is what I'm going to do here. Now sometimes when you get a break in the text here, what you can do is, you can create a new shape if you want to. Or you can just kind of scoot the line up very quickly and then join it to the next letter. You wanna kinda do it at an angle, so that it starts at the top and it doesn't kind of jump in at the middle of the line there. And we'll just continue on tracing just like this, There we go. I am actually going to make a second shape here to get the cross in the t, just like that, and to get this i. So I'm gonna make a third shape, I guess, to get the dot of the i here, just like that. And then you want to order these, if you drill down in the layer under Contents, so that they go top to bottom, one, two, three, or however many shape layers that you use. Because the next step of this process is, we are going to put a Trim Paths. So if you select Contents and not any one of these individual shapes, you come over here to Add, and we're gonna put a Trim Paths on here. And we're gonna animate the end position, but we wanna set this not too simultaneously, but individually. And that's gonna write them in order, which is correct. And finally, what we wanna do is, we want to change, and by we, I mean you, if you're following along. You're gonna wanna change the stroke line cap and maybe the stroke line join, and you wanna change that to round cap and round join. So that's going to put a roundy bit here where this joins, and that's gonna make that look much nicer. So the end cap here or the line cap is actually this end bit. So let me change that back to butt so you can see. And I want this to actually stroke with a round cap, which is gonna look a little bit nicer. And so now once that's done, we can just kind of look over and make any small adjustments that we might need. I actually might take my whole comp here and just give it a little bit more width, maybe, I don't know, 1040. And maybe just a little bit more height, maybe 540. And that shouldn't really change the alignment in the master comp where this lives. Okay, so let me see if I can just dial this in a little bit. Okay, I think that looks good enough. So now what you wanna do is actually go ahead and animate this on. So if you come down here to your Trim Paths, and you go maybe, let's say somewhere around the three second mark here, and we drop an end keyframe, and that's set to 100%. And then we'll go back to the beginning, and we'll set this to 0. And so now when we play this, you can see, look at what we have here, very nice. It doesn't look great if you're looking at the stroke. However, if you change this to alpha matte on the Text Fixed comp, now what you'll see is, we get this very nice write-on effect here. Now, it doesn't look perfect, there are some kind of strange things going on. Probably the first thing that you want to address here is the timing of this. So I'm gonna scooch this down to two seconds, I'm gonna see what that looks like here. Okay, that looks pretty decent. I'm also gonna ease these keyframes here. And I'm gonna jump over to the motion three script utility that I've used in some previous lessons just to give this just a little bit more kind of easing on those keyframes. So let's check that out now, very nice. So I get this kind of, it starts a little bit slower, it kinda rips through the middle, and then it slows down towards the end. I like that, I think that looks pretty good. And I like the timing of that too, I think that works pretty well. Now, the real trick of this is that, as this is drawing on, and it looks pretty good right now. However, what you'll see is that part of the letters kind of get drawn on in a weird way, which they shouldn't be. So when this top kind of first part of the stroke comes down here, we're getting bits of the B here because this stroke width of the original text is not a fixed value. There's no great way to kind of emulate that. It would be far too tedious to go through and create a bunch of different strokes at different lengths and then link them all up, that's crazy. The easy way to do that is to just come along here, and as it's animating on, you just kinda follow it. And every time there's a little bit that sticks out here, what you're gonna do is, you're gonna take the pen tool. And with your Text Fixed layer selected, you're gonna create a little mask. And as you're closing it up, just hit the S key and that'll change that to subtract. And so now if you click away, and you've drawn your mask relatively in the right spot, essentially, what you wanna do is mask out all of the bits that you don't want to see. And we really only need to address this mask here, when this line comes back and crosses over it, so it's gonna be right here. So at this point, what you would wanna do is, you jump into your masks, and you set a keyframe for this mask. And then you go one frame forward, you take this mask, you can just double-click it and just move it away. And when this plays back, you won't even see that, it just sort of appears. And so anytime you have a little kind of weirdness in the alpha track matte here, so this bit right here sticks out, you go to the frame right where it is getting occluded, if you will. So this is the frame where we want our little mask to move. We'll just go one frame before there, grab the pen tool, select the layer. I'm gonna create that same sort of mask shape again, I'll hold S to make that a subtract mask there. Sometimes what I like to do is take this point here and just smooth that out just a little bit. And then as long as you're working on that mask, you can hit Ctrl+Shift+M and that'll drop a keyframe right there. You go one frame forward, so that's Page Down on the keyboard, double-click this mask, and we'll just move it up a little bit. And so now when this part plays, I'll deselect so you can see, you won't even see that. You can't even see it moving, and so it's a very seamless way. And this is in fact the fastest way to do this write-on technique to have it look essentially flawless. And I'll just do the rest and I'll play it in fast forward, you can see, and I'll be back in a second. I think that's just about perfect, cool. Now if you wanted to use something like a motion blur for this, you will have wanted to have turned that on before you've done those masks. Because that will kind of alter where the masks are, because the motion blur will kind of project ahead a little bit. I think for the most part, most of those masks work just fine. If there are any kind of weird little things, you're not gonna be able to see it when it's going that fast. Let's see how that looks in the main composition here. [MUSIC] Ooh, that's already gorgeous looking, I really like it. I have one more lesson where we're gonna kinda finish off this animation. We're gonna do kind of a line animation here and kinda draw things in and bring it all together. So check that out coming up next. [MUSIC]


