
 Lessons: 22Length: 3.6 hours
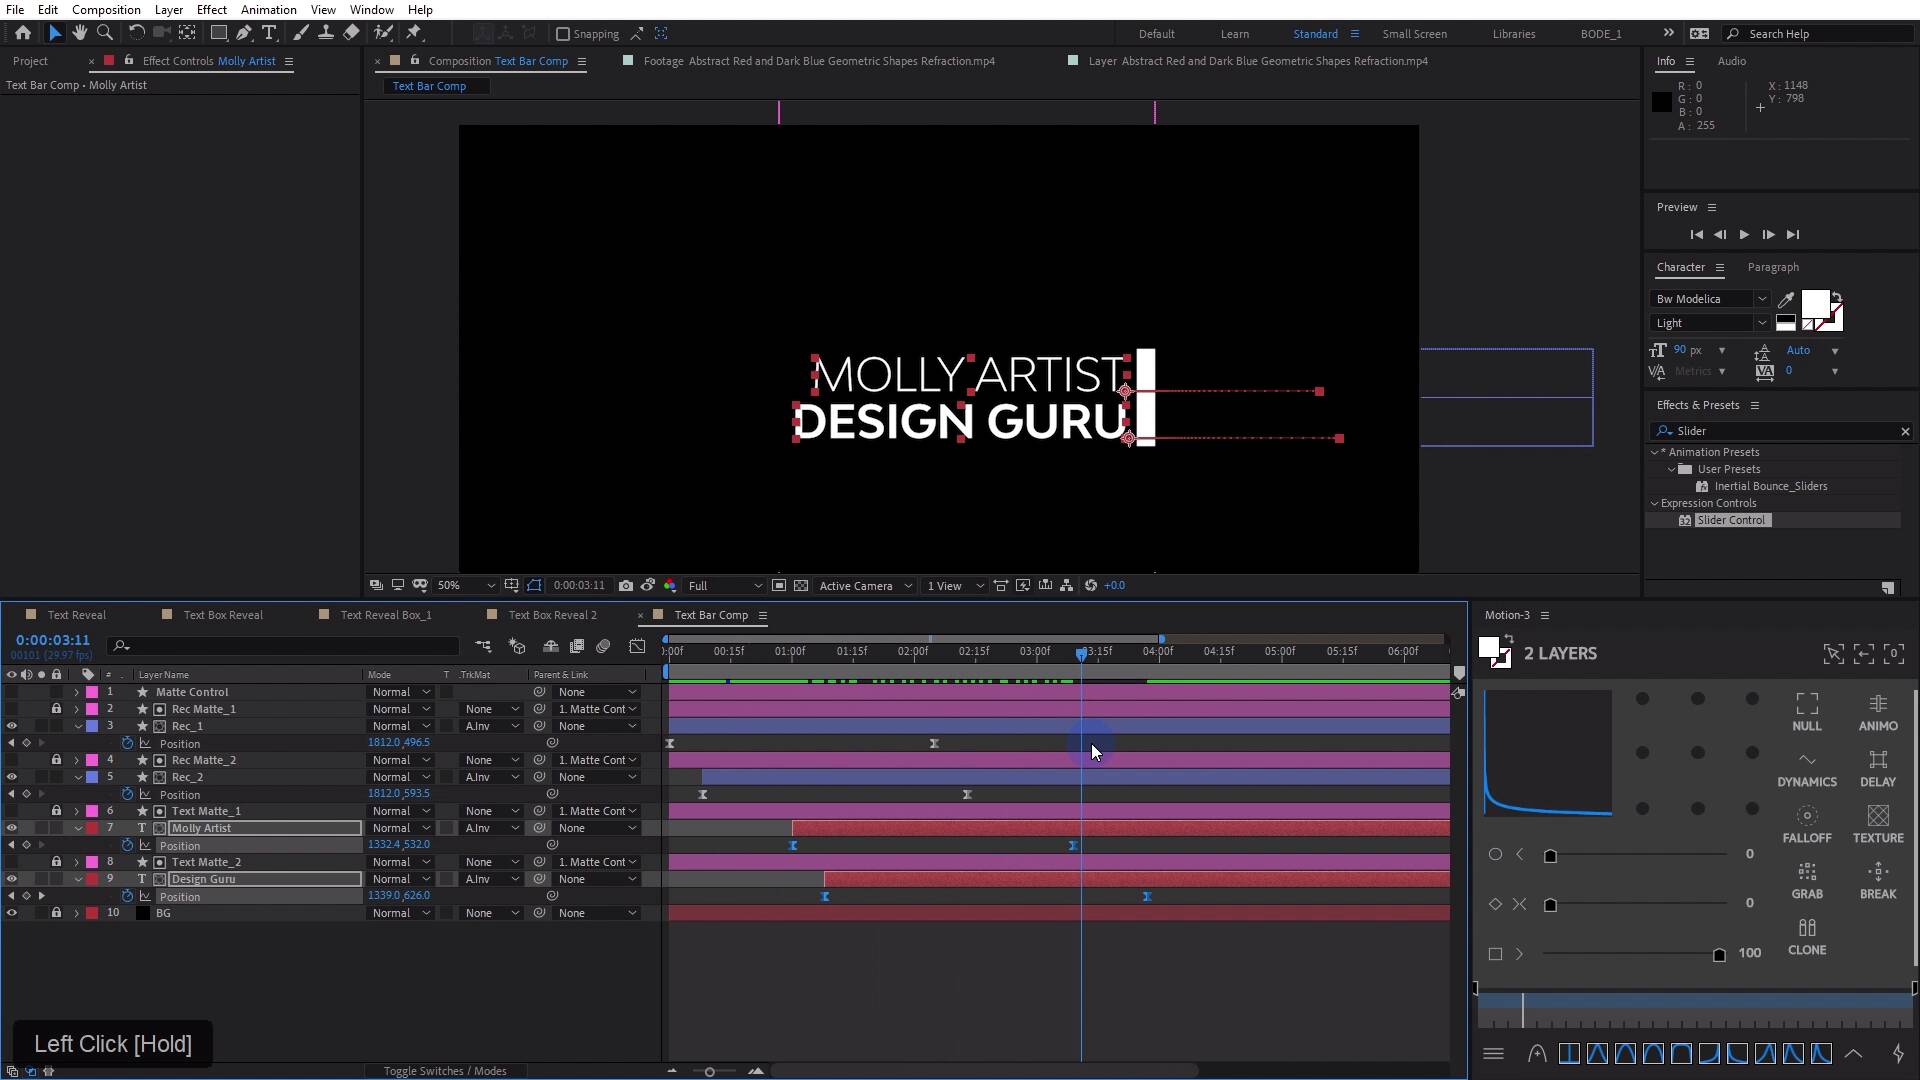
- Overview
- Transcript
2.6 Text Reveal Rectangles: Part 2
In this lesson, you will learn how to finish out this animation by dialing in the animation on the text and the rectangles.
Related Links
- Motion Tool by Mt. Mograph
1.Introduction
1.1Introduction02:55
2.Basics
2.1Keyframe Basics14:03
2.2Reveal Text With Masks and Shape Layers12:08
2.3Basic Text Box Reveal08:57
2.4Bounding Box Reveal11:48
2.5Text Reveal Rectangles: Part 113:02
2.6Text Reveal Rectangles: Part 208:44
3.Burger Logo Reveal
3.1Burger Logo: Prepare the Artwork11:54
3.2Burger Logo: Animate the Layers11:04
3.3Burger Logo: Final Touches10:46
4.Outer Space Intro
4.1Outer Space: Animate With CC Lens09:53
4.2Outer Space: Animating Strokes & Glow Effects13:42
4.3Outer Space: Lens Flares08:44
4.4Outer Space: Noise & Grain12:14
5.Boutique Text Effect
5.1Boutique Text: Prepare the Artwork06:59
5.2Boutique Text: Create the Layout06:14
5.3Boutique Text: Inertial Bounce Expression11:20
5.4Boutique Text: Wiggle Expression06:06
5.5Boutique Text: Layer Control06:07
5.6Boutique Text: Handwritten Text13:07
5.7Boutique Text: Final Touches11:38
6.Conclusion
6.1Conclusion02:09
2.6 Text Reveal Rectangles: Part 2
In this lesson, we're gonna pick up right where we left off in the last lesson. And we're gonna do some animation, and make it look like the text is revealing behind these rectangles, and it's gonna look great. All right, so we built this entire kind of monstrosity here. I know it was maybe a little bit intense if you're newer to after effects, but thanks for sticking with me. Now, we have this really cool composition that's gonna be really flexible for text that is different size text that has a number of different characters in it. And we can do a lot of things very quickly to modify this in a number of different ways. So this is really cool. The next part of this is to do some animation. So I need to animate my rectangle number one in my rectangle number two. And I'm gonna slide this from left to right, maybe in a second and a half or so. So I'm gonna bring a position in insert a key frame. I'm gonna come to the beginning of the composition, and I'm just gonna click and drag here in the X and just pull them over here. Once they get to this point here where they're being covered up by the mat, I don't need to really pull it any further. When you're clicking and dragging, you can also hold down Shift, and that'll make the movement 10 times what it normally is. So you can get it to move across a little bit faster. So now we have this sort of thing, very cool. To get that sort of offset effect, first thing I'm gonna do is select my Keyframe, easy ease them, you guessed it, I'm gonna jump in here and I'm gonna change this curve just a little bit, something like that. Okay, I think that's a little bit too long, actually. Make this like two seconds, and then all I need to do is to take this second rectangle and just pull it down the timeline a little bit. That's it [LAUGH]. It's that simple to get that kind of really cool offset sort of effect. The next part of this is I'm gonna animate the text and I need to start that at two different times. So the text actually doesn't need to show up until right about here maybe. And I'm going to animate the end position. So I'll go to maybe three and a half seconds. And this time I'm gonna use the keyboard shortcut, Alt+Shift+P, that's gonna insert a position Keyframe that I'm going to go to right here. And I'm going to slide the text over, but this time, I don't need it to start way over here. I'm going to have it start just behind my rectangle here. And I think the same thing for this layer right here. I'll just scrub down, maybe I'll have a start right here. So I'm just gonna slide the position over to right here. Have it come out, kind of like that maybe tighten this up a little bit. Let's just look at what we have so far, yeah. That's coming out really, really slow, but not to worry. Now I did mention before that there are some third-party tools to help you and make modifying the Keyframes easier. I wanna show you one of those right now. This is an extension called motion three. It's just off the screen I went to window and then extension. This tool is made by Mount Mograph and you can find that at mtmograph.com/motion. This is a third party tool, it is 65 United States dollars. But it's really really cool that I wanted to show you that there are some really cool tools here to help you to really quickly adjust your Keyframe speed and influence. So with this tool here, all I need to do is drag these sliders out. And it will give me kind of a visual representation of the speed curve that I want to have. And so, actually for this animation with this text kind of flying out here, what I'd like is actually I'd like it to come out really, really fast at the start [SOUND]. And then slowly come to a stop. And so I want this really drastic curve. And so instead of changing these from linear to bezzie, a and then going into the graph editor, I can basically do that all in one step. There we go, all right, see what we got now. Very cool, like I showed you a second ago. You can adjust the key frames here with the sliders. You can even input values here if you know specifically what you're looking for, or you can just click and drag in here to create the shape that you are looking for. So I think I want something like that. So when I do that, if I look over in the graph editor, check that out, created that exact same shape, but it's a lot faster to do. And that's the exact emotion that I wanted. I want it to start really fast and just kind of slide and come to a nice slow stop. So, just like that, I have a nice looking animation. Let's look at the whole thing here, perfect. And like I said before, if you need to adjust this, and we need to add another word here, like Ella or something and design senior or something. This is super easy to modify. You can see that the mat is cutting those off, but all I need to do is just extend this out over here, and then make a few modifications to the key frames. So that needs to go there and then this needs to go there, and then I'll just adjust the position of that and the position of this rectangle. Oops, this rectangle right here, just like that. Within just a couple of seconds, I have a new animation that fits this new text here. I mean, if I didn't screw up a few of those clicks there, that would have taken probably under, I don't know, 10 seconds to do. And this is a nice technique to be able to get this sorta look here and have it be quite modular. Now if this text wasn't positioned exactly where you wanted it to be, that is also not a problem. We could just take all of these layers here, and just pair them to your mat layer, bring up the position of your mat layer. And because I made those mats a little bit fatter, so they're sticking off the screen there a little bit. We can reposition this, if we move it over too far here, I think the rectangles are gonna bleed off that one side. So you may have to go back in and make some other modifications for example, I think what you could do is you could just take this mat here and just add another mat right there and do the same thing down here. And then everything else should work fine. And now we can take the position of this and we can move it pretty much anywhere because everything else is being kind of mad at out. So we can put this down kind of as a lower third right here. Just that easy, thanks for sticking with me for this lesson. We learned how to kind of build something in a modular way. And I wanted to show you this motion three extension here. It is a third party tool and it's not free, but it's gonna ton of great features, I definitely recommend going to mountmograph.com and check out the guide and check out all the cool things that you can do with it coming up. The next several lessons, you're gonna learn how to take artwork that was created by a designer in something like Photoshop or Adobe illustrator, prep it for use in after effects, and then animate that design in various. Ways you're gonna learn a few different techniques including some write on, some more expressions with inertial bounce and overshoot, and more. A lot of great stuff coming up in the next few lessons, so don't miss it. [MUSIC]


