
 Lessons: 43Length: 6.5 hours
- Overview
- Transcript
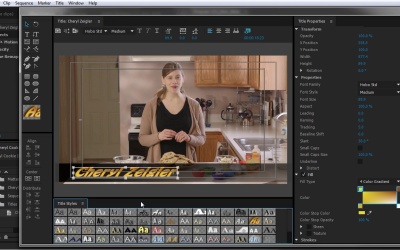
6.5 Adding Titles
You will often have to add titles to your video, and in this lesson you will learn a few ways to do it!
1.Introduction
1.1Introduction01:12
1.2What You Need07:14
2.Getting Started
2.1File Structure06:07
2.2Quick Tour of Premiere Pro11:14
3.Set Up Your Project
3.1Import09:55
3.2Organize08:39
4.Editing Basics
4.1Creating a Sequence10:07
4.2Cuts06:26
4.3Subclips06:46
4.4Editing in the Timeline, Part One11:27
4.5Editing in the Timeline, Part Two07:19
5.Beyond Basic Editing
5.1Adding a Cutaway Shot10:06
5.2Building on the Basic Edit, Part 107:09
5.3Building on the Basic Edit, Part 209:09
5.4Audio Transitions11:22
6.Fine-Tuning the Look and Sound
6.1Video Effects10:48
6.2Master Clip Effects10:47
6.3Adjusting the Volume of Your Tracks09:46
6.4Audio Effects11:17
6.5Adding Titles11:16
6.6Exporting12:10
7.Conclusion
7.1Conclusion02:33
8.Frequently Asked Questions
8.1FAQ Introduction01:22
9.Sharing
9.1Dynamic Link to After Effects12:44
9.2Exporting to HEVC for Faster Sharing Online06:39
9.3How to Export ProRes Video and Other Professional Formats07:17
10.New Audio Workflows
10.1Using the Essential Sound Panel for Dialogue: Part 111:58
10.2Using the Essential Sound Panel for Dialogue: Part 206:35
10.3Using the Essential Sound Panel for SFX and Ambience07:59
10.4Using the Essential Sound Panel for Music08:35
10.5Send Audio to Audition for Editing From Premiere Pro13:59
10.6Mixing Audio With Killer Effects Inside Premiere12:57
11.Essential Graphics Panel
11.1Use the Essential Graphics Panel to Create Basic Titles12:30
11.2Use the Essential Graphics Panel to Create a Motion Graphic Title in Premiere13:23
11.3Make Your Own Templates for the Essential Graphics Panel03:51
11.4How To Use Title Templates in the Essential Graphics Panel: Part 107:14
11.5How To Use Title Templates in the Essential Graphics Panel: Part 207:09
11.6How To Use Transition Templates in the Essential Graphics Panel08:26
12.Real-World Projects
12.1Use Proxies for Faster Editing13:42
12.2Create Multiple Camera Shots From a Single Camera10:56
13.New Features
13.1Using the Freeform View09:36
13.2Use Auto-Reframe to Crop Your Video09:36
13.3How to Work With Captions13:41
6.5 Adding Titles
You will often have to add titles to your video. And in this lesson, you will learn a few ways to get it done. So if I wanted to add a basic title when Cheryl says, hi, my name is Cheryl Ziegler. I can do that right inside Premiere. Now, I can't come up here to the Title menu and select New Title or I can do it right down here in the Project panel, which is what I usually do. Now, before I create a title, I'm just going to make a Titles bin. And I'll also go ahead and make a Mattes bin while I'm here and I'll throw this black video in there. Now, if I click on my Titles bin and I choose New Item Title. The title will be created in my Titles bin. So I'm just gonna name this here. Always good to name your titles. And then, you'll see the title shows up right down here, just like I wanted it to. And it also opens up this title or window here, where we can create a title from scratch. Now, if we didn't want to create a title from scratch, we can click right up here, and we can load up a template. Now, most of the templates in here are going to be geared towards DVD menus. But, there may be a few that you might find usable down here, under lower thirds, and possibly upper thirds. Let's take a look at the ones in lower thirds, now I find most of these pretty hokey. I'm just gonna press the down arrow on my keyboard to cycle through these. You can modify these, so you can think of them as a place to start. I don't really like the look of any of these though, so I usually make titles from scratch. But, if you did like one of these, you can select it and open it up in here and then make adjustments however you need. For example, grab the selection tool here, come over here and very carefully try and select the text only. There are multiple layers here, there's a shape layer here then there's a text layer here. So if I double-click, sometimes they can be tricky to select. If I double-click on the text layer here, maybe change the font to something more simple, Arial, maybe Narrow, increase the Font Size. And I can make an adjustment to this template or I can just start from scratch. So I'm just gonna select all here and just hit delete. So if I wanted to start from scratch, I've grabbed the text tool here. Type in Cheryl's name, and then position that somewhere around this action safe/title safe area. Probably, change the color to white and it looks like there's some stroke on here, which I can find down here in the Title Properties. And just get rid of that cuz I don't particularly like that. You can also add shadow and a whole bunch of other stuff here and really kind of customize the look of your title. For something basic like this, I'd probably just do a white text and then maybe grab this rectangle tool here. And draw a rectangle right here, and change the color to, I don't know, black. And then, I'd like this to be behind the text. So if I right-click here, just off the screen, there's an option to arrange and then send to back. There's also a keyboard shortcut, which is Ctrl+Shift+(. And that will send whatever selection you have to the back of the stack. So I wanted this shape layer behind the text. And that's how you do it. Then to align these, if I wanted the text to sit right in the center here, I could just draw a selection box around both of these here. And then, come over here to the Align tools and select vertical center and that will align those guys right there. And maybe, select the rectangle here and turn on the opacity just a little bit. I also have other fill types, I could do a Linear Gradient, or I might do a 4 Color Gradient and then turn these guys up to maybe 90 and then turn these guys down a little bit something like that. Let's see what that looks like. So I'll just drag this in. I think she says, hi, my name is Cheryl right here. >> Hi, my name is Cheryl Zeigler and in this video. >> Can also hear that bad DeNoiser is driving me nuts. I'm just gonna take that off my audio track mixer here. >> Hi, my name is Cheryl Zeigler and in this video I'm going to show you. >> And I'd probably select this clip and hit Ctrl D, so that it adds a nice little cross fade on either side, which will essentially just fade it up and then fade it down, just like we looked at before. >> Hi, my name is Cheryl Zeigler and in this video. >> So that's obviously a very basic looking title. I tend to prefer simple looking titles. If I wanted to make an edit on this, I can double-click it right here in the timeline or double-click it down here in the Project panel. That'll bring the title or window back up. I can't turn the video off, sometimes the video depending on the color can make it very difficult to see what you're doing. So there's an option right here to show background video. And there are some styles down here that come loaded by default. Most of these are pretty terrible. You get the western thing, whatever this thing is, some options, they're just going to undo those because those are pretty awful. If I wanted to maybe add some texture to this, gonna come over here to the Title Properties and then right over here, I have an option for Texture. And I'll twirl that down and if I click in this box here, I'll just navigate to somewhere where I have some textures. Maybe this brown cardboard, it's one of my own textures and load that in here. If I make this a little bit bigger, you can see that the scale of this is a little bit funny. You can see, it's kind of squashing the scale. If I toil down Scaling here and Alignment, I can kind of fix that. If I set this to Texture, and it's not going to rescale the texture as I make this smaller. But you can see the Alignment is off here, so if I adjust this over, that's gonna do something weird there too. I may have to change this back to Clipped Face and then set this to zero, that kinda looks right. To be honest, I personally don't use the titler in Premiere to make fancy looking titles. I usually keep it pretty basic. If I have to make anything kinda intricate looking, I'll do that in After Effects or Photoshop, but it does have some options to make, you know some fairly nice looking titles. So I might take the texture here, come down to Blending and maybe turn this down a little bit and then probably change this to something like brown. Turn the opacity up on that, maybe just down to like 80 and then just kind of adjust that, maybe I'd add a little shadow here on this text. And then, adjust that just a little bit here. Be 10 and 30, something like that. Might change the color to like brown. Just to make it punchy a little bit. If you created something that you really liked, you could save it as a template. For me, I probably wouldn't go with something like this to save as a template. I would probably take off this texture changes color to black, then jump into 4 Colour Gradients, so it sets all the colors to black. And maybe, select this guy here, bump it up to 90 and turn these guys down to maybe like 70, just to give a nice little gradient here. Probably, select the text which can be tricky to do, and then take the shadow off. And then, once you have everything set and you think, yeah, I might wanna make a template out of this, this looks like something I could use again. Come right up here to the Template button, it also has a keyboard shortcut of Ctrl+J. We can import the current title as a template. We'll just call this Basic Lower Third, and we have that available right here. Anytime you wanna pull that in, then you can change the text name and do whatever you need to do. If I wanted to create another title, based on this title, very easy to do, come up here to Title, New Title, Based on Current Title. It'll ask me to rename it. Bob Smith. And now, I have the Bob Smith title open. I wanted to change this text here. Just double-click Cheryl in the text box. Bob Smith, there you go. Alternatively, you can just duplicate these items and then rename them and the keyboard shortcut for that is Ctrl + Shift + /. And that'll duplicate whatever item you have selected. And then, I'll just rename this and then double click it to open it and then I can make my adjustments here. And then, I have all these available to use. Now again, like I mentioned, there are other ways to build titles. You can build one in Photoshop, you can build one in After Effects. The only thing that you need to make sure is that you save it in some kind of file format that saves an alpha channel and that your file actually has an alpha channel which means that it has transparency. For example, I created some titles here. And if I look at this title, I'll just import it into the project. And I'll drag this out here. This is a video title that I created and it has an alpha channel, which means that it has transparency in it. Here's another example of a Lower Third Title that I created in After Effects. It's a nice little animated thing. >> I cookies. First, let's go over the ingredients. You will need two cups of hot. >> Obviously, that doesn't work for this, but you can see, this is a little bit more of a complex kind of animation thing here with some different cool looking shines and whatnot. But, you can also create titles in Photoshop just make sure that they have transparency and you save them to something like PST or a PNG, JPEG will not work. JPEG does not have an alpha channel. So that's not going to work, but anything that has an alpha channel and it will work if you wanna build your titles in another application. So now, that you know the basics of creating titles in Premiere, you're ready to go on to the next lesson, where you're gonna learn about exporting your project.


