
 Lessons: 43Length: 6.5 hours
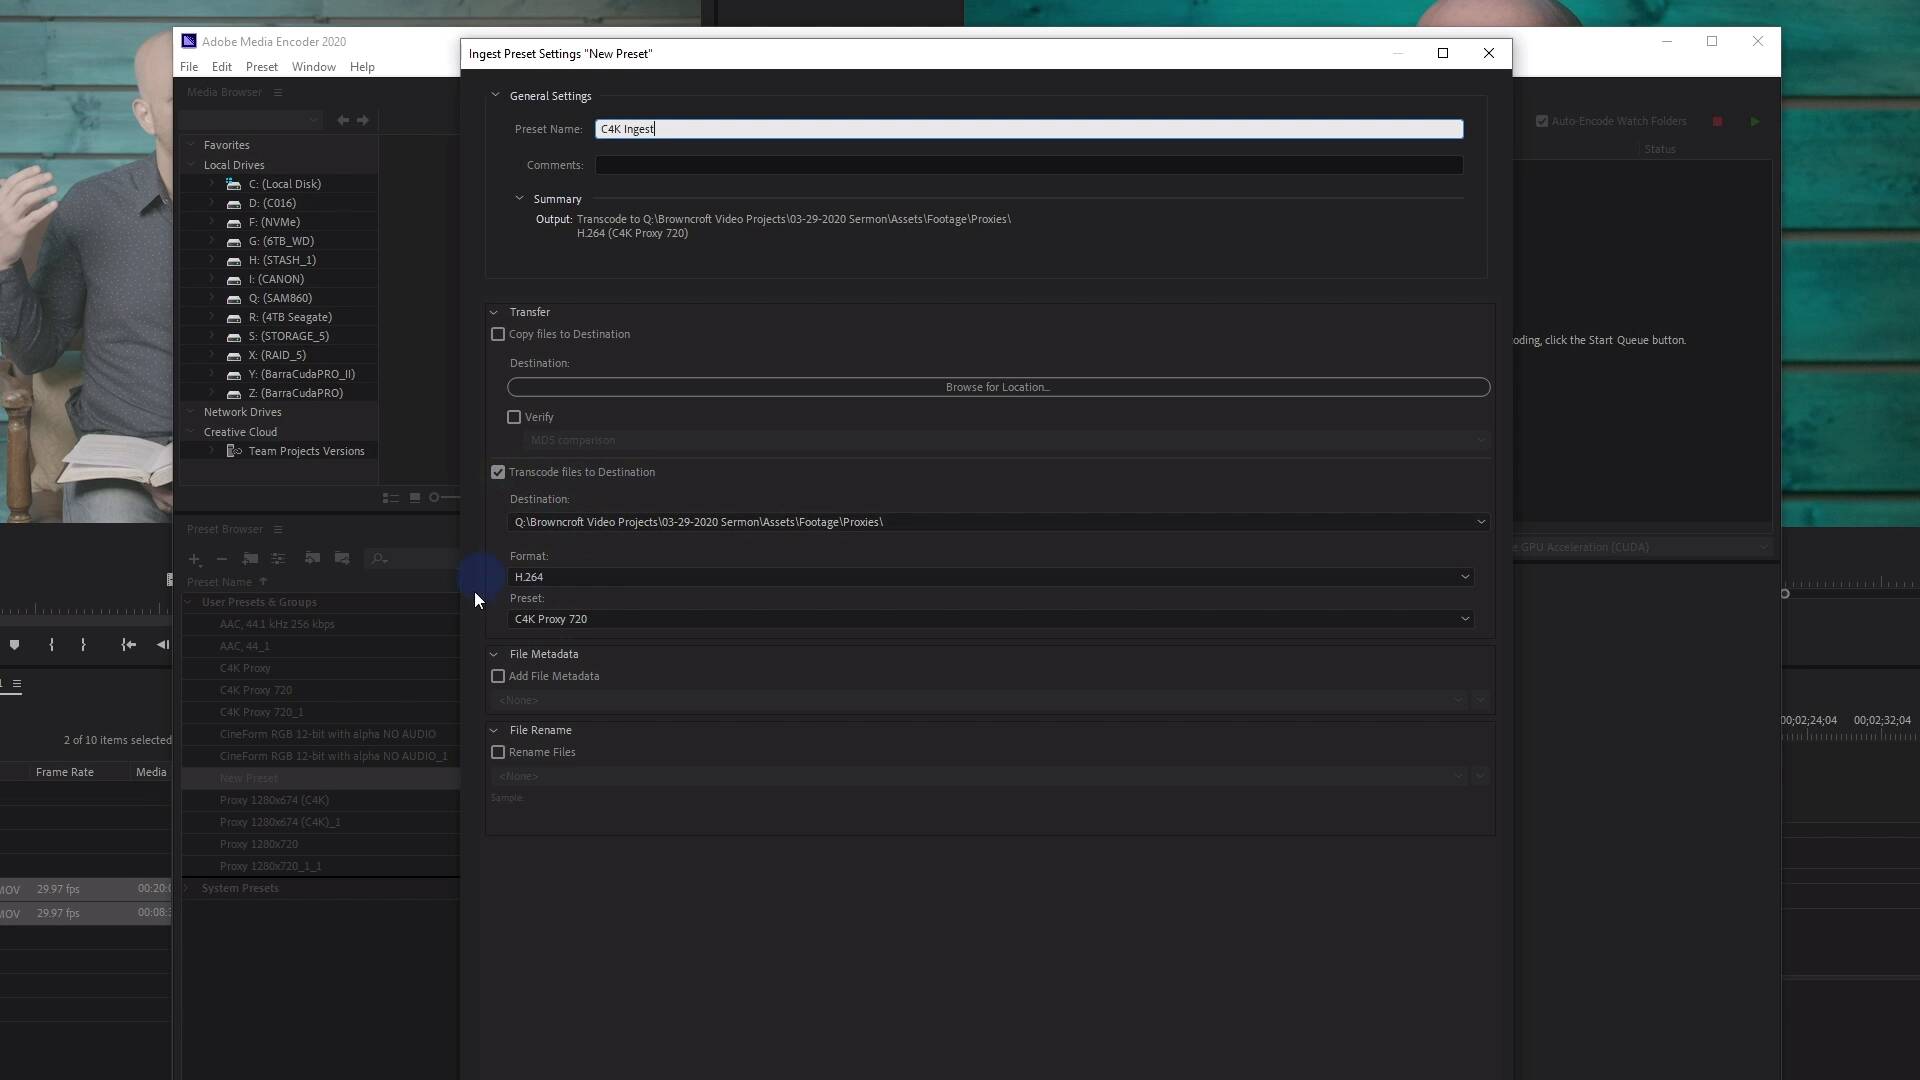
- Overview
- Transcript
12.1 Use Proxies for Faster Editing
In this lesson, you will learn how to create and use proxy files for super-fast editing!
1.Introduction
1.1Introduction01:12
1.2What You Need07:14
2.Getting Started
2.1File Structure06:07
2.2Quick Tour of Premiere Pro11:14
3.Set Up Your Project
3.1Import09:55
3.2Organize08:39
4.Editing Basics
4.1Creating a Sequence10:07
4.2Cuts06:26
4.3Subclips06:46
4.4Editing in the Timeline, Part One11:27
4.5Editing in the Timeline, Part Two07:19
5.Beyond Basic Editing
5.1Adding a Cutaway Shot10:06
5.2Building on the Basic Edit, Part 107:09
5.3Building on the Basic Edit, Part 209:09
5.4Audio Transitions11:22
6.Fine-Tuning the Look and Sound
6.1Video Effects10:48
6.2Master Clip Effects10:47
6.3Adjusting the Volume of Your Tracks09:46
6.4Audio Effects11:17
6.5Adding Titles11:16
6.6Exporting12:10
7.Conclusion
7.1Conclusion02:33
8.Frequently Asked Questions
8.1FAQ Introduction01:22
9.Sharing
9.1Dynamic Link to After Effects12:44
9.2Exporting to HEVC for Faster Sharing Online06:39
9.3How to Export ProRes Video and Other Professional Formats07:17
10.New Audio Workflows
10.1Using the Essential Sound Panel for Dialogue: Part 111:58
10.2Using the Essential Sound Panel for Dialogue: Part 206:35
10.3Using the Essential Sound Panel for SFX and Ambience07:59
10.4Using the Essential Sound Panel for Music08:35
10.5Send Audio to Audition for Editing From Premiere Pro13:59
10.6Mixing Audio With Killer Effects Inside Premiere12:57
11.Essential Graphics Panel
11.1Use the Essential Graphics Panel to Create Basic Titles12:30
11.2Use the Essential Graphics Panel to Create a Motion Graphic Title in Premiere13:23
11.3Make Your Own Templates for the Essential Graphics Panel03:51
11.4How To Use Title Templates in the Essential Graphics Panel: Part 107:14
11.5How To Use Title Templates in the Essential Graphics Panel: Part 207:09
11.6How To Use Transition Templates in the Essential Graphics Panel08:26
12.Real-World Projects
12.1Use Proxies for Faster Editing13:42
12.2Create Multiple Camera Shots From a Single Camera10:56
13.New Features
13.1Using the Freeform View09:36
13.2Use Auto-Reframe to Crop Your Video09:36
13.3How to Work With Captions13:41
12.1 Use Proxies for Faster Editing
[MUSIC] In this lesson you will learn how to use and create proxies for a faster editing experience. [MUSIC] So you're looking at a project here that I did recently that I shot with my camera for my local church, where I recorded the main Sunday morning message. We call it the sermon, other churches may call it something else. And my camera can use a few different codecs, but usually I use H.265 because it's very space efficient and it looks very good. And H.265 is not a very easy codec to edit. And you may find that using multiple streams of H.264 in ultra HD or even higher resolutions may be difficult for your machine to edit. Maybe your machine is not quite powerful enough, or maybe your hard drives aren't quite fast enough. Anyway you cut it, you don't really need to work with the full resolution files when you're editing especially if you're not using a full screen preview. If you're just using the program monitor like I am here maybe on a single monitor or even if it's not full size on a large monitor, having a proxy file which is a smaller resolution, lower bit rate version of your original video is not gonna make any difference. But it will make the editing performance much, much faster. So, this file right here will play reasonably well in the timeline. >> Actually several weeks ago now and I said we're gonna grow some plants right from the seeds and we bought these pods that we could plant seeds in. >> Now it looks like it's playing back reasonably well and it is but that's only because it sat here and found the frame to start on for several minutes. Watch what happens when I scrub in the timeline. >> [INAUDIBLE] >> I'll try here. My goodness, I think I had two birthdays in that amount of time. So the scrubbing performance is absolutely terrible, and this is running at half resolution. It's actually a little worse when it's running at full resolution. You can drop it down lower, but it's not gonna make a difference. H.265 is tricky for computers to edit and my computer is a very fast machine. The key to this is not faster, better hardware, it's creating proxies. Proxies are a lower resolution, lower bit rate version of the same file like I mentioned earlier and depending on where you are in your editing process, creating proxies is pretty simple. Now I already have my footage pulled into my project. So the way to create proxies here in Premiere is to right click and choose Proxy, Create proxies. We have a couple of options here. You can choose QuickTime or H.264. My system can rip through H.264 plenty fine including multiple streams. It's that's no problem. The issue comes with these three presets which are the stock H.264 presets, I don't think they're very good. So I like to create a custom preset that is 1280 in the horizontal and then whatever the vertical resolution is relative to the original file. So if you are shooting Ultra HD that's going to be 1280 by 720. If you're shooting cinema 4K which is 4096 by 2160, that should be 1280 by 674 I believe. That's kind of a weird aspect ratio. And so to create a custom ingest preset, we need to jump over to Adobe Media Encoder. And what we're going to be doing here is making a custom ingest preset, which is different than a custom encoding preset. However, we need a custom encoding preset for the ingest preset. I know that's a little bit confusing, it'll make sense in a second. So to make a custom encoding preset, you can click on the plus button here in the preset browser, choose Create encoding preset. You can name this and for my particular footage, it's like I mentioned before cinema 4K, so it's 4096 by 2160. So let's name this preset. I'm going to call it C4k. And I'll call it Proxy. I'm gonna use the format of H.264 and usually when you create one for the first time this will say, match source high bit rate. However, I don't want that because I don't wanna create full resolution proxies, I want to create much lower resolution proxies. So I'm gonna uncheck this check under match source here and I'm gonna change the resolution. So you can see it's come up with the resolution right here 4096 by 2160, and I'm just going to use 1280 as the width, and that's going to create 1280 by 674 which is some weird aspect ratio. It doesn't really matter. That's the only thing that I need to change, and that's gonna be plenty good enough and it'll look fine in the program monitor. We'll see some compression artifacts for sure but that's not a big deal because we're going for speed and not super quality. And then under bit rate, you can really choose anything but You can probably go as low as maybe two or three. Again, this is going to look a little bit on the potato vision side but at any point in time, you can switch back within a second or two and look at the full resolution files and I prefer really small proxies. You can bump this up and experiment with different codecs and different formats, however you choose. The point is that I want to create this specific resolution 1280 by 674 for my cinema 4K files. Now, if you're shooting ultra HD which many cameras do, you would want to create one that's probably 1280 by 720. When you're done with this, you can click OK. Now, I've already created these several times. To make an ingest reset, you click this plus button, create an ingest reset. I'll call this C4K ingest, I'm not going to copy files to destination because I pull the files off the card in a different way and that's just sort of my workflow. What I do wanna have checked is transcode files to destination because that's going to actually create the proxies and I'm going to click on okay. Now over in Premiere, when we go to Create proxies, we have this button here Add ingest preset, and it may not come up with this folder but this is the location where you want to go to point Premiere to this see 4k ingest preset that you've just created. Hit Open, it says a preset with this name already exists, do you want to overwrite? Yes, it's not going to say that for you because you haven't already created one but I have. Right down here I have the option to put the files next to the original media in a proxy folder that's usually the option that I choose, but you can put them in another folder if you want. As soon as you click OK, it's going to send the files over to Adobe Media Encoder and it's going to begin encoding them. Now while that's finishing creating those proxies, I wanna show you a few of the other ways that you can create proxies. You can also create proxies when you pull in footage from the media browser which you just saw me grab over here in the window and then down to media browser. If you navigate to your files and I'll show you the same files that I am working on In this project, these are the only two files that I need right here and there's an ingest check box right here. Before you go ahead and import those, click on the wrench icon right up here and choose an ingest setting that you want to use. What you may want is to create proxies only if you are copying the files from a different destination. You may want to choose copy and create proxies if you want to just transcode these to something like Pro res and then not use proxies at all. You have that option as well, but to do a similar operation that I showed you before, I'm just going to create proxies. You can choose whichever preset you have created here. The proxy destination, you can choose same as project or use preset destination which you can see right down here. We'll put the footage in my footage folder in a subfolder called proxies that's usually the one that I choose and then you press OK. Then when you import these files, it's going to pull them into the project. And then if we look over in Media Encoder, it adds them to the queue right here and it will do basically the same thing. So if you know you're going to create proxies with your footage, this is kind of a faster step. It should autolink these and make them available as soon as it's done encoding. I'm just going to delete those there and then get rid of them in my project. Another option is you can create proxies manually and then you can link them to your original footage after you've created them. So if you know that you're not going to be editing right away and your computer is gonna be maybe free overnight or something to create some proxies because depending on the length of your footage and the number of files you have, it could take a pretty decent amount of time. You can just pull your files right over here into Media Encoder and then choose not your ingest preset, but you're encoding preset for the proxies. And then just manually place them in that proxy folder and then I'll show you how to link them as soon as these proxies are finished. So that's another way that you can create proxies without going through this process as well. So there's a few different ways to do the same thing depending on your workflow. Back in Premiere now, if you've created proxies from Premiere, it should have attached the proxies to the original files automatically. And if you click this toggle proxies button on right here, you should see it switch over to the proxies. Now you probably can't see that here but if I put this in full screen, you'll be able to see a quality shift here when the proxies are on and the proxies are off, right? So you can definitely see if you're looking in a blown up view here or maybe you're watching on a full screen monitor, you'll definitely see a quality shift because we're looking at one eighth of the resolution here with these proxies. But when it's in this size right here, you really can't see too much of a difference, especially when it's in motion. Now to get this toggle proxies button, in the program monitor, there's a button editor right down here and you can pull the toggle proxies button down to your button menu right here, this little button toolbar and then press OK. And then check out the scrubbing performance here. [SOUND] We'll just really stress it out so you can see the edit performances. Super fast at any point in time, you can just disable the proxies to get back to the high resolution footage. You want to make sure that you disable your proxies and you go back to your high resolution footage before you export because that would not look fantastic. And if for whatever reason your proxies were not attached to your original files maybe because you created your proxies manually, that's no problem. You can just select your files over here, go to proxy, attach proxies, it'll come up with the first clip. You can see in the file name here. And then you click attach, and then it should point to the proxy folder. If not, you'll have to navigate to it over here in this folder tree. So I'm gonna select the proxies folder and then I wanna choose the file with the corresponding file name to my first file in the list here and then click attach and it will attach. Usually what will happen is it will automatically attach both files, but I think because they were already attached, it didn't do that this time. If for whatever reason your full resolution files go offline, for example if you created proxies and you put them on a different drive or your full resolution files are on different drive and you need to reconnect your full resolution files before you export, you have that option here. And in the same way that you attached your proxies, you can attach your full resolution files to the proxy files. Again, just make sure you uncheck the toggle proxies before you export and everything should be cool. That about does it for this lesson, make sure to check out the next lesson where you're gonna learn how to use one high resolution video file to get two camera shots. [MUSIC]


