
 Lessons: 43Length: 6.5 hours
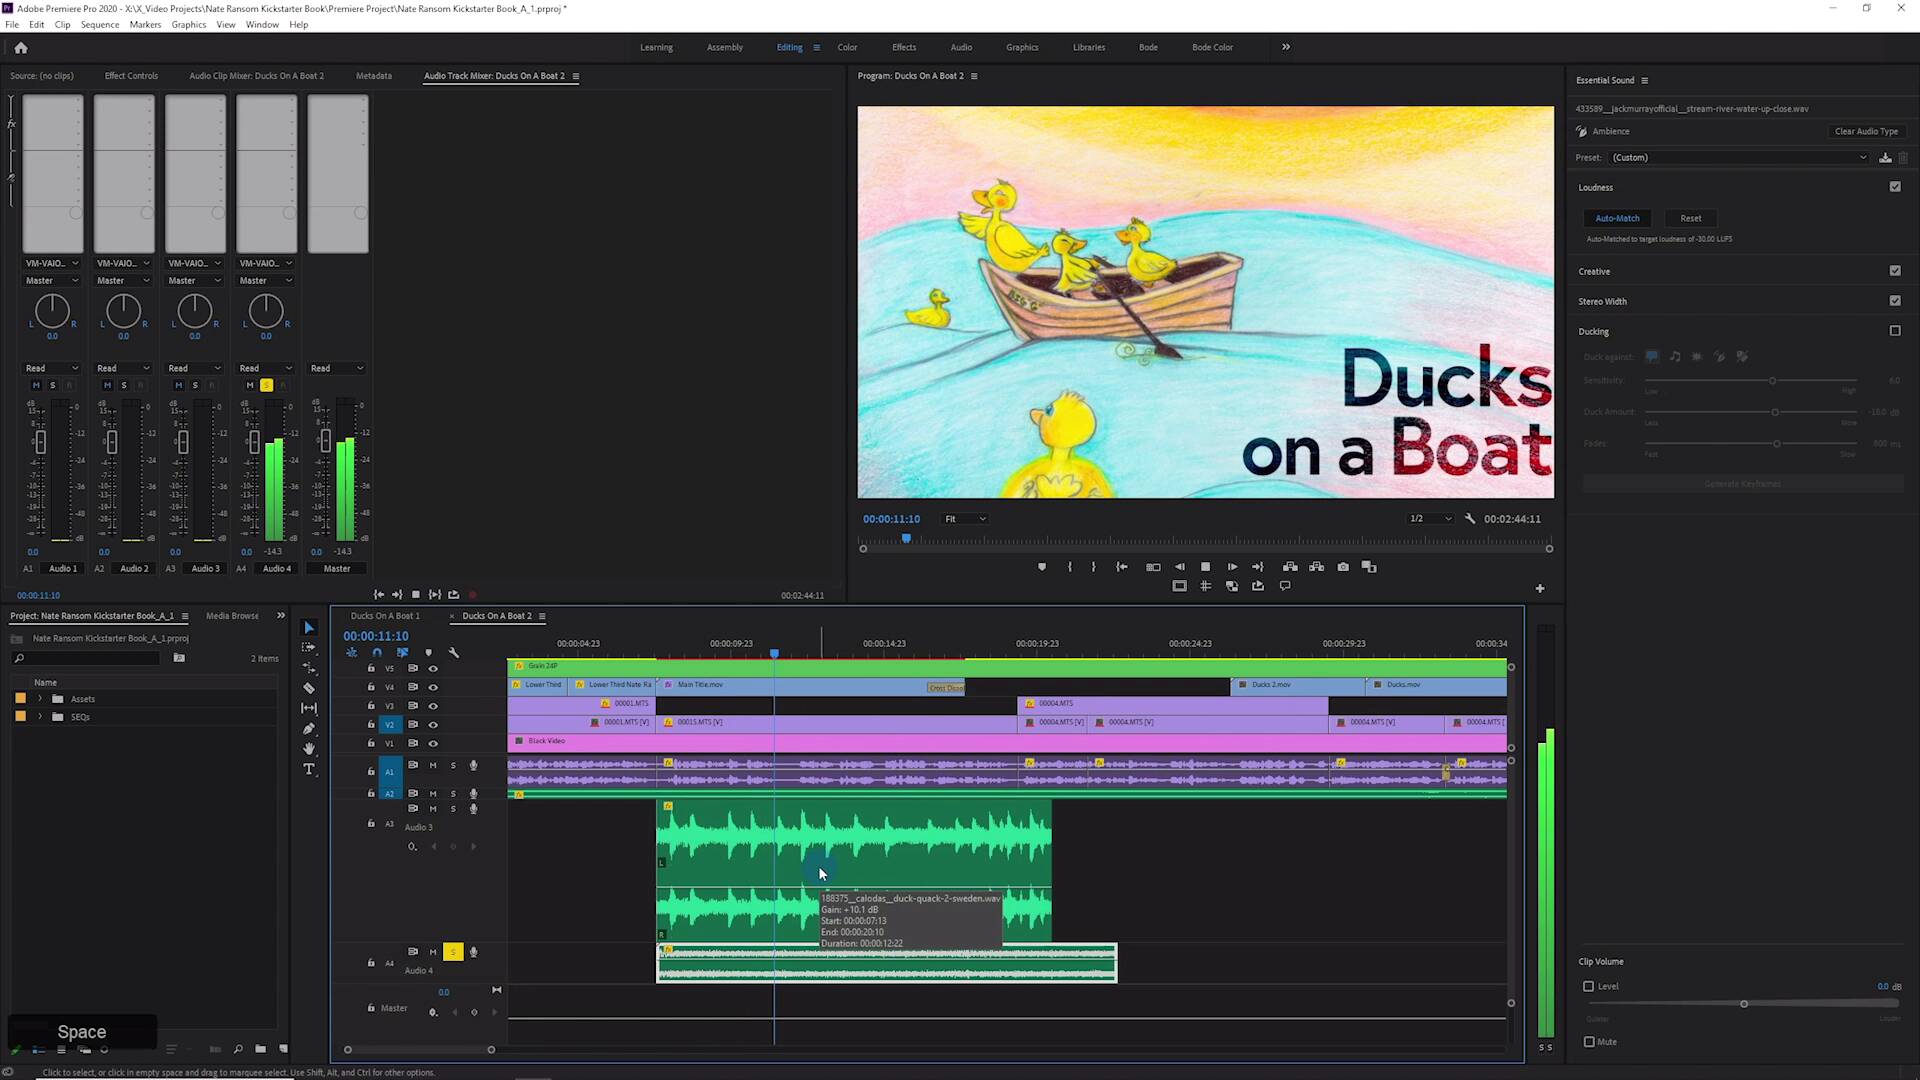
- Overview
- Transcript
10.3 Using the Essential Sound Panel for SFX and Ambience
In this lesson, you will learn how to use the Essential Sound Panel to help level and treat SFX and Ambience.
Related Links
- Royalty-Free Sound Effects on Envato Elements
1.Introduction
1.1Introduction01:12
1.2What You Need07:14
2.Getting Started
2.1File Structure06:07
2.2Quick Tour of Premiere Pro11:14
3.Set Up Your Project
3.1Import09:55
3.2Organize08:39
4.Editing Basics
4.1Creating a Sequence10:07
4.2Cuts06:26
4.3Subclips06:46
4.4Editing in the Timeline, Part One11:27
4.5Editing in the Timeline, Part Two07:19
5.Beyond Basic Editing
5.1Adding a Cutaway Shot10:06
5.2Building on the Basic Edit, Part 107:09
5.3Building on the Basic Edit, Part 209:09
5.4Audio Transitions11:22
6.Fine-Tuning the Look and Sound
6.1Video Effects10:48
6.2Master Clip Effects10:47
6.3Adjusting the Volume of Your Tracks09:46
6.4Audio Effects11:17
6.5Adding Titles11:16
6.6Exporting12:10
7.Conclusion
7.1Conclusion02:33
8.Frequently Asked Questions
8.1FAQ Introduction01:22
9.Sharing
9.1Dynamic Link to After Effects12:44
9.2Exporting to HEVC for Faster Sharing Online06:39
9.3How to Export ProRes Video and Other Professional Formats07:17
10.New Audio Workflows
10.1Using the Essential Sound Panel for Dialogue: Part 111:58
10.2Using the Essential Sound Panel for Dialogue: Part 206:35
10.3Using the Essential Sound Panel for SFX and Ambience07:59
10.4Using the Essential Sound Panel for Music08:35
10.5Send Audio to Audition for Editing From Premiere Pro13:59
10.6Mixing Audio With Killer Effects Inside Premiere12:57
11.Essential Graphics Panel
11.1Use the Essential Graphics Panel to Create Basic Titles12:30
11.2Use the Essential Graphics Panel to Create a Motion Graphic Title in Premiere13:23
11.3Make Your Own Templates for the Essential Graphics Panel03:51
11.4How To Use Title Templates in the Essential Graphics Panel: Part 107:14
11.5How To Use Title Templates in the Essential Graphics Panel: Part 207:09
11.6How To Use Transition Templates in the Essential Graphics Panel08:26
12.Real-World Projects
12.1Use Proxies for Faster Editing13:42
12.2Create Multiple Camera Shots From a Single Camera10:56
13.New Features
13.1Using the Freeform View09:36
13.2Use Auto-Reframe to Crop Your Video09:36
13.3How to Work With Captions13:41
10.3 Using the Essential Sound Panel for SFX and Ambience
[MUSIC] In this lesson, you're going to learn how to use the essential sound panel to deal with sound effects and ambience. [MUSIC] All right, let's check out what we have in terms of sound effects. So I've selected my ducks quacking here, nothing special with this clip. [SOUND] So again, we have a loudness automatch and I'll zoom up on this duck quack clip. It could be a tongue twister, and let's just see what this is going to do. All right, so this made it too loud, [SOUND] that we've titled Ducks on a Boat. [LAUGH] So again, we can reset this and maybe give it another try here but yeah, that's not gonna work. But this would be good, okay, stay with me here that didn't work very well. But if you had multiple sound effect clips, right, and this is very common when you're dealing with sound effects is that the level of sound effects is not going to be equalized between them. You may have a big sounding explosion, you may have something really, really quiet, right? So this automatch here is nice because it's going to make a very level playing field with a bunch of different sound effects. Now I just use it on one but you can see how that could be very, very handy and then you could bring the level down using track key frames for volume to mix against the rest of the things in your project. Another option we have here is reverb. This is again something that will work maybe a little bit better with high impact kind of sound effects. >> And we're looking for some input from the community and a little help getting over the finish line as far as publishing cost go. >> That sounds pretty good. The nice thing about reverb is that it has the effect of pushing things in the background. So you can select something like heavy reverb and maybe just dial it up a little bit more. >> On a boat, and we're looking for some. >> Quick way to add some reverb, I think it's pretty cool. I wouldn't use it in this particular instance, but you have that option. Finally there's a pan option. And this is kind of nice if you have a bunch of sound effect clips that you need to manage their position in terms of their stereo imaging right or left, this is a quick way that you can do that and you don't have to go into the effect controls. So you can just move this right or left and it's pretty simple to do that. You'd be surprised at how much clearer you can make a mix by taking some sound effects and moving them around. I mean, if you had sound effects that were matching something happening on screen, you'd wanna match those two. If you had an explosion over here, you wouldn't pan it to this side. You'd probably pan it over here. So that's nice in that respect but also If you have a lot of things going on, spacing those out in terms of right and left can really open up your mix a lot more. So experiment with that. Finally we have the ambience option and it looks like I've messed with this before. So let me just reset this a little bit. Actually I'll just clear that audio type and then reset that again so you can see at any point in time, if you need to clear the audio type to remove like all the stuff that's happened to it, maybe you're like, Man, I have screwed this up really bad and I just wanna start over. You get an idea of what some different processes will sound like, just go ahead and select your clips or you can click dialogue, and then clear the audio type and when you do it, it'll remove all the audio effects and it'll reset all of the loudness. So let's look at ambience. I have some water here. First thing I'll do is just throw some automatching loudness on there and you can see that's brought up the level of that ambient clip considerably. [SOUND] Is that going to work in this mix? Probably not. >> And we're looking for some input from the community. >> And that's a [LAUGH] that's a lot ambient noise in there. But we'll leave it there for now so we can hear a few of these other effects. Again, we have creative, now this is reverb. At this point, you may be thinking creative is just a reverb. [LAUGH] It's not really that creative. And I would agree, but the nice thing about reverb is when you're dealing with ambient type sounds, it has the effect of pushing the ambient sounds in the background, right? If something is further away from you, it's going to sound more reverberant. It's not really what's happening but the more reverberant a sound is, the less clear it is because what's actually happening is you're hearing direct sound mixed with reflected sound that is time delayed. You hear the direct sound gets to your ear first and then you hear the reflections of that sound bouncing off different surfaces and they all get to your ear at a later time. That's what makes reverb and the effect is that it sounds less clear. So if you need to kinda virtually push the ambience into the background. >> This book that we've titled Ducks on a Boat, and- >> You can do that with reverb, it's pretty cool. Now I'm gonna take that off so you can hear the next effect and I'll solo up that water and that is stereo width. This is a nice way to give your audio a wider or a more narrow stereo image. Check it out if I pull all the way down to narrow, [SOUND] it actually collapses this stereo recording into a mono track. It's not really a mono track, but it makes both the right and the left channels exactly the same which is more or less mono. But if we push it the other way [SOUND], so I'll play it with it off. [SOUND] It gives this really hyper wide kind of sound, which can be really useful. And finally we have ducking. So right now, our ambient sound effect is way too loud. So let's apply a little bit more aggressive ducking and generate some keyframes, and it'll pull it down for us and let's see if this now fits into our mix. >> Is a children's book that we've titled Ducks on a Boat, and we're looking for some input from the community and a little help getting over. >> Not bad actually, I think more 18 decibels might have done a better job. >> The finish line as far as publishing costs go. >> That's pretty much it, I mean to just dress this up I would apply maybe a little bit of crossfade or just chuck a couple of keyframes on here too. Maybe just fade these in and out in a nice subtle way and that's really pretty much it. You can get this project here in a lot better shape just by tagging your clips as dialogue music, sound effects or ambience, doing a little loudness automatching and adjusting some of the other parameters there to help things sit in the mix, especially that ducking is very, very useful. It's not everything and it won't solve all your audio issues but, if you're really unfamiliar with how to mix audio and even if you are familiar, you'd be hard-pressed to do some of these operations in a faster and easier way. So that about does it for this lesson. Now, coming up in the next lesson, I wanna show you how to get a project like this over to Adobe Audition for some hardcore editing work in a really seamless way. So check that out coming up next. [MUSIC]


