
 Lessons: 43Length: 6.5 hours
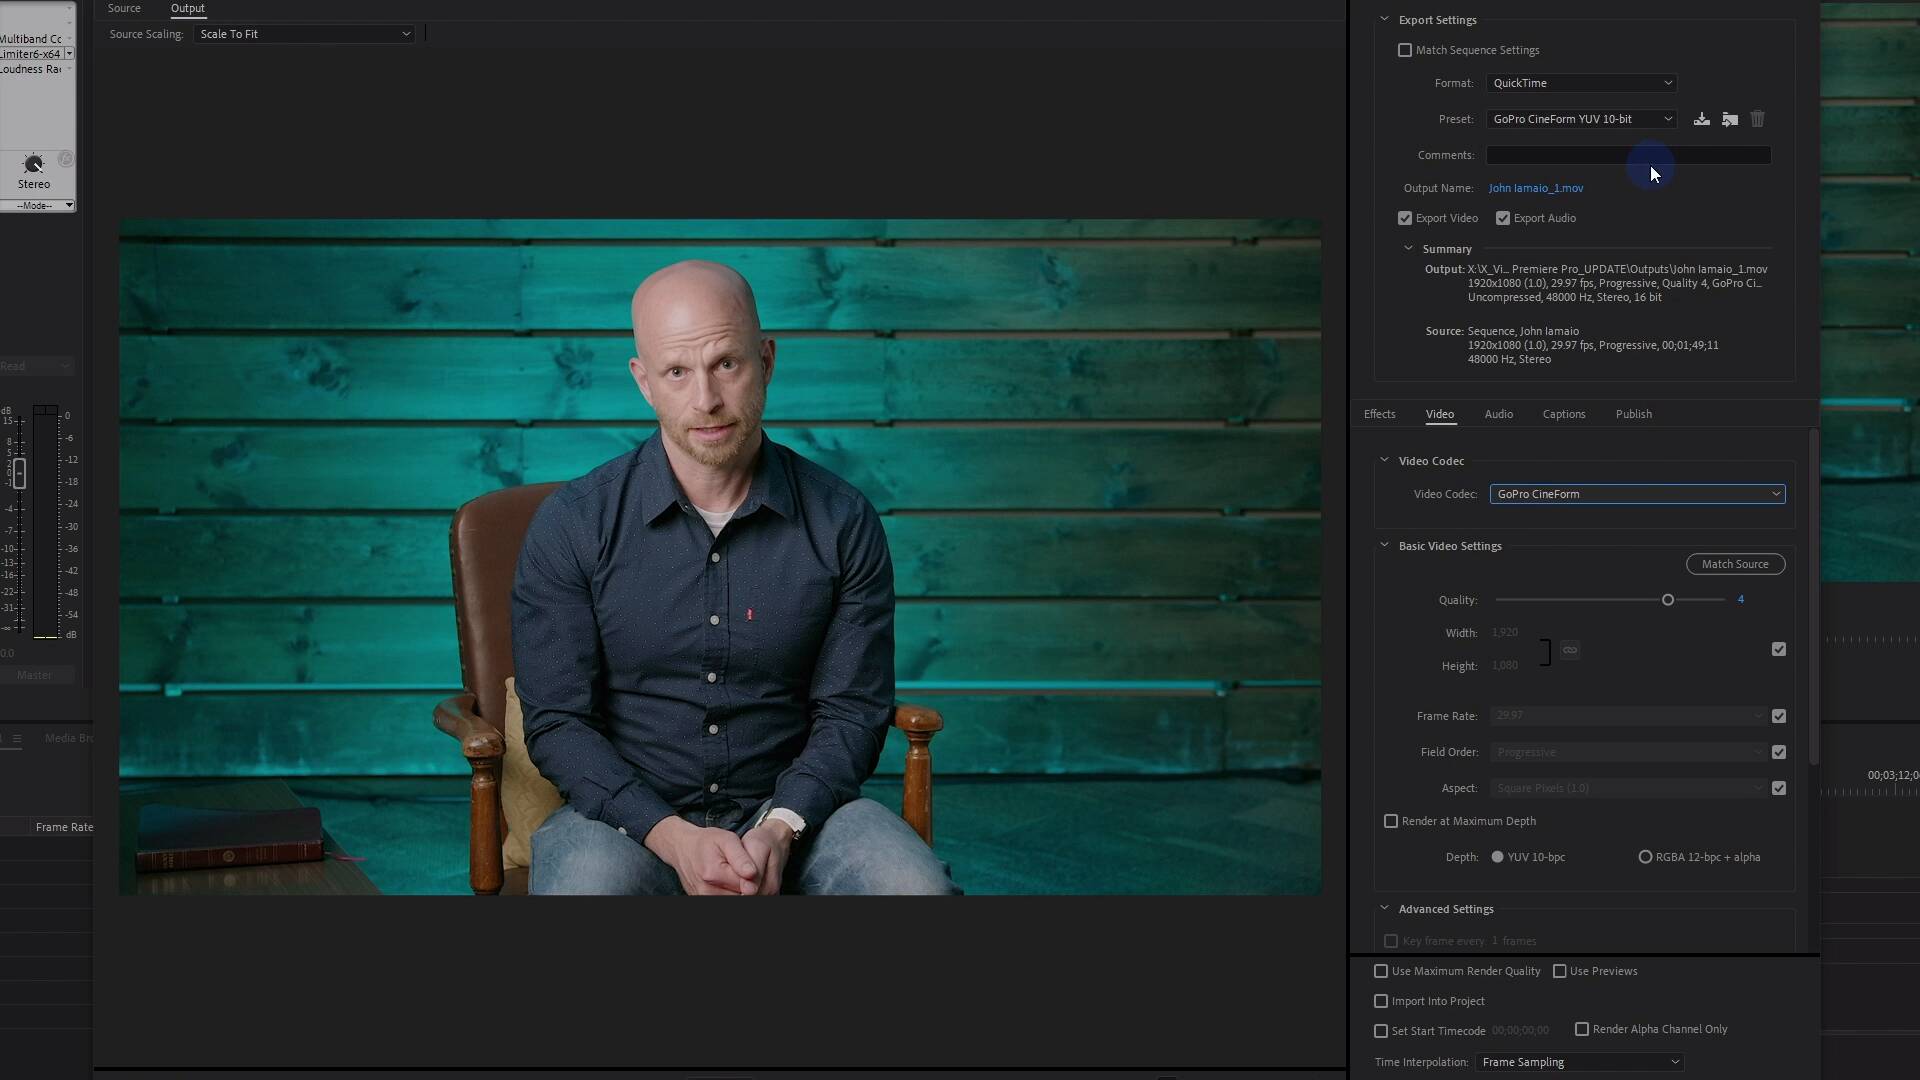
- Overview
- Transcript
9.3 How to Export ProRes Video and Other Professional Formats
In this lesson, you will learn how to export your projects to an intermediate codec like ProRes, Cineform, or DNxHD.
What is an intermediate codec? Hit play and find out.
1.Introduction
1.1Introduction01:12
1.2What You Need07:14
2.Getting Started
2.1File Structure06:07
2.2Quick Tour of Premiere Pro11:14
3.Set Up Your Project
3.1Import09:55
3.2Organize08:39
4.Editing Basics
4.1Creating a Sequence10:07
4.2Cuts06:26
4.3Subclips06:46
4.4Editing in the Timeline, Part One11:27
4.5Editing in the Timeline, Part Two07:19
5.Beyond Basic Editing
5.1Adding a Cutaway Shot10:06
5.2Building on the Basic Edit, Part 107:09
5.3Building on the Basic Edit, Part 209:09
5.4Audio Transitions11:22
6.Fine-Tuning the Look and Sound
6.1Video Effects10:48
6.2Master Clip Effects10:47
6.3Adjusting the Volume of Your Tracks09:46
6.4Audio Effects11:17
6.5Adding Titles11:16
6.6Exporting12:10
7.Conclusion
7.1Conclusion02:33
8.Frequently Asked Questions
8.1FAQ Introduction01:22
9.Sharing
9.1Dynamic Link to After Effects12:44
9.2Exporting to HEVC for Faster Sharing Online06:39
9.3How to Export ProRes Video and Other Professional Formats07:17
10.New Audio Workflows
10.1Using the Essential Sound Panel for Dialogue: Part 111:58
10.2Using the Essential Sound Panel for Dialogue: Part 206:35
10.3Using the Essential Sound Panel for SFX and Ambience07:59
10.4Using the Essential Sound Panel for Music08:35
10.5Send Audio to Audition for Editing From Premiere Pro13:59
10.6Mixing Audio With Killer Effects Inside Premiere12:57
11.Essential Graphics Panel
11.1Use the Essential Graphics Panel to Create Basic Titles12:30
11.2Use the Essential Graphics Panel to Create a Motion Graphic Title in Premiere13:23
11.3Make Your Own Templates for the Essential Graphics Panel03:51
11.4How To Use Title Templates in the Essential Graphics Panel: Part 107:14
11.5How To Use Title Templates in the Essential Graphics Panel: Part 207:09
11.6How To Use Transition Templates in the Essential Graphics Panel08:26
12.Real-World Projects
12.1Use Proxies for Faster Editing13:42
12.2Create Multiple Camera Shots From a Single Camera10:56
13.New Features
13.1Using the Freeform View09:36
13.2Use Auto-Reframe to Crop Your Video09:36
13.3How to Work With Captions13:41
9.3 How to Export ProRes Video and Other Professional Formats
[MUSIC] In this lesson, you're going to learn how to export your projects to an intermediate codec, like ProRes, CineForm, or DNX. [MUSIC] The first thing you may be asking yourself is what is an intermediate codec? And that's a great question. So an intermediate codec is something you use in the post production process. It's not something you use typically to deliver a final product to an end destination. Any web platform, they're all gonna be looking for something much, much smaller. What you would use an intermediate codec for is to send an edited version of your project over to someone else to either have it color corrected to have motion graphics applied or to be part, maybe, of a longer video. So the example that I'm showing here, this is a short section of a video that I shoot each week from my church because at the time of recording this video, we in the United States, I live in the state of New York, are under lockdown from the COVID-19 global pandemic. And so any organization that does live events is rethinking how they're doing that. And so what we're doing is we're shooting everything during the week. Editing all of it together and then broadcasting it on Sunday morning. So my job is to shoot the sermon which is like the main portion, the main speaking portion of our Sunday morning service. I shoot that, I edit it and I deliver it to another editor. And then he combines that with the music, the announcements, he throws in the sermon, the message and then any ending bits of the service. So I don't wanna give the editor a highly compressed delivery codec because he's gonna take that whole edit and then compress it again. So intermediate codecs have less visual loss to them than your typical delivery codec. They have way more color information. They have way more bit depth, which is shades of grey in each one of the color channels. And there are three main codecs that you have to choose from that are sort of industry standard. One of them is Apple ProRes, another is GoPro's CineForm, and the third is Avid's DNX. So to export your projects to an intermediate codec is the same as exporting a delivery codec. We just need to change the format. So I just hit Ctrl + M on the keyboard to bring up this Export Settings window here. And instead of H.264 or H.265, if you wanna use Avid's DNX, and the only reason why you would use this is if you are sending it to someone who's using Avid. Otherwise, almost everyone else is going to ask for either ProRes or CineForm. In fact, I've never had anyone asked for anything else except ProRes. But GoPro CineForm is another great option. In fact, that's almost always what I use. So when I export these projects, I use the QuickTime format and QuickTime is not a codec, you can kinda think of it like a bucket. And inside that bucket you can use many different codecs. So you can use QuickTime animation codec, Apple ProRes. You can actually use DNX codec inside of a QuickTime wrapper, or with a .mov file extension. And you can see there are some other codecs that are not really popular anymore, GoPro CineForm. Almost all the stuff that I have ever done is either GoPro CineForm or ProRes. I've been using GoPro CineForm because before Adobe had whatever license deal they now have with Apple to get ProRes. Which you can see right here. They had CineForm and CineForm is just as good as ProRes. Most of the time, GoPro CineForm yuv 10 bit or Apple 422 will be fine for 98% of the projects you ever send to anyone else, but you want to check so that they're getting the type of file that they are expecting. If someone just says send me a ProResfile, what they're looking for is Apple ProRes 422. This is the standard flavor of ProRes when someone says, send me a ProRes file. There is a high quality version, which is very high bitrate. There is a lite version which is lower bitrate. There s a proxy version which is even lower bitrate. And then there are 2 ultra high quality versions, one is with an alpha channel and the other one is not marked with an alpha channel, but this fourth four is where the alpha channel goes. So I don't know what's up with that preset there. But if you're ever exporting graphics from After Effects and they have a transparent background, you're going to need a codec with an alpha channel or a flavor of a codec with an alpha channel. So you'd want to pick either Apple ProRes 4444 with alpha, or maybe go Pro CineForm 12 bit with alpha. But like I said, probably the two most common that you'll run into are Apple ProRes 422, which is what folks normally call just ProRes, or go Pro CineForm yuv 10 bit. And the process of exporting is like anything else, you just queue it right here to run. There are not a lot of options like there are with, H.264 and H.265. For CineForm you have a quality slider the preset for YUV 10 bit is on four and it only goes up to five. Five is what they call, I think film scan two, four is film scan one, both four and five, are nearly visually lossless. So they're both very, very high quality. If you use a preset for ProRes, you don't even get an option for the bandwidth because the bandwidth is in this ProRes preset. When you pick ProRes 422, the bandwidth is tied to whatever resolution your project is in. So if it's 4k, it's going to be huge. If it's 1080 is gonna be less than 4k. But just to give you an idea, you can just queue it up in Media Encoder and it will open right up. So it shows right up in a Adobe Media Encoder and you can get that started. Now last thing I wanna show you is, this is the output folder for a recent video that I did. This right here, this 6/6/2020 sermon, this is a 30 minute video, and it's almost 48 gigabytes. So we're talking a big big file size difference compared to a delivery codec. A delivery codec might be a fifth of this size, maybe a tenth of this size. For 30 minute H-264 video, I'm thinking maybe 4 gigs is what it might be if it were H.264. So major, major difference here. And if you're sending things through the Internet like I have been doing for the last few months, you need to make sure you have a pretty fast connection to be able to upload files that are this big. That about wraps it up for this lesson. Coming up in the next few lessons, you're gonna learn about some new audio workflows including the essential sound panel. [MUSIC]


