
 Lessons: 43Length: 6.5 hours
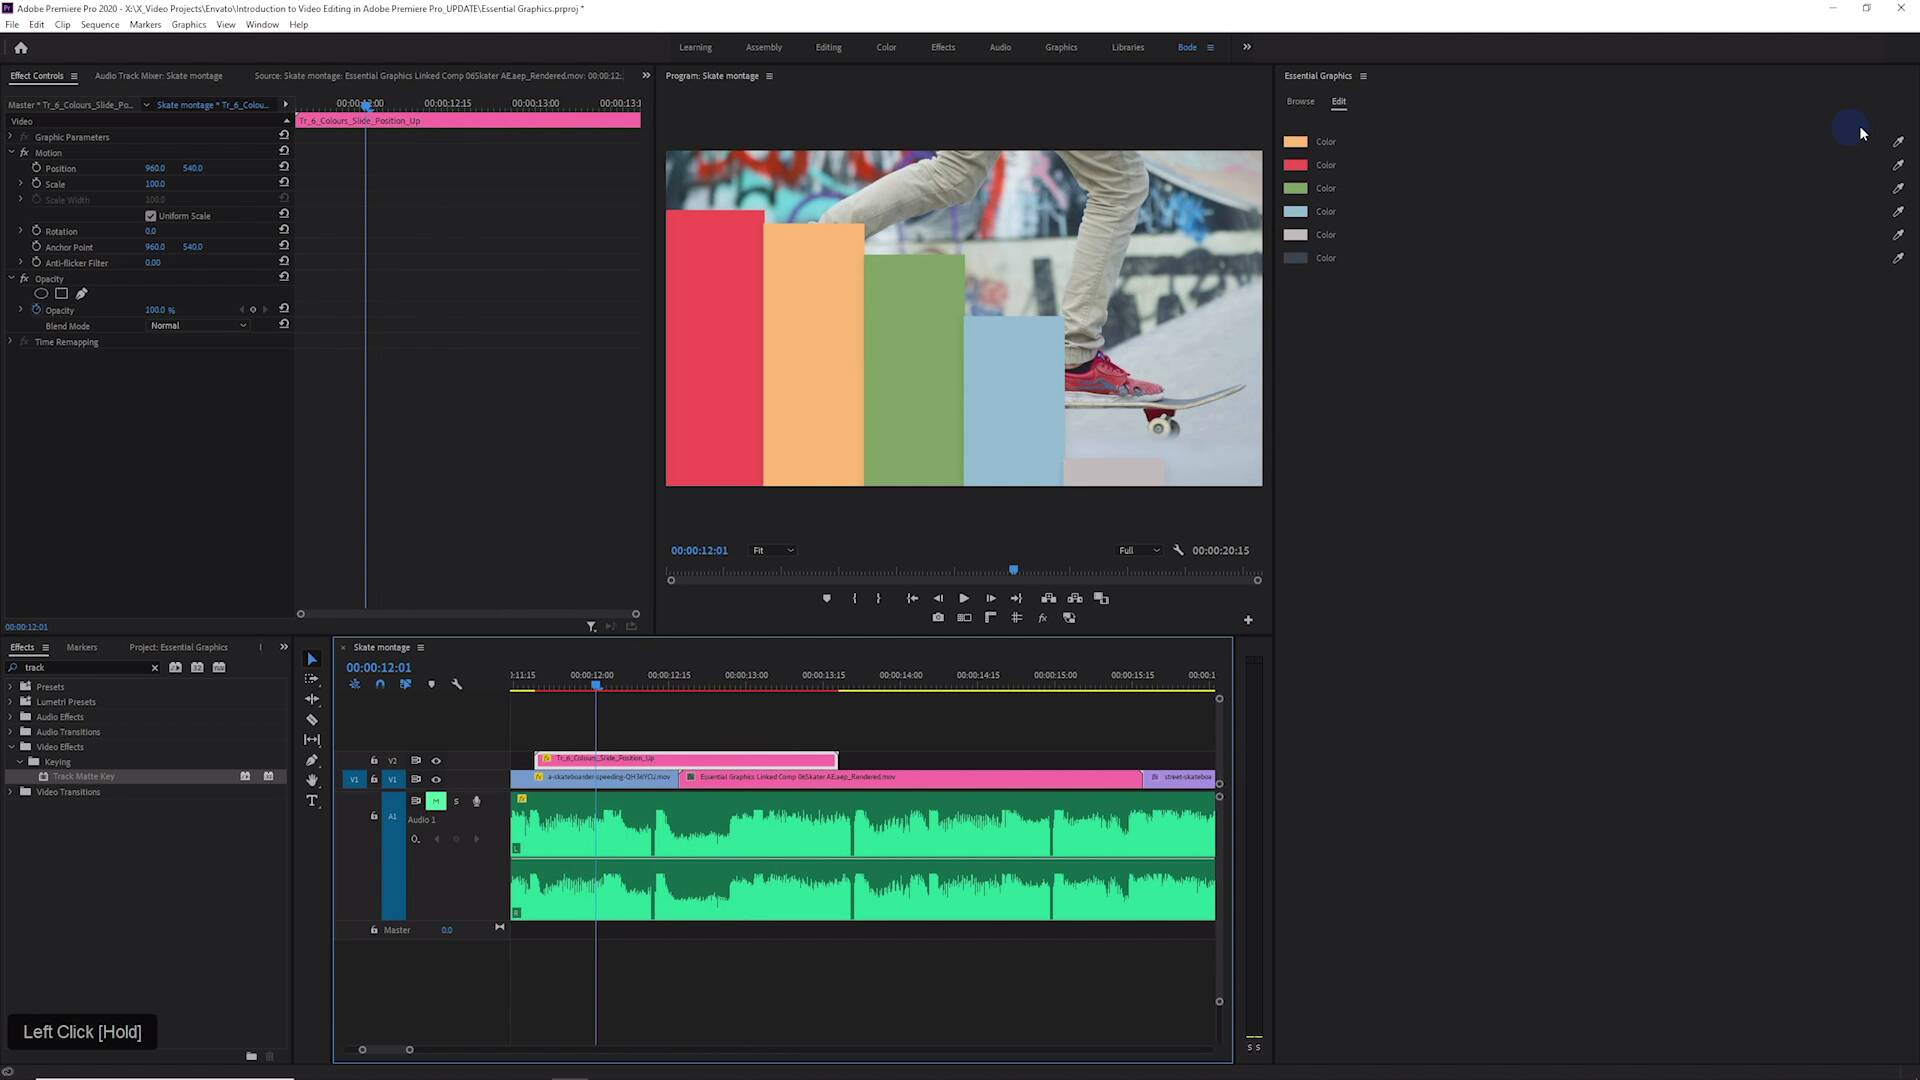
- Overview
- Transcript
11.6 How To Use Transition Templates in the Essential Graphics Panel
In this lesson, you will learn how to install, use, and find great-looking transition motion graphic title templates on Envato Elements.
Related Links
- Video Templates on Envato Elements
- Flat Design Transitions Pack
- Liquid Transitions
1.Introduction
1.1Introduction01:12
1.2What You Need07:14
2.Getting Started
2.1File Structure06:07
2.2Quick Tour of Premiere Pro11:14
3.Set Up Your Project
3.1Import09:55
3.2Organize08:39
4.Editing Basics
4.1Creating a Sequence10:07
4.2Cuts06:26
4.3Subclips06:46
4.4Editing in the Timeline, Part One11:27
4.5Editing in the Timeline, Part Two07:19
5.Beyond Basic Editing
5.1Adding a Cutaway Shot10:06
5.2Building on the Basic Edit, Part 107:09
5.3Building on the Basic Edit, Part 209:09
5.4Audio Transitions11:22
6.Fine-Tuning the Look and Sound
6.1Video Effects10:48
6.2Master Clip Effects10:47
6.3Adjusting the Volume of Your Tracks09:46
6.4Audio Effects11:17
6.5Adding Titles11:16
6.6Exporting12:10
7.Conclusion
7.1Conclusion02:33
8.Frequently Asked Questions
8.1FAQ Introduction01:22
9.Sharing
9.1Dynamic Link to After Effects12:44
9.2Exporting to HEVC for Faster Sharing Online06:39
9.3How to Export ProRes Video and Other Professional Formats07:17
10.New Audio Workflows
10.1Using the Essential Sound Panel for Dialogue: Part 111:58
10.2Using the Essential Sound Panel for Dialogue: Part 206:35
10.3Using the Essential Sound Panel for SFX and Ambience07:59
10.4Using the Essential Sound Panel for Music08:35
10.5Send Audio to Audition for Editing From Premiere Pro13:59
10.6Mixing Audio With Killer Effects Inside Premiere12:57
11.Essential Graphics Panel
11.1Use the Essential Graphics Panel to Create Basic Titles12:30
11.2Use the Essential Graphics Panel to Create a Motion Graphic Title in Premiere13:23
11.3Make Your Own Templates for the Essential Graphics Panel03:51
11.4How To Use Title Templates in the Essential Graphics Panel: Part 107:14
11.5How To Use Title Templates in the Essential Graphics Panel: Part 207:09
11.6How To Use Transition Templates in the Essential Graphics Panel08:26
12.Real-World Projects
12.1Use Proxies for Faster Editing13:42
12.2Create Multiple Camera Shots From a Single Camera10:56
13.New Features
13.1Using the Freeform View09:36
13.2Use Auto-Reframe to Crop Your Video09:36
13.3How to Work With Captions13:41
11.6 How To Use Transition Templates in the Essential Graphics Panel
[MUSIC] In this lesson, you're gonna learn how to use motion graphics templates designed for transitions [MUSIC] So I thought I would take you through the whole process of downloading and installing these so you can see what it's like for any of these mogrts or motion graphics templates. If I jump over to Envato Elements, I just did a search underneath video templates for "mogrt transitions" and I got all these great options here. Some of them will have a bit of a description, some of them won't. But you can see there's a ton of really cool liquid stuff. There's some more Flat designed transition elements here like this and like this from sweets_fxm and most of these should be in mogrt format, so they're very easy to install. So I downloaded this 100 Flat Pack Design Transition Pack. And I unzipped it, and then inside this folder you can see we have a few different things. There is the original After Effects file, so you could go in and make some modifications. Sometimes what you'll find is some of these transition elements have been designed for a lower frame rate than the project that you are currently working in. So my skater kind of demo project here is 29.97, so anything that has been designed in 24p or maybe 25 frames a second, may not look as smooth as something that was designed for 30 P. So you could, if you were reasonably skilled in After Effects, you could come in here and make some modifications to the comps and then maybe re export some things. That's probably way too much for this lesson, so I'm just gonna show you how the stock motion graphics work for this particular pack right here. This one comes with a couple of tutorials which is really handy to help you to be able to use these. And then in this folder here Transitions_EG, EG stands for Essential Graphics. These are the folders that you want to install in your motion graphics folder right here. And in fact, what I did is I just pulled this entire Transitions_EG folder right over into my motion graphics template folder on Windows. Again, for Mac, that's going to be a different address or a different location on your system. And then once I did that, They are all right here, they all populated in the browse tab. I tend to like these kind of geometric bar shaped transitions, I think this is pretty cool. And that just happened to be within maybe one frame. Let me just select this and hold Alt and then use the arrow keys to get this just right, yeah. This one doesn't look like it may line up exactly for a transition point, meaning that it doesn't cover the entire screen. Again, this may be designed for 25p and I am in a 29.97 sequence. But if I get this right about here, this will make a pretty smooth transition, you're not even really gonna see it. Even though it doesn't cover up the entire screen, it's still pretty nice looking. And if we select this mogrt here over in the edit tab, you can see that we have some options for customizations basically, it's color. Now, different transitions may offer some different customizations. I found that the transition motion graphics templates don't offer a lot of customization, but it's not always needed. It's nice that you can change the color here. I'm guessing that the stock colors are probably not going to work for all of your projects, so we could do something like just pick colors here that are already in the frame. Something like this. Maybe this purple. Maybe that'll match a little bit better. Yeah, that's pretty cool or work with whatever color scheme that you are working with. Again, it's just as easy as dragging and dropping these into your project. You could also use any of these as track matte as well, which is another way that you could use these. For example, maybe we want to adjust our edit here and do something like, I'll get rid of this one right here. Maybe I'll take this cool kind of three panel thing, throw it up here. And then for this one, I'll put a track matte Key on this, set the track Matte to video three. And now it's just gonna kind of blink on and blink off. [NOISE] Which could be cool. It may not work for this particular [NOISE] example, but you can see how that could be really useful. I'll show you another pack that I found and installed here. This one is called liquid transition and you can find this on Envato Elements as well. And if I pull this out on the timeline, this one gives you some customization as well here. [SOUND] It also comes with a sound effect in the background that you can hear. [SOUND] Which is pretty cool. I'm gonna mute that because that's gonna get annoying, but let me position that up. I think this one just goes on, I don't think this one actually goes off. So this basically just comes on and you could use this just as kind of a wipe. So it just kind of wipes on like this, maybe you put it like at the end here, boom and then it goes to just something else or we can also use this as a track matte element. And so if I put the track matte Key effect on here, and I set this to video three, You can see it's gonna wipe on with this video and that looks pretty cool. And what do we have over here for customization? Well, we have scale, so we can scale this up. And it looks like this is a vector driven layer and so when you scale this up, it's going to maintain really nice sharp edges, which is very cool. Just reset that. We have rotation, and that's not really gonna be helpful. That's no different than just changing the rotation over here. Because we're still gonna see kind of the edges there, but I suppose you could scale it up and then rotate it, and that would work for you. If we didn't use this as a track matte, so let's take this track matte key off, and we used it just in its default state here as essentially a piece of footage. It's got a glow here. We can change the glow color, to something like, I don't know, red, or this purpley color I guess. No, I don't like that. Something bright, pink. That looks cool. Pixelization, pixelization intensity, it's got a couple of cool options on it. Now, all of these are just effects that are on the original After Effects composition that's running in the background here, but it's still cool to have some customization. Not all of the transitions have that. So lots of different options for transitions and they're super easy to use inside of Premiere. It's definitely something that you should check out. Coming up in the next lesson you're gonna learn about proxies and how that can totally change your life when working with high resolution or difficult codecs. Check that out. Coming up next. >> [MUSIC]


