
 Lessons: 43Length: 6.5 hours
- Overview
- Transcript
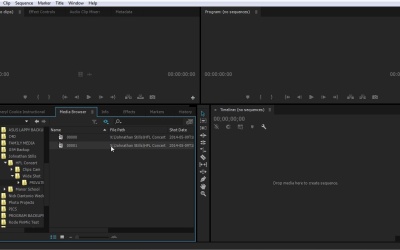
3.1 Import
The first step in editing is to get your footage and other assets imported in Premiere. In this video you will learn a few ways to do that.
1.Introduction
1.1Introduction01:12
1.2What You Need07:14
2.Getting Started
2.1File Structure06:07
2.2Quick Tour of Premiere Pro11:14
3.Set Up Your Project
3.1Import09:55
3.2Organize08:39
4.Editing Basics
4.1Creating a Sequence10:07
4.2Cuts06:26
4.3Subclips06:46
4.4Editing in the Timeline, Part One11:27
4.5Editing in the Timeline, Part Two07:19
5.Beyond Basic Editing
5.1Adding a Cutaway Shot10:06
5.2Building on the Basic Edit, Part 107:09
5.3Building on the Basic Edit, Part 209:09
5.4Audio Transitions11:22
6.Fine-Tuning the Look and Sound
6.1Video Effects10:48
6.2Master Clip Effects10:47
6.3Adjusting the Volume of Your Tracks09:46
6.4Audio Effects11:17
6.5Adding Titles11:16
6.6Exporting12:10
7.Conclusion
7.1Conclusion02:33
8.Frequently Asked Questions
8.1FAQ Introduction01:22
9.Sharing
9.1Dynamic Link to After Effects12:44
9.2Exporting to HEVC for Faster Sharing Online06:39
9.3How to Export ProRes Video and Other Professional Formats07:17
10.New Audio Workflows
10.1Using the Essential Sound Panel for Dialogue: Part 111:58
10.2Using the Essential Sound Panel for Dialogue: Part 206:35
10.3Using the Essential Sound Panel for SFX and Ambience07:59
10.4Using the Essential Sound Panel for Music08:35
10.5Send Audio to Audition for Editing From Premiere Pro13:59
10.6Mixing Audio With Killer Effects Inside Premiere12:57
11.Essential Graphics Panel
11.1Use the Essential Graphics Panel to Create Basic Titles12:30
11.2Use the Essential Graphics Panel to Create a Motion Graphic Title in Premiere13:23
11.3Make Your Own Templates for the Essential Graphics Panel03:51
11.4How To Use Title Templates in the Essential Graphics Panel: Part 107:14
11.5How To Use Title Templates in the Essential Graphics Panel: Part 207:09
11.6How To Use Transition Templates in the Essential Graphics Panel08:26
12.Real-World Projects
12.1Use Proxies for Faster Editing13:42
12.2Create Multiple Camera Shots From a Single Camera10:56
13.New Features
13.1Using the Freeform View09:36
13.2Use Auto-Reframe to Crop Your Video09:36
13.3How to Work With Captions13:41
3.1 Import
The first step in editing is getting your footage and other assets imported into Premiere. In this video, you will learn a few ways to get it done. So let's start by going up to File > New > Project, so we can start fresh. And we'll call this, Cheryl Cookie Instructional. Now when you are creating a new project, you will see you'll have a lot of options here, location, where you want this project to be saved. And this is just the project file, not the assets that you are going to import into your project. These other options you can pretty much leave at thier defaults, and then press OK. So let's look at how to import assets into Premiere. And we can do this in a few ways. If we jump over to the project panel here, you can see that it says Import media to start. And if you double click right in here, it brings up a window here, and then I can navigate to where I have the assets for this particular project located. And for you, you're going to be looking for a downloaded folder called Cheryl Cookie Instructional Assets. For me that's located on my X Drive under a folder called Cheryl Cookie Instructional. And then here I have my Cheryl Cookie Instructional Assets. If I go into this folder, I have two sub folders, one is called Wide. And here I have a collection of the Wide shots that we're gonna be working on. And then I have another folder called Cutaway, which has the collection of the Cutaway shots that we'll be using as well. So I can select individual files to import. I can select a single file here. I can lasoo several files, and import them all. And I can also import a folder. You can see there is an Import folder option right down here. So I can actually back up and choose this folder, which contains the two sub folders in it, and then import this folder into Premiere. And now, I have a representation of that same file structure in Premiere, which is a really handy way to go about importing your assets. Now, I don't have to do as much organization inside of Premiere. And you can see if I drill down in these folders, I have all the files that I need exactly how I organized them. Now additionally, you can also just drag files right into Premiere. So if I wanted to grab an additional file, I could do that. I could search for a file here. I'm gonna look for an arrow graphic that I created, and I could take that and just drag that right into Premiere. And if I jump back to Premiere, because this is a Photoshop file, it's going to ask me if I want to import this merging all the layers together, or I have some other options here. I'm just gonna choose Merge Layers. And now I have that asset in here as well, so you can drag items into the Project Panel. You can also drag items into a sequence once you've created one. So this way of importing files works well for a lot of different files, for graphics, for audio, for some video clips, if they're shorter. For some camera systems, though, particularly cameras that shoot in an AVHD format, they store the files in a file structure, which we looked at in a previous lesson. And importing those raw files will not get you the result that you're looking for. So let me show you an example of what I'm talking about. This is a folder of a concert that I shot, and you'll see there are ten files in here. But I actually only press the Record button once, and I let it run for, I don't know, two hours or so. You see as I click around on these clips, they all say they're about 11 minutes, 12 seconds long. And that's really not how I want to use these clips, because if I import these into Premiere by just dragging them into Premiere, there's going to be a very small break in-between these clips when I put this on sequence. And that's going to break the flow. But basically drops a frame and the audio gets kind of glitched out a little bit. So this is not the way you want to import this MTS files into Premiere. What you wanna do instead is go over here to the Media Browser and navigate to where those files are stored. As you can see, if I jump into my Jonhathan Stills folder, I go to my HFL Concert, and I go into the Wide Shot folder, and then I click on PRIVATE. I don't even get those other folders because Premiere knows that what it's really looking for is the Streams folder. And you see there's only two files listed. But if I look back in here, this is the same exact location, there's actually ten files in here. So Premiere is showing you that it knows that at the start of this file here is 00001, this is one file. And all of the rest of those between 00001 and 00009, those are all one continuous clip. And so when I right click, and I choose Import, this file will import into Premiere perfectly. And there won't be any breaks in between any of those files. And this is how you want to import the files. If you have MTS files that were shot on a camera that records to AVHD format. And I believe there's a few other cameras that record with a similar file structure. When I'm working with footage from one of these cameras that stores the file in this particular file structure that I need to leave intact. The way to do that is you go into the Media browser in Premiere, you navigate to the files, and then you can select the files, you right click, and then you can choose Import. If I just import this one file in here, it will show up as one clip. And you can see the media duration is 1 hour, 39 minutes, 20 seconds, and 0 frames. And that's exactly what you want. Now other files that have come from a DSLR or other camera systems that shoot two different file types, you can pretty much just organize those files however you like, and then import them into Premiere. But again, cameras that shoot to AVHD format that store the files in that particular file structure need to be imported this way into Premiere. Otherwise, you're gonna have just a whole bunch of headaches. Now because importing files has to do with where files are located and getting them inside of Premiere, I wanted to touch on one other point really quick. And that is what happens if you have a project and you've saved it, and then you move the files to a different location? Well, thankfully Premiere is pretty darn smart. And if I save this file, and then I close Premiere. And then what I'm gonna do is I'm going to navigate back to my folder here. I'm gonna go into the Cheryl Cookie Instructional Assets. And I'll just take one of those files, and I will cut and then I'll paste it somewhere else. So I'm gonna go back. And I'll just paste it in here. So this is just going to represent what happens if you move some of your files. If I open Premiere back up, and I open that last project. Premiere is going to start loading those assets, and it's gonna come up and say, hey, one or more of your files is not where it was before. And it brings up this link media dialog box, and it says missing media for these clips. And we see the clip name, and the filename, because those are separate which we'll look at later. And the file path where it was looking for it. You see that, X Drive, X Video projects, Cheryl Cookie Instructional, Cheryl Cookie Instructional Assets, and it was in the Wide folder. So I can just tell it that this file is offline. I can cancel or what you probably wanna do is Locate. And Locate brings up another window here, where you can search for the file, or if you know where you moved it, you can just tell Premiere look in this file. Now to make it easy, there's an option right down here to Display Only Exact Name Matches. And this means that it won't show you any other files, except for files that have the exact same name as the file that Premiere is currently looking for. So if I check that box, then I can just jump to the folder where I know that the new file is, and it's right here, and it's displaying that. Then I select that, and I choose OK. And now when I open up my project, that file is going to be in here, and everything's going to be all set. Now let's say you move to a whole bunch of files. Well, Premiere is smart enough to know that when it finds one file in that folder, and it sees all the other files associated with that project, it will link them automatically. So you do not have to do this to every file. If you pointed to the location where just one of those files is, Premiere will find all of those other files, and it will relink everything so your project works correctly. It's a fantastic feature, and I use it all the time when I have to kind of re-organize things or add or move files to another drive. It does not ruin your project, and it's very easy to get things up and running again, when you move around your files. You do need to be careful when you're moving around video files that need to remain in that particular folder structure like those MTS files. So that probably means that you have to take the files and the folder structure exactly how it came off the camera, and then move that entire folder structure or whatever the top folder is, and then move that somewhere else. That will work. But for example, if you move those .MTS files out of that last folder, out of the Streams folder, and you move those somewhere else, Premiere is gonna have a really difficult time figuring that out. It probably won't work correctly. So make sure you keep those files in that folder structure, and move the top level folder when you're moving those around. In the next lesson, you're gonna learn how to do some basic organization inside of Premiere to keep your projects running smoothly. So check that out coming up next.


