
 Lessons: 43Length: 6.5 hours
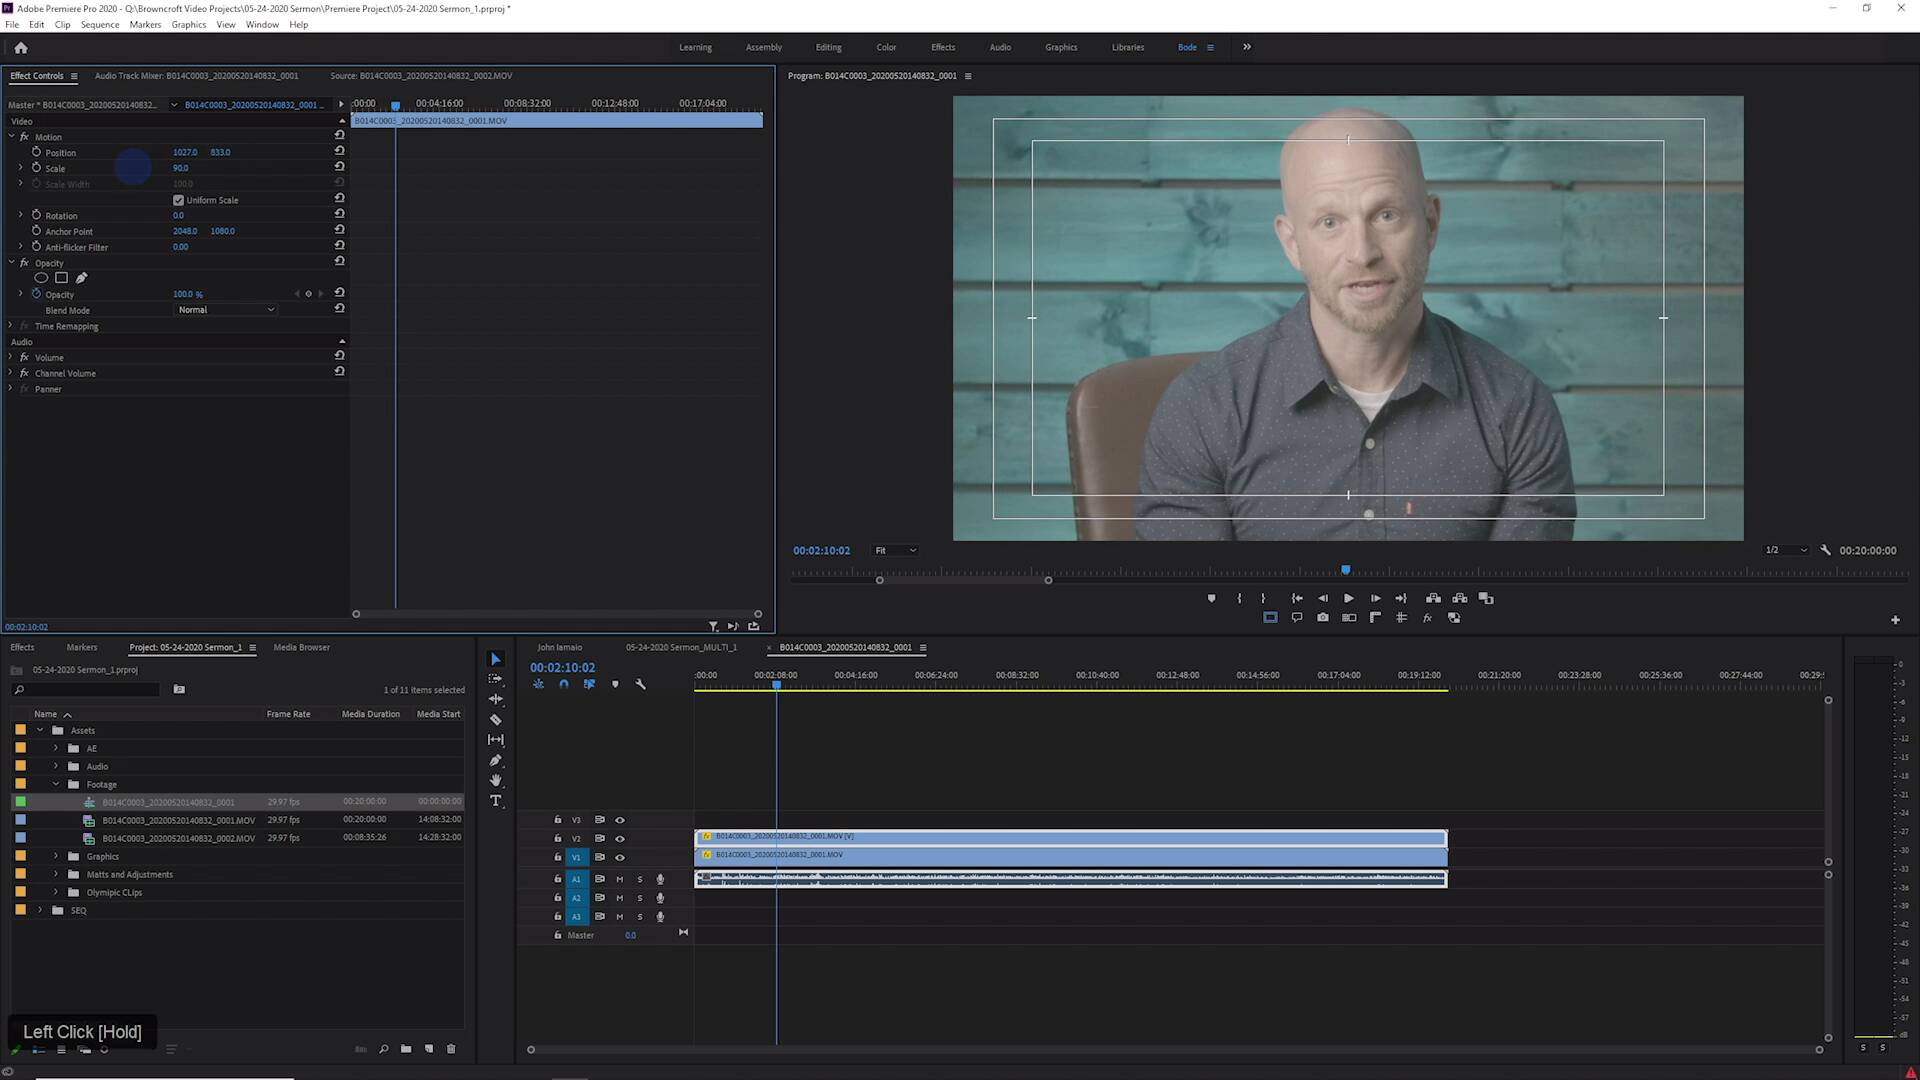
- Overview
- Transcript
12.2 Create Multiple Camera Shots From a Single Camera
In this lesson, you will learn how to create a multi-camera sequence with one high-res camera shot!
Related Links
- Stock Videos on Envato Elements
1.Introduction
1.1Introduction01:12
1.2What You Need07:14
2.Getting Started
2.1File Structure06:07
2.2Quick Tour of Premiere Pro11:14
3.Set Up Your Project
3.1Import09:55
3.2Organize08:39
4.Editing Basics
4.1Creating a Sequence10:07
4.2Cuts06:26
4.3Subclips06:46
4.4Editing in the Timeline, Part One11:27
4.5Editing in the Timeline, Part Two07:19
5.Beyond Basic Editing
5.1Adding a Cutaway Shot10:06
5.2Building on the Basic Edit, Part 107:09
5.3Building on the Basic Edit, Part 209:09
5.4Audio Transitions11:22
6.Fine-Tuning the Look and Sound
6.1Video Effects10:48
6.2Master Clip Effects10:47
6.3Adjusting the Volume of Your Tracks09:46
6.4Audio Effects11:17
6.5Adding Titles11:16
6.6Exporting12:10
7.Conclusion
7.1Conclusion02:33
8.Frequently Asked Questions
8.1FAQ Introduction01:22
9.Sharing
9.1Dynamic Link to After Effects12:44
9.2Exporting to HEVC for Faster Sharing Online06:39
9.3How to Export ProRes Video and Other Professional Formats07:17
10.New Audio Workflows
10.1Using the Essential Sound Panel for Dialogue: Part 111:58
10.2Using the Essential Sound Panel for Dialogue: Part 206:35
10.3Using the Essential Sound Panel for SFX and Ambience07:59
10.4Using the Essential Sound Panel for Music08:35
10.5Send Audio to Audition for Editing From Premiere Pro13:59
10.6Mixing Audio With Killer Effects Inside Premiere12:57
11.Essential Graphics Panel
11.1Use the Essential Graphics Panel to Create Basic Titles12:30
11.2Use the Essential Graphics Panel to Create a Motion Graphic Title in Premiere13:23
11.3Make Your Own Templates for the Essential Graphics Panel03:51
11.4How To Use Title Templates in the Essential Graphics Panel: Part 107:14
11.5How To Use Title Templates in the Essential Graphics Panel: Part 207:09
11.6How To Use Transition Templates in the Essential Graphics Panel08:26
12.Real-World Projects
12.1Use Proxies for Faster Editing13:42
12.2Create Multiple Camera Shots From a Single Camera10:56
13.New Features
13.1Using the Freeform View09:36
13.2Use Auto-Reframe to Crop Your Video09:36
13.3How to Work With Captions13:41
12.2 Create Multiple Camera Shots From a Single Camera
[MUSIC] In this lesson, you're going to learn how to create multiple cameras from a single camera shot. [MUSIC] These days, cameras can shoot at very, very high resolutions. A 4K camera is not uncommon. However, the need to output a 4K version of your file is not really something that everyone needs to do. And that's because many end users are still only using 10 ADP screens. So a very common thing for folks to do when they're shooting is to shoot in 4K, and maybe shoot a little bit wider, and then arrange those files in Premiere to get two different camera shots. In this sequence right here, that's basically what you are looking at. I'm just gonna mute the audio here. And you can see as I scrub along, I'm going to turn proxies back on here, so this goes a little bit faster. You can see that I have a nice wide shot and a tight shot. But this is coming from the same camera. And if I turn proxies back off, and I look at this at 100% resolution, you can see that it actually still looks plenty fine. It's nice and sharp, plenty of resolution here. And so you don't really lose anything with this technique. So let me show you how I set that up. So, I have one file here. I'm just gonna do it with one of my footage files. And I'm just gonna drag this over and create a new sequence. Now you can see that the color does not look right, and that's because my camera is shooting in a log color profile. But don't worry about that for right now. For this technique, instead of color correcting all of the individual footage layers, I just do one color correction adjustment layer at the end because that's a little less processing overhead. So the next thing I'll do is I will come up here to sequence settings and change the resolution to 1920 by 1080. It'll say, changes to preview file format, or color space require all preview files to be deleted. No problem, doesn't make any difference. So now you can see my cinema 4K file, which is, my original file is 4096 by 2160, at 100% scale, if we look over here in the effects controls tab, gives us a lot of room to play with to reposition this image here. And so what I usually like to do is set up my wide shot first, and I will go something like 52% scale, and that's because I shoot it a little bit wider. If I just right click on the file down here and choose set to frame size, that'll set the width to the frame size and I'll get these black bars at the top and the bottom. Now maybe you like that as some kind of aesthetic choice, but I don't. I like it to fill the frame, and so I usually will set the scale to something like 50. And even at 50, it leaves me a little room, if I click on motion, you can see that's how much wiggle room I have on the right and the left to recenter this image. Usually in my toolbar here, I will have the safe margins here, which gives me a really nice center spot. And so if I have to recenter this, or just move it over to exactly center of the frame, shooting in 4096 by 2160 gives me just a bit of wiggle room to be able to move the image right or left a little bit. So I can move it all the way over here and not lose anything, or move it all the way over here and not lose anything. If I'm shooting with someone in the center or someone on camera right or camera left, that's pretty handy to be able to balance them. If I'm using one third graphics over here, it really helps to be able to refine that. So I will go at least 50%, if I need to adjust where the headspace is here, I'll bump it up to something like 52% maybe. I'll click on motion so I can see where the bounding box is. And then push it up, maybe just a hair, something like that. You can also move it manually if you click in the program monitor here. And if you hold Ctrl or you have snapping enabled, it will snap to the edges of the sequence box here, or if you have guides, it'll also snap to the guides. But I prefer to just move the position over here, and that works for me. So this is one camera shot, right? So this is going to be my wide shot. The second thing that I do is I will Alt+drag the video up on to a 2nd video layer, and this is gonna be my tight shot. And I usually don't go 100%. Now, I could go 100% and I'm not technically losing any information here, because this still looks reasonably sharp. However, I don't always feel like I need to get this tight. So I will usually go to something like 85, or maybe 90%. And that's enough of a difference. To make a pretty convincing two shot out of this one camera shot. But you can do it however you like. So if I play this. >> Top of our heads. >> You'll hear that I'm using just the built in camera mics for my camera, and I haven't recorded the shotgun microphone to my camera. So the final step that I need to do, and you may not need to do this, is to put my audio in here as well and synchronize it with my clip. Now it's already pretty close to being synchronized. But if I right-click on those two files, the camera audio and the audio from my audio recorder, I can come up here to synchronize and then choose audio track 1 to synchronize to, and it's gonna go ahead and analyze those. There we go. And now those should be reasonably well synchronized, the only thing that I need to do is just maybe trim up the beginning here. There we go. And then finally, for this multi cam thing to work properly, I want to pull my camera audio down and put my audio from my audio recorder on audio track 1 and then mute audio track 2. And that's because as I switch between cameras, it's going to by default just follow audio track number 1. Now there are different ways to set up the multi camera switching in Premiere. But having the camera switch and having the audio locked to audio track 1 works fine. I'm just gonna name my sequence over here. I'm just gonna drag it to the bottom. And if I drag my sequence into a new sequence, I'll call this main just so we can keep these clear. To make this a multi cam sequence, all I need to do is right-click on this, go to multi cam, and then Enable. And then, I can toggle on my multi cam view, right here. And if you don't have this button, you can access it, with the button editor, right here. And now you can see I have my wide camera and my tight camera right here. And so I can edit this really easily. >> Your high school students who are really missing prom and they're missing grad- >> Now I'm gonna mute the audio here, so I can talk over this. But as I play this back, what I can do, is I can cut back and forth, either with my mouse here, or I can use the keyboard, the numbers above the QWERTY keyboard will correspond to these camera shots. So 1 is here, 2 is here. If you had multiple camera shots, 3 and 4 would be down here. And you can put as many cameras as you want in here. And you can see that the bounding box here turns red when it is recording what you are doing. But as soon as you stop, it turns yellow. And then when you play this back, it will basically follow that switch exactly like I did it. And so this is a super-fast way to edit between two different camera shots, that came from one higher resolution camera file. If at any point in time you need to make an adjustment, like you say, you know what, maybe I want a little bit more headroom here, you just jump back to your multi cam project, and then make a little adjustment to the position, no problem. Jump back here, it's all set. The final thing that I do is add a color correction layer to my footage, which I do with an adjustment layer, turn multi cam off and check that out. That's a super simple way to create two camera shots from one camera. But if you wanted to adjust any of these transitions, you can just slide that edit point along or you can click on this individual clip here. And then you can just change it by clicking on the camera, or you can just play it back, and at any point in time as soon as you click to switch cameras, it's going to start recording your camera automation, if you will. And if you stop it, it's going to leave whatever camera switches you have done down the timeline to the right, but if you keep playing it, you will overwrite any of these edits right here. Boop, boop, boop, boop, boop, boop, boop. You can see it overwrites any other edits that I have. So experiment with this. It definitely makes editing this kind of content a lot faster. And it's really simple to do. That about does it for this lesson. Coming up in the next lesson, you're gonna learn how to use the free form view to review, organize and prepare media for your projects. [MUSIC]


