
 Lessons: 43Length: 6.5 hours
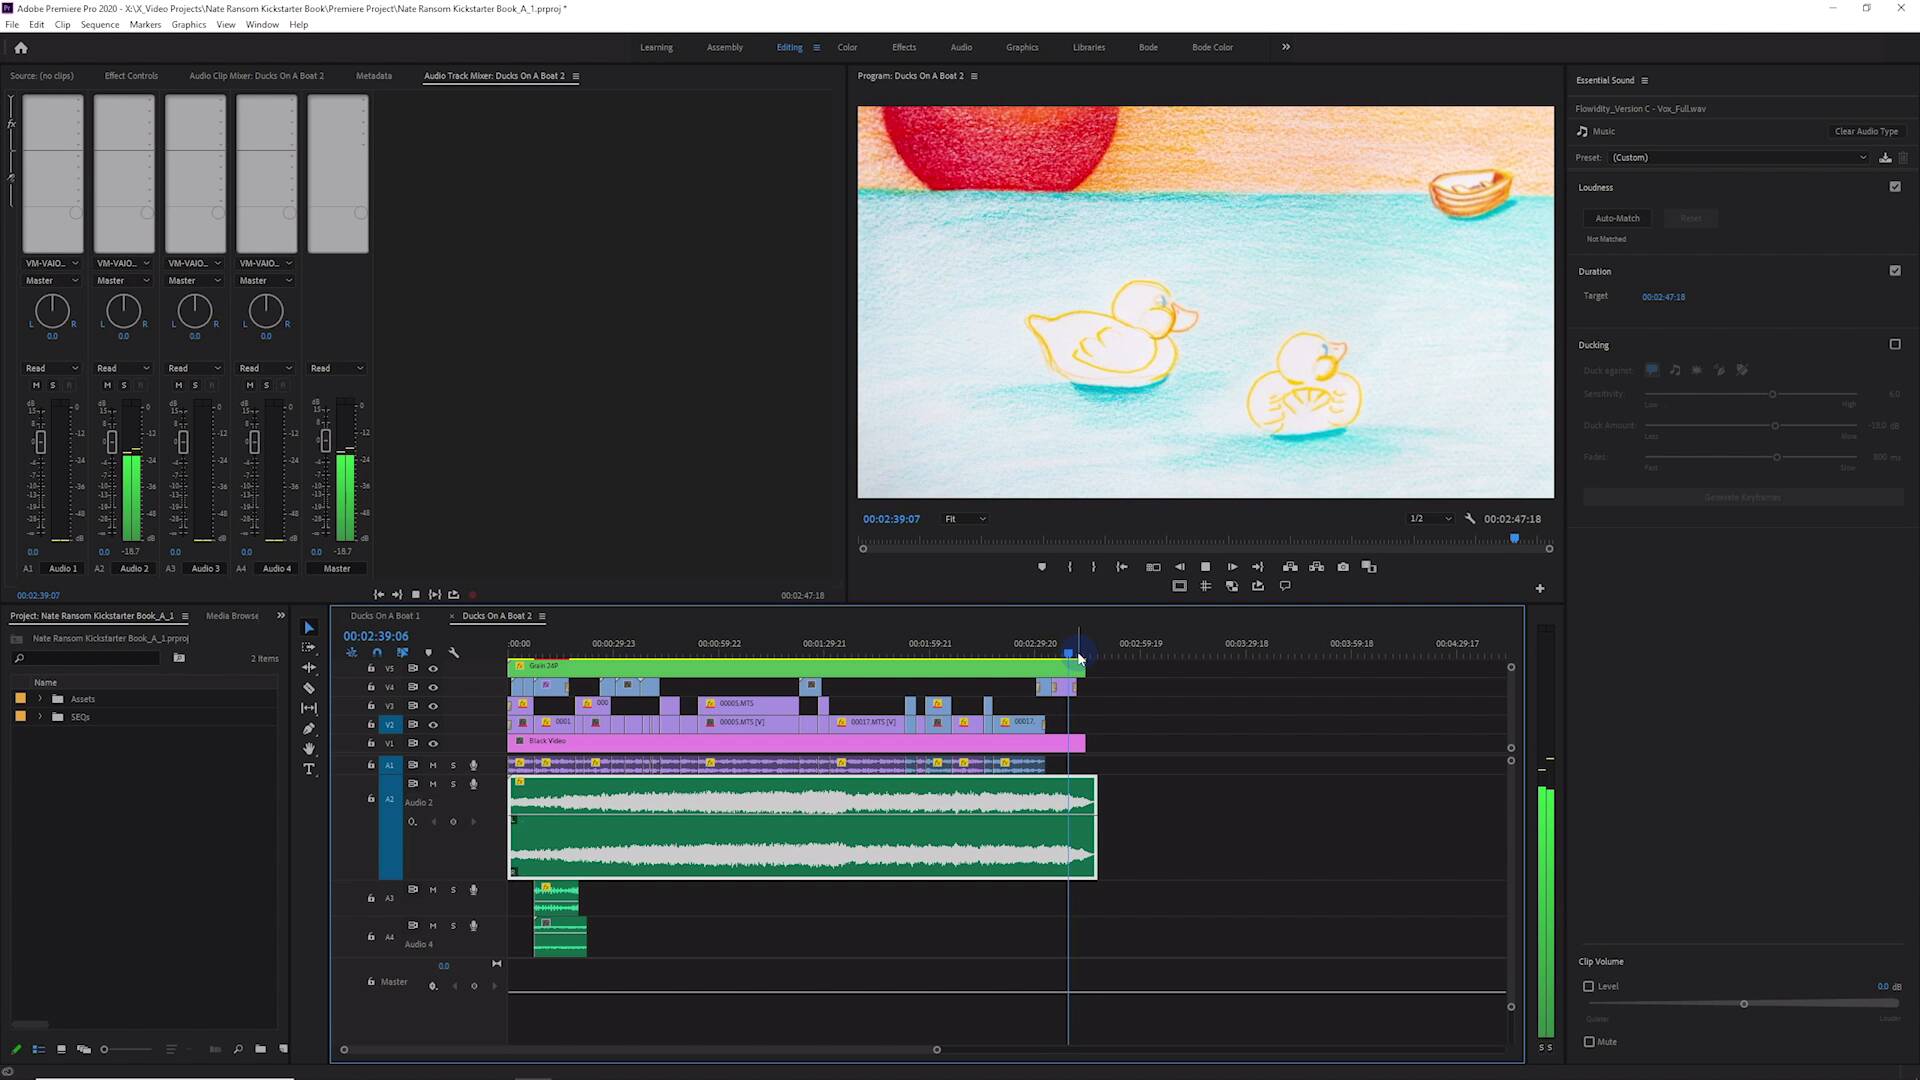
- Overview
- Transcript
10.4 Using the Essential Sound Panel for Music
In this lesson, you will learn how to use the Essential Sound Panel to help level, mix, and treat music.
Related Links
- Royalty-Free Music on Envato Elements
1.Introduction
1.1Introduction01:12
1.2What You Need07:14
2.Getting Started
2.1File Structure06:07
2.2Quick Tour of Premiere Pro11:14
3.Set Up Your Project
3.1Import09:55
3.2Organize08:39
4.Editing Basics
4.1Creating a Sequence10:07
4.2Cuts06:26
4.3Subclips06:46
4.4Editing in the Timeline, Part One11:27
4.5Editing in the Timeline, Part Two07:19
5.Beyond Basic Editing
5.1Adding a Cutaway Shot10:06
5.2Building on the Basic Edit, Part 107:09
5.3Building on the Basic Edit, Part 209:09
5.4Audio Transitions11:22
6.Fine-Tuning the Look and Sound
6.1Video Effects10:48
6.2Master Clip Effects10:47
6.3Adjusting the Volume of Your Tracks09:46
6.4Audio Effects11:17
6.5Adding Titles11:16
6.6Exporting12:10
7.Conclusion
7.1Conclusion02:33
8.Frequently Asked Questions
8.1FAQ Introduction01:22
9.Sharing
9.1Dynamic Link to After Effects12:44
9.2Exporting to HEVC for Faster Sharing Online06:39
9.3How to Export ProRes Video and Other Professional Formats07:17
10.New Audio Workflows
10.1Using the Essential Sound Panel for Dialogue: Part 111:58
10.2Using the Essential Sound Panel for Dialogue: Part 206:35
10.3Using the Essential Sound Panel for SFX and Ambience07:59
10.4Using the Essential Sound Panel for Music08:35
10.5Send Audio to Audition for Editing From Premiere Pro13:59
10.6Mixing Audio With Killer Effects Inside Premiere12:57
11.Essential Graphics Panel
11.1Use the Essential Graphics Panel to Create Basic Titles12:30
11.2Use the Essential Graphics Panel to Create a Motion Graphic Title in Premiere13:23
11.3Make Your Own Templates for the Essential Graphics Panel03:51
11.4How To Use Title Templates in the Essential Graphics Panel: Part 107:14
11.5How To Use Title Templates in the Essential Graphics Panel: Part 207:09
11.6How To Use Transition Templates in the Essential Graphics Panel08:26
12.Real-World Projects
12.1Use Proxies for Faster Editing13:42
12.2Create Multiple Camera Shots From a Single Camera10:56
13.New Features
13.1Using the Freeform View09:36
13.2Use Auto-Reframe to Crop Your Video09:36
13.3How to Work With Captions13:41
10.4 Using the Essential Sound Panel for Music
[MUSIC] In this lesson, you're going to learn how to use the essential sound panel to help you to mix and balance music against dialogue, sound effects, ambience and more. [MUSIC] So where we left off, we took a look at the essential sound panel for dialogue. But, now let's check out what we can do when we select one or more pieces of music in your project. In this case, I just have one and we label that or tag that as music. Now, I didn't mention in the last lesson, but there are some Presets up here which you can experiment with. And these will do a bunch of different things at once. Again, if you're doing something really quick and dirty and you don't have a lot of time to mess with some things, this can get you pretty close to where you want to be possibly, [LAUGH]. It's something to experiment with. But let's just go through the options individually really quick. The first one, just like in dialogue is loudness. Now loudness is another nice feature to have here, because I think for a lot of folks, they may struggle with balancing dialogue versus music. What sounds right to one person may sound way overdone in terms of the music. It's got too much music and not enough dialogue, or I can barely hear the music in the background, that sort of thing. This kinda gives you a nice level playing field here. So if I just hit the Automatch button, you can see what it's gonna do. I'll just reset this here so you can watch it processing in the background. It's really, pretty quick. Again, this is analyzing the loudness, not the loudest thing. So it's actually listening to the entire track or analyzing, in computer terms. And it's determining how loud it actually is, not just what the loudest thing in this clip happens to be. And so, just by doing a loudness match, and all that I've done to the dialogue so far is applied a loudness automatch to it. Check out how it sounds, compared to when we first started. >> Hi everyone. My name is Nate Ransom. And I wanted to tell you about a project that my brother in law Chris and I have been working on for the past several months. The project is a children's book that we've titled Ducks on a Boat. And we're looking for some input from the community, and a little help getting over the finish line as far as publishing costs go. So one of the things we really think is exciting about this book and this product. >> So, already it's really pretty good. However, if we jump to the middle and I play a little bit more probably in this area here. >> It's about how it works, and why. Some of the other areas we've discussed, are actually things around. >> Aah, you can see that, it started out sounding really good and you're thinking, man, I didn't know it could be this easy or maybe woman, I didn't know it could be this easy. Because, it sounded like it was gonna be really great. But the problem is, that this is a particularly troublesome music clip because it starts kind of quiet and then slowly kind of builds in intensity in a rather subtle way, but you can clearly see that this wave down here is smaller and then it gets fatter up here, right? And that means it's louder, essentially. So, this loudness matching automatch dealio here is great, but it isn't everything and you are going to have to do a little bit of work to be able to manage the level of your music. But, this gets it a lot closer to where it needs to be for the final product, and I like that, I really do. The next thing that we have is a duration. Now, if you enable this, and we change the duration, say this clip was longer, like this, and you really wanted this ending bit, right here where. [MUSIC] It kinda fades out in a really nice way, you want that to be kind of where our whole piece ends. So, you just, maybe just try and shorten this up a little bit. Let's see what that's gonna do. Eeh, we need to shorten that. Okay, maybe a little longer. Yeah, something like this. Yeah, let's hear that. Hang on, it's got to render this first. No big deal, we'll just let that render in the background there. [MUSIC] What, hang on, hang on, [INAUDIBLE] what? That sounds weird. >> Pick through the different fun. >> Aah, here's the thing [LAUGH]. This duration option here, does not do something fancy or clever, tt basically does the same thing as getting the rate stretch tool which I can select by hitting R, and just scooching it in like that. >> Funding levels. >> Except that it pitch matches it, so it brings the pitch down to where it was before. So, it's not a great option, it is an option, but it's not a great option because it's essentially just increasing the speed of the music and then pitch shifting it down, and those two processes do not sound great. Now the great thing is, you can remix music in an incredibly seamless way. Something that, I would say gets you 90% of the way to what a real pro like myself would do, by listening to it and deciding where to make the cuts. You can do that in audition. And in fact, the essential sound panel in audition, the duration option in there uses their remix algorithm or their remix engine, I don't know exactly what they call it. But that doesn't, rather advanced analyzation of the music and determines where to make edits. That remix feature is absolutely incredible. So, the duration if you're going to plus or minus it just a hair, it's probably okay. If you're gonna make larger adjustments like I showed you here, I would just maybe trim it up like this and just do a fade out with a couple of keyframes, something like that. Okay, finally, we have this Ducking option. Let's enable this. The Ducking option basically, will pull the audio down, which is what ducking means, right? It'll duck it to get it out of the way of something else. And that something else is something that you can determine right up here by enabling one of these buttons. Now by default, which is what you want, I would say most of the time the audio will duck against dialogue. That's what's enabled, right here. But you can also have it duck against music, or sound effects, or ambience, or duck against any clips without assigned audio types. So, it's pretty cool. And we have some options here to adjust sensitivity, the duck amount and the fade times. But if we leave them at their defaults and just click Generate keyframes, we'll see that it will do something. Now, I don't know exactly how it's gonna handle this, end fade here that I did, but, there we go, it just got rid of it completely. So, [LAUGH] we'll have to deal with that again, which is no big deal. You do that in less than one second. But now, our audio is going to be at a little bit more of an appropriate level here especially in this middle section here where you can that the audio gets a little bit louder, let's check it out. And the way that these ducks could learn lessons about how it works and why, some of the other areas that we've discu-. >> Now I would say that's probably really pretty close to how I would mix it. I probably would bump it a little bit but, If you were a novice, I'm not sure you could really get it better by fussing with it too much if you didn't know what you were doing. Now, as you saw, it didn't really generate a whole lot of key frames and that's because all this dialogue is jammed, tt's like really compressed. It's just talk talk, talk, talk, talk talk, if there was a space in here, select this music again and generate keyframes. What you'll see is that, it will push the audio up here. Drumroll please. There we go. It does a good job of bringing the level up when there's no dialogue, and then bringing it back down when there is dialogue. It works pretty well I'd say, doing that. Let's just undo, all of that. So there you go. That's what you have in terms of options for music. Well, that's a great place to stop for this lesson. There is a little bit more to explore with the essential sound panel in dealing with sound effects and ambience. And you're gonna learn all about that, coming up in the next lesson. [MUSIC]


