
 Lessons: 43Length: 6.5 hours
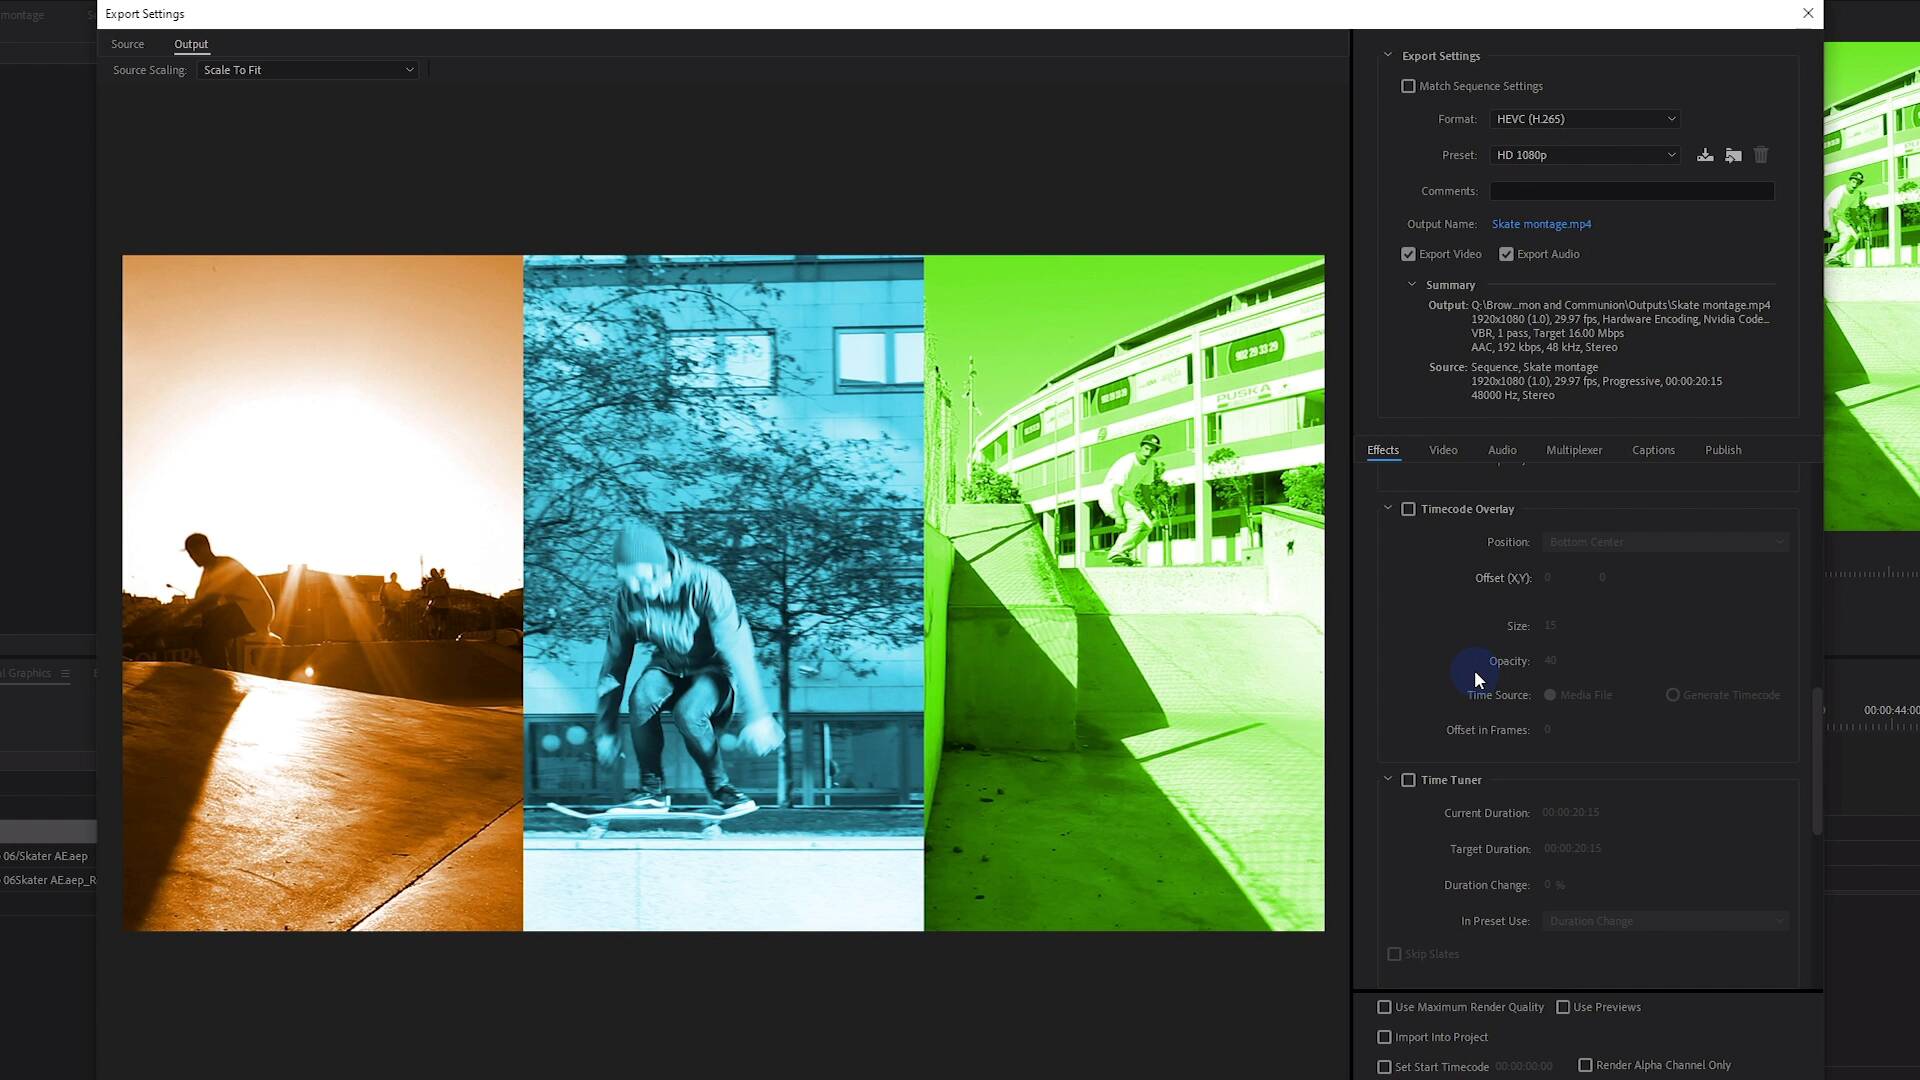
- Overview
- Transcript
9.2 Exporting to HEVC for Faster Sharing Online
In this lesson, you will learn how to export your projects to HEVC.
1.Introduction
1.1Introduction01:12
1.2What You Need07:14
2.Getting Started
2.1File Structure06:07
2.2Quick Tour of Premiere Pro11:14
3.Set Up Your Project
3.1Import09:55
3.2Organize08:39
4.Editing Basics
4.1Creating a Sequence10:07
4.2Cuts06:26
4.3Subclips06:46
4.4Editing in the Timeline, Part One11:27
4.5Editing in the Timeline, Part Two07:19
5.Beyond Basic Editing
5.1Adding a Cutaway Shot10:06
5.2Building on the Basic Edit, Part 107:09
5.3Building on the Basic Edit, Part 209:09
5.4Audio Transitions11:22
6.Fine-Tuning the Look and Sound
6.1Video Effects10:48
6.2Master Clip Effects10:47
6.3Adjusting the Volume of Your Tracks09:46
6.4Audio Effects11:17
6.5Adding Titles11:16
6.6Exporting12:10
7.Conclusion
7.1Conclusion02:33
8.Frequently Asked Questions
8.1FAQ Introduction01:22
9.Sharing
9.1Dynamic Link to After Effects12:44
9.2Exporting to HEVC for Faster Sharing Online06:39
9.3How to Export ProRes Video and Other Professional Formats07:17
10.New Audio Workflows
10.1Using the Essential Sound Panel for Dialogue: Part 111:58
10.2Using the Essential Sound Panel for Dialogue: Part 206:35
10.3Using the Essential Sound Panel for SFX and Ambience07:59
10.4Using the Essential Sound Panel for Music08:35
10.5Send Audio to Audition for Editing From Premiere Pro13:59
10.6Mixing Audio With Killer Effects Inside Premiere12:57
11.Essential Graphics Panel
11.1Use the Essential Graphics Panel to Create Basic Titles12:30
11.2Use the Essential Graphics Panel to Create a Motion Graphic Title in Premiere13:23
11.3Make Your Own Templates for the Essential Graphics Panel03:51
11.4How To Use Title Templates in the Essential Graphics Panel: Part 107:14
11.5How To Use Title Templates in the Essential Graphics Panel: Part 207:09
11.6How To Use Transition Templates in the Essential Graphics Panel08:26
12.Real-World Projects
12.1Use Proxies for Faster Editing13:42
12.2Create Multiple Camera Shots From a Single Camera10:56
13.New Features
13.1Using the Freeform View09:36
13.2Use Auto-Reframe to Crop Your Video09:36
13.3How to Work With Captions13:41
9.2 Exporting to HEVC for Faster Sharing Online
[MUSIC] In this lesson, you're going to learn how to export your projects using the successor to H.264, H.265. [MUSIC] So, H.265, or High Efficiency Video Coding, is the successor to H.264. And although H.264 is still very much a web standard at the moment for things like YouTube, Vimeo, Facebook, etc, you're going to see H.265 slowly start to take over because H.265 is 25 to 50% more efficient. What that basically means i you can have the same size of a file and you're going to get better quality. Or you can have the same quality at a much smaller file size. Now, this is a big deal, because online video is not slowing down in terms of its growth and its spread, and it's used for all kinds of different applications. And if you can get the same quality in a smaller package, you can bet that that standard is going to be adopted, because storing big videos costs money. So, thankfully, this is very easy to do using Media Encoder. So in the same way you export any other project from Premiere, you can, either from the timeline, right here, have your sequence selected, or from the project panel, have your sequence selected. And you can use the keyboard shortcut, Ctrl+M. Or, you can come up to the menu, you can choose Export > Media, same thing. But I would learn the keyboard shortcuts. Now, you're probably most used to selecting H.265 or maybe some other format, but check this out. We now have the option to use HEVC, High Efficiency Video Coding, or H.265. And you're gonna see there are some different options. But by and large, you can probably get away with using some of these presets. So, if your composition is HD, you can choose the HD preset, and you'll see you'll get a very standard sort of resolution, although you can change that if you like. There are some other options down here in terms of what level you want to encode that. And this is something that you're going to want to check if you are uploading to a specific platform. Now, right now, sites like YouTube and Vimeo will accept H.265, but they do not have recommended specifications for what level or what bit rate to use. My guess is that you can basically get away with using the same thing that you would for H.264, but you'll be uploading a higher quality. Because if you're exporting at the same bit rate, it's gonna be grabbing more information, for the most part. Now if you haven't checked out some of the options in Adobe Media Encoder, and this is just the exporter, but these are all the settings that Adobe Media Encoder will use, there are a lot more options than there used to be in terms of the effects. Because now we can apply luts, we can do standard dynamic range, conforming, we had image overlay, name overlay, time code overlay. I believe those were in the previous versions when the original Intro to Video Editing in Premiere Pro was created. We also have things like a video limiter, a loudness normalization and going through all of those will be its own mini course. And you can explore what all of those options do over on Adobe's site. They go into great detail. The one thing I do wanna mention here that is new is this option right here, for hardware encoding. Now, this is a big deal. This is something that was added to the latest edition, at least at the time that I recorded this lesson. This just came out within the last, I don't know, two weeks or so. Now, hardware encoding has been a part of the Adobe Suite for a while, but its implementation was sketchy at best. It used to be that your options of software encoding or hardware encoding were the hardware encoder might be faster, but the quality wasn't as good if you were comparing it to the software encoder. With the latest update, the hardware encoder is every bit as good as the software encoder, and it is much, much faster. So this is a really cool option if you have the hardware for it. So, again, you can probably stick with the presets here. And they go all the way up to 8k Ultra HD, which I'm guessing is probably not what you're producing videos at right now. But when, and if you do, this codec has you covered, and it's gonna look fantastic. And just like anything else, we'll select this back to HD 1080p. You wanna just select the output name and output location. Click Save, and then click Queue, and this is going to go right over to Adobe Media Encoder. There it is right there. If you need to make any other adjustments, once it gets over here, you can click on this preset and it'll open up that export window again and you can change any settings that you need to. And you can just click the play button to start encoding. Now, I'll pull up my Task Manager here, so you can see exactly what the hardware encoder is going to do. So let's see here. If I sort by GPU, you should see that Media Encoder is going to utilize the GPU at least a little bit. Yeah, there it goes, up to 20% to rip down this encode. Now, I have a ton of other stuff running in the background. But the last few projects that I have exported from a Media Encoder with that hardware encoder option enabled have gone a lot faster. So there are some downsides to using H.265. One of those is that you need a much more powerful computer to be able to edit it. So this is not the codec that you want to use if you are sending your projects to someone else, either so that they can do some motion graphics, or color correction, or just to edit in a larger sequence. For that, you want to use an intermediate codec. And to find out more about that, make sure to check out the next lesson. [MUSIC]


