
 Lessons: 43Length: 6.5 hours
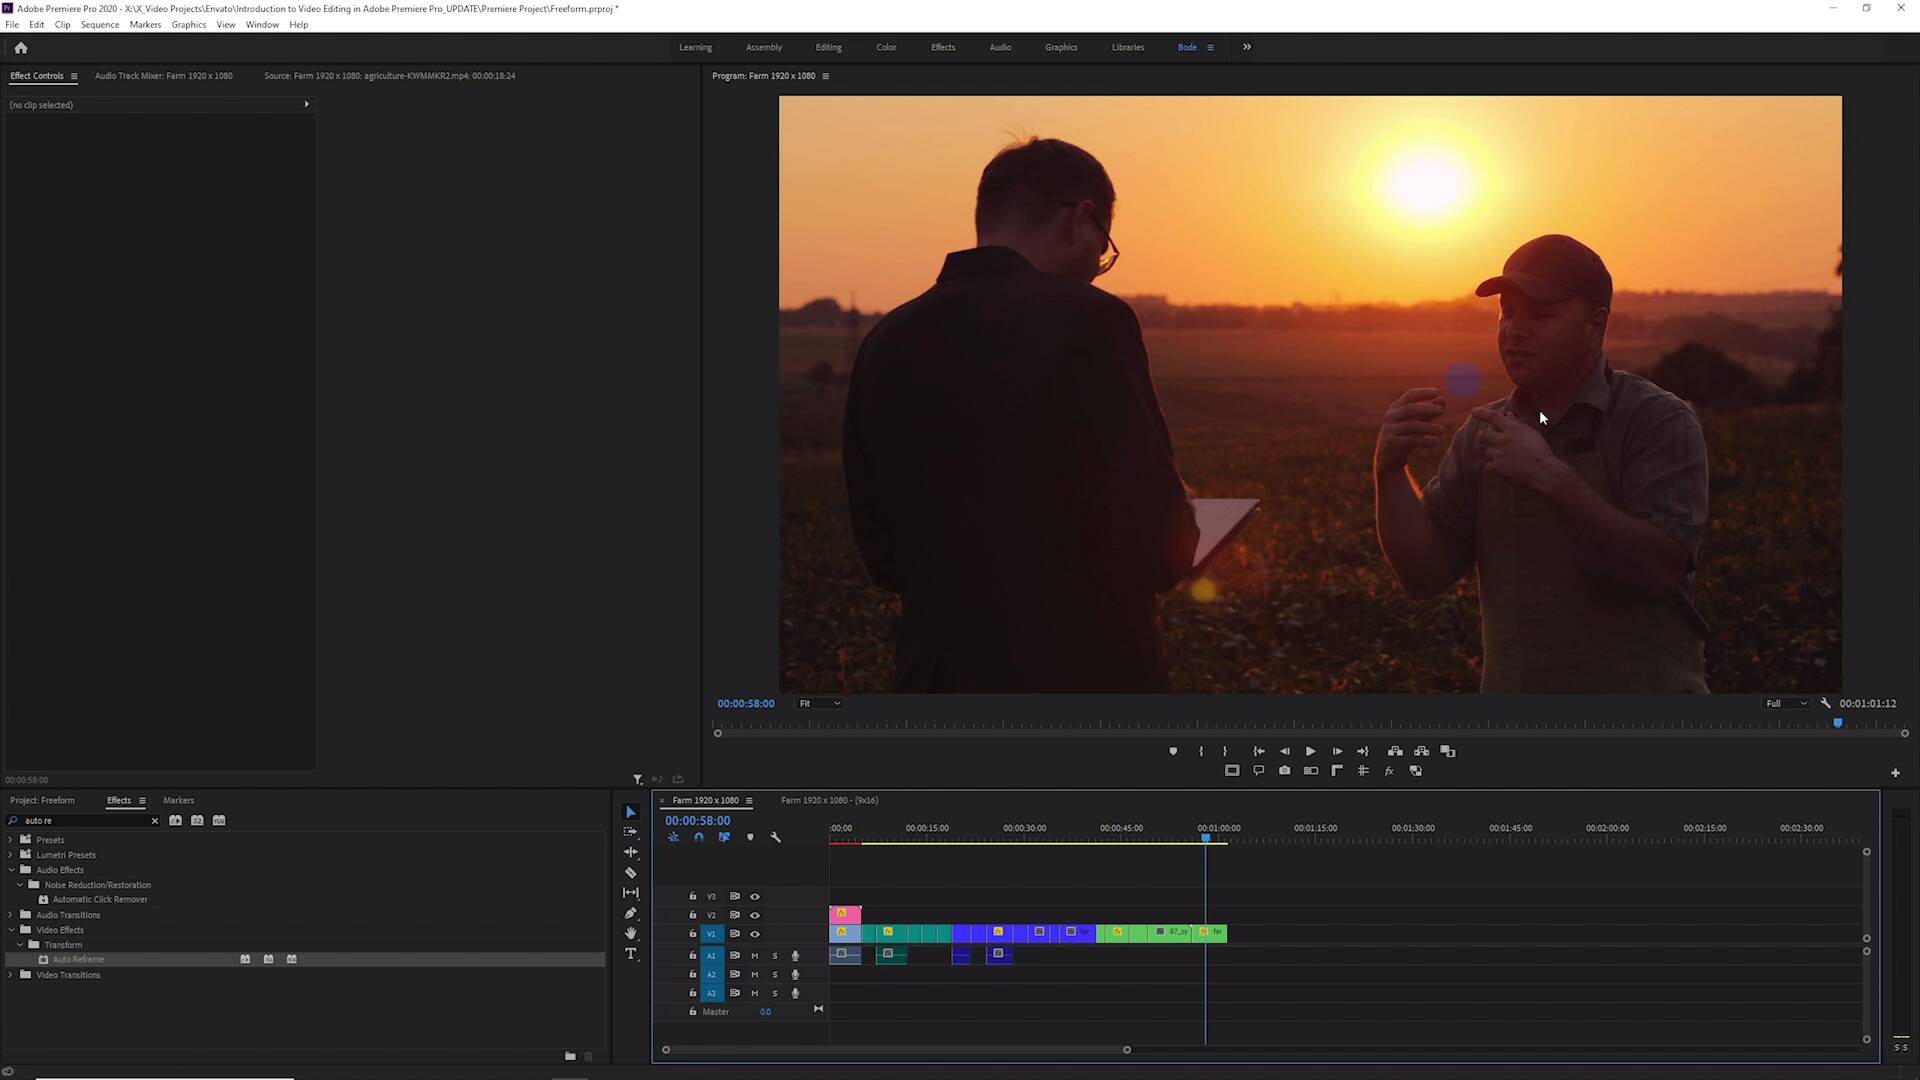
- Overview
- Transcript
13.2 Use Auto-Reframe to Crop Your Video
In this lesson, you will learn how to use the Auto-Reframe feature to create crops of your video in different aspect ratios for social media!
1.Introduction
1.1Introduction01:12
1.2What You Need07:14
2.Getting Started
2.1File Structure06:07
2.2Quick Tour of Premiere Pro11:14
3.Set Up Your Project
3.1Import09:55
3.2Organize08:39
4.Editing Basics
4.1Creating a Sequence10:07
4.2Cuts06:26
4.3Subclips06:46
4.4Editing in the Timeline, Part One11:27
4.5Editing in the Timeline, Part Two07:19
5.Beyond Basic Editing
5.1Adding a Cutaway Shot10:06
5.2Building on the Basic Edit, Part 107:09
5.3Building on the Basic Edit, Part 209:09
5.4Audio Transitions11:22
6.Fine-Tuning the Look and Sound
6.1Video Effects10:48
6.2Master Clip Effects10:47
6.3Adjusting the Volume of Your Tracks09:46
6.4Audio Effects11:17
6.5Adding Titles11:16
6.6Exporting12:10
7.Conclusion
7.1Conclusion02:33
8.Frequently Asked Questions
8.1FAQ Introduction01:22
9.Sharing
9.1Dynamic Link to After Effects12:44
9.2Exporting to HEVC for Faster Sharing Online06:39
9.3How to Export ProRes Video and Other Professional Formats07:17
10.New Audio Workflows
10.1Using the Essential Sound Panel for Dialogue: Part 111:58
10.2Using the Essential Sound Panel for Dialogue: Part 206:35
10.3Using the Essential Sound Panel for SFX and Ambience07:59
10.4Using the Essential Sound Panel for Music08:35
10.5Send Audio to Audition for Editing From Premiere Pro13:59
10.6Mixing Audio With Killer Effects Inside Premiere12:57
11.Essential Graphics Panel
11.1Use the Essential Graphics Panel to Create Basic Titles12:30
11.2Use the Essential Graphics Panel to Create a Motion Graphic Title in Premiere13:23
11.3Make Your Own Templates for the Essential Graphics Panel03:51
11.4How To Use Title Templates in the Essential Graphics Panel: Part 107:14
11.5How To Use Title Templates in the Essential Graphics Panel: Part 207:09
11.6How To Use Transition Templates in the Essential Graphics Panel08:26
12.Real-World Projects
12.1Use Proxies for Faster Editing13:42
12.2Create Multiple Camera Shots From a Single Camera10:56
13.New Features
13.1Using the Freeform View09:36
13.2Use Auto-Reframe to Crop Your Video09:36
13.3How to Work With Captions13:41
13.2 Use Auto-Reframe to Crop Your Video
[MUSIC] In this session you will learn how to use auto-reframe to re-frame your videos for different aspect ratio outputs. [MUSIC] In the last session we looked at the free form view, and you say me create this really simple farm sequence here. And I changed the sequence setting to make this 1920 by 1080. But what if you wanted to export a vertical video, something that wasn't 16 by 9, but 9 by 16 or a square video? Well Premiere has a really nice feature to be able to do that. And if you wanna do it to your whole sequence and have it a little bit more automated, all you need to do is right click on your sequence. You can see here's My Farm 1920 by 1080 sequence, and I can choose auto-reframe sequence. It's going to come up with this dialog box here. And there are a few different presets. Let's first check out 9 by 16. It has a motion tracking drop down here where we can pick a few different options depending on the type of motion in our video. If there's a lot of fast moving action, and we want it to move between the subjects or the things that are sort of in focus or being featured, we wanna choose the fast motion option. I'm just going to leave it on default and choose Create. All right here is my project right over here. Let's check out how good of a job it did. It's still analyzing down here. So we'll let that finish analyzing all of the clips And then if you look at these individual clips, over here in the effects controls auto-reframe, which is an effect which you can find right down here in the Effects panel. This auto-reframe effect has been applied to almost all of these clips here with the exception of this essential graphics element that I have here. But that's been centered up nicely. So let's check out what it has done here. I'll play this looks like we have the sun in view. Hey, check that out. We got our farmer in view. This is reframed pretty well Look at this. So it basically analyzes the footage and tries to figure out what is the thing that I need to be focusing on. It's doing a fantastic job so far. It's getting this guy in there. Very good. It's getting the cow's face very nice. Looks like it's giving us a little pan there. Look at that it looks like it caught on maybe to one of those horses there and was doing a little pan and scan, which is pretty cool. It's keeping our guy's face in view. They're very nice. Same thing here. Overall, I'd say it's doing a really nice job. But let's look at a few of the options. So I'm gonna find this horse clip here, because I did see a little bit of weirdness on that shot there. So let me zoom up here in the sequence. And I think what its doing is it may be tracking this horse here and then panning over, but if we change the preset for motion tracking too fast motion, it's gonna reanalyze this clip and let's see what it looks like now. So kind of a similar thing. Let's try slower motion. And let's see what it looks like. All right, so slower motion it basically ignored that fast moving horse here right here where I think in fast motion it was trying to get a little bit more of that horses action in the frame. But the slower motion preset basically ignores that. Everything else here looked really pretty nice. However, on this last clip here, it kind of has to decide what it wants to do. Because the way that this clip is in the time line, you can see anyway you slice it 9 by 16 is not going to work to be able to get both of these guys in without having some black bars on the top and the bottom. So let's look at how you might wanna deal with this. We can experiment with maybe slower motion. See what that's gonna do here. We get a little bit of this guy. Is it gonna stay with him the whole time? Okay, yeah it is. If we choose faster motion what's gonna happen? Okay, it's gonna hang with this first guy here with his back turned. And then we gonna go over here to the second guy. Now we can edit these key frames. And you can see basically what it has done to the position in order to do that move that it did right there? So I'm gonna go to this first keyframe here, and I'm gonna delete these other ones. This will be my start Keyframe. And maybe I'll just push this over here. We'll start with this guy right here and then we'll just slowly move over here to the second gentleman right here. And we can adjust the temporal interpolation. So maybe we do an Ease Out and then Ease In. Something like this. I think I like that a little bit better than what the automated tracking solution gave us. So at any point in time, if the presets here are not doing it for you. You can go in here and basically do it yourself manually. Now that's not too different than just Keyframing the motion for each one of these. But I would say for probably 90% of the clips, the auto-frame effect that it puts on here by default is really gonna do a fantastic job. And you can see over here in the Project panel, I have a new folder. That is my auto-reframed sequence. And you can see that it has my original name and then in parentheses, it says 9 by 16. Let's just check out one more variation of this and let's do a square clip. We'll just create that and then let it do its magic with the analyzation. All right, so that was pretty fast. And let's play this down and see what we have here. So the title still looks good that's nice and centered, although I wouldn't expect it to be too off. This clip is looking nice. That's looking nice. We have a little bit more wiggle room with a square sequence as opposed to a 9 by 16, which is really pretty skinny. So I'm guessing that this is going to be pretty smooth. And we shouldn't have to adjust too much because we should be able to get those two gentlemen at the end into frame a little bit easier than the 9 by 16 version. Which I'll admit is really not my favourite. That looks great with the horses, I think that worked fine. This guy gonna look great there, that's an easy track, that machine. Not much movements so no big deal there, this gentleman here is looking fine, not much movement there. How are we gonna do here with the last one? Not great. [LAUGH] Okay, so for this last one, we may wanna come in here and just edit these Keyframes. You can see it came up with a different solution, which in my estimation is still bad. Let's see if we can center that up here, I'm just going to hold Shift and lock the CTI to this first keyframe and see if we can get. Yeah, we can't really get both of these guys in here. So in this particular instance, what you might wanna do is delete the auto-reframe effect and maybe just scale this down a hair. Like this. Maybe push it up to another video track and then do the old blur the background sort of trick like this. Where we put a Gaussian blur on the background video here and just blur that way out maybe. Something like that. That might work for shots that are too difficult to get in and shots that you don't wanna see that weird kind of pan and scan action, like you saw before there. So that pretty much does it for the auto-reframe in Premiere, super, super handy. And I would say 90% of the time, it's gonna get really great results. All right, coming up in the next lesson, you're going to learn how to work with captions in Premiere. So check that out coming up next. [MUSIC]


