
 Lessons: 43Length: 6.5 hours
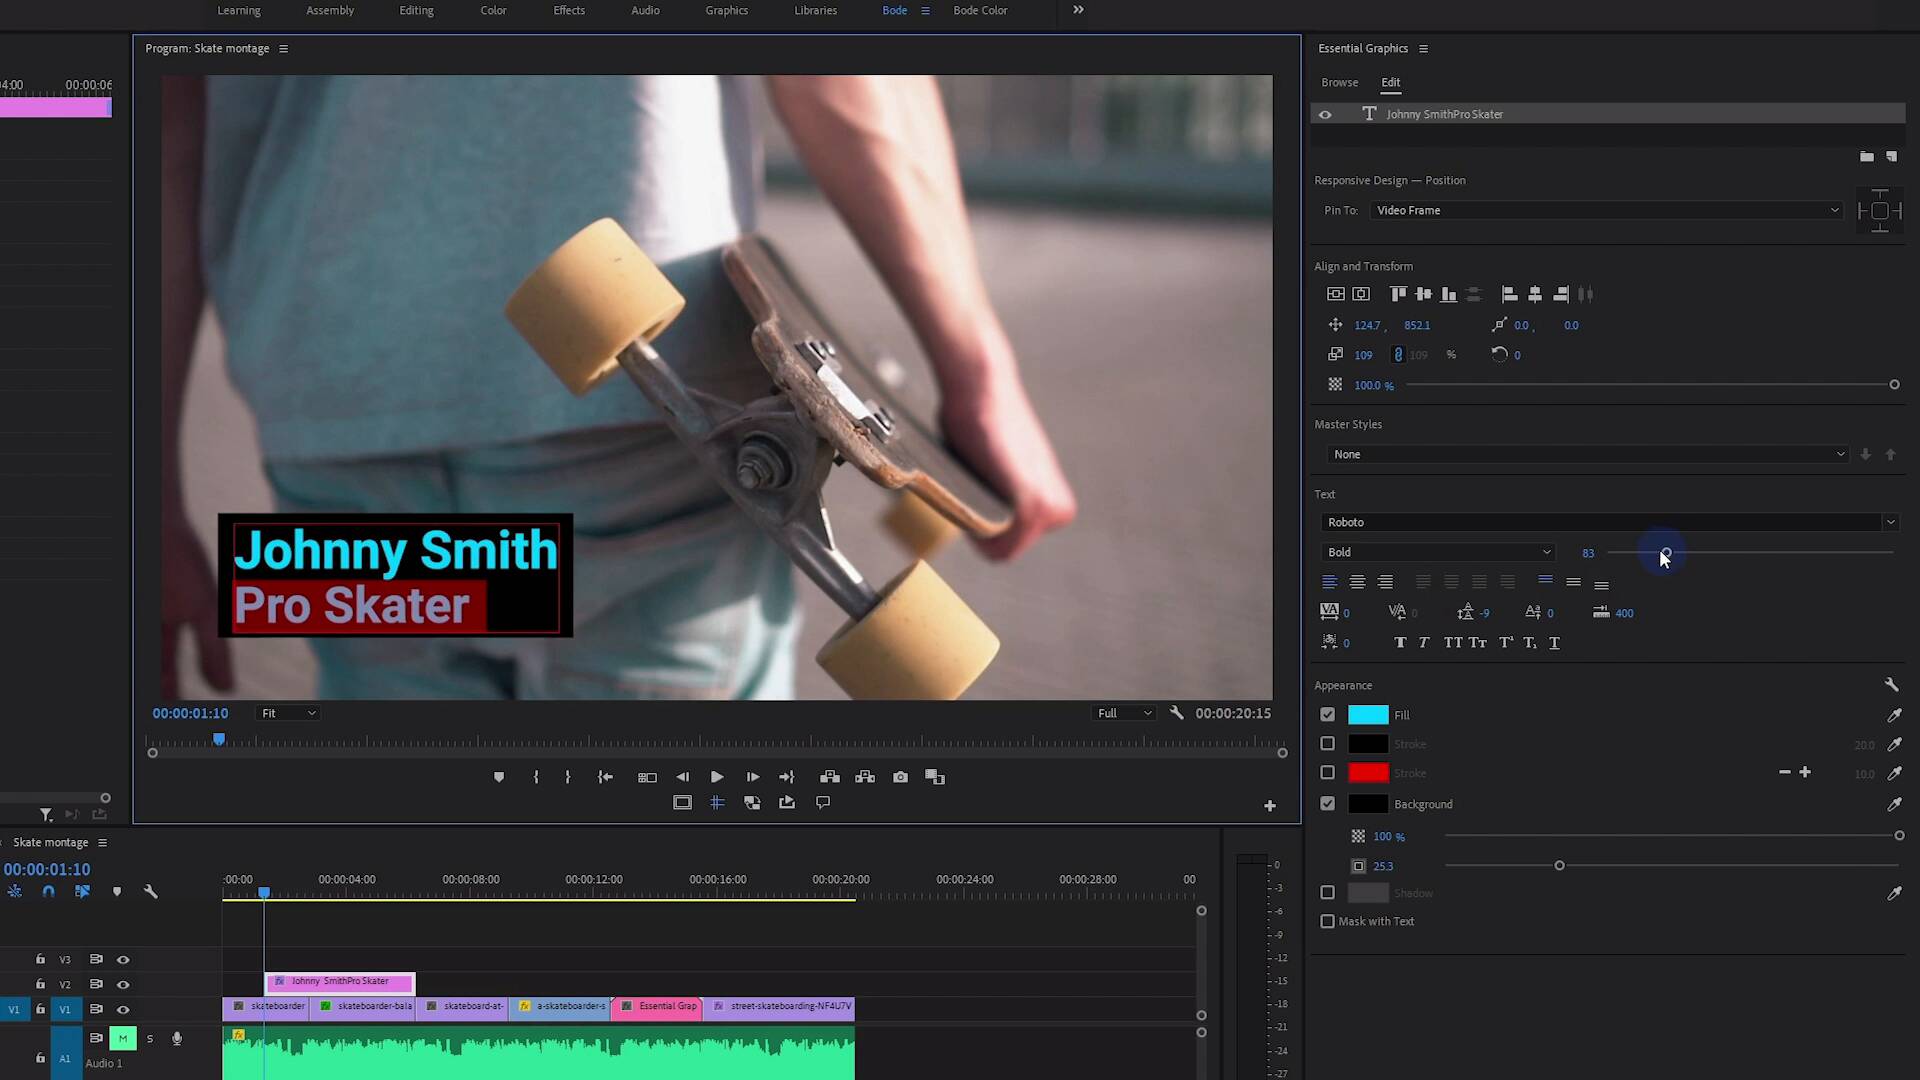
- Overview
- Transcript
11.1 Use the Essential Graphics Panel to Create Basic Titles
In this lesson, you will learn how to use the Essential Graphics Panel to create some simple but great-looking titles.
Related Links
- Titles Video Templates on Envato Elements
1.Introduction
1.1Introduction01:12
1.2What You Need07:14
2.Getting Started
2.1File Structure06:07
2.2Quick Tour of Premiere Pro11:14
3.Set Up Your Project
3.1Import09:55
3.2Organize08:39
4.Editing Basics
4.1Creating a Sequence10:07
4.2Cuts06:26
4.3Subclips06:46
4.4Editing in the Timeline, Part One11:27
4.5Editing in the Timeline, Part Two07:19
5.Beyond Basic Editing
5.1Adding a Cutaway Shot10:06
5.2Building on the Basic Edit, Part 107:09
5.3Building on the Basic Edit, Part 209:09
5.4Audio Transitions11:22
6.Fine-Tuning the Look and Sound
6.1Video Effects10:48
6.2Master Clip Effects10:47
6.3Adjusting the Volume of Your Tracks09:46
6.4Audio Effects11:17
6.5Adding Titles11:16
6.6Exporting12:10
7.Conclusion
7.1Conclusion02:33
8.Frequently Asked Questions
8.1FAQ Introduction01:22
9.Sharing
9.1Dynamic Link to After Effects12:44
9.2Exporting to HEVC for Faster Sharing Online06:39
9.3How to Export ProRes Video and Other Professional Formats07:17
10.New Audio Workflows
10.1Using the Essential Sound Panel for Dialogue: Part 111:58
10.2Using the Essential Sound Panel for Dialogue: Part 206:35
10.3Using the Essential Sound Panel for SFX and Ambience07:59
10.4Using the Essential Sound Panel for Music08:35
10.5Send Audio to Audition for Editing From Premiere Pro13:59
10.6Mixing Audio With Killer Effects Inside Premiere12:57
11.Essential Graphics Panel
11.1Use the Essential Graphics Panel to Create Basic Titles12:30
11.2Use the Essential Graphics Panel to Create a Motion Graphic Title in Premiere13:23
11.3Make Your Own Templates for the Essential Graphics Panel03:51
11.4How To Use Title Templates in the Essential Graphics Panel: Part 107:14
11.5How To Use Title Templates in the Essential Graphics Panel: Part 207:09
11.6How To Use Transition Templates in the Essential Graphics Panel08:26
12.Real-World Projects
12.1Use Proxies for Faster Editing13:42
12.2Create Multiple Camera Shots From a Single Camera10:56
13.New Features
13.1Using the Freeform View09:36
13.2Use Auto-Reframe to Crop Your Video09:36
13.3How to Work With Captions13:41
11.1 Use the Essential Graphics Panel to Create Basic Titles
[MUSIC] In this lesson, you're going to learn how to create some basic but really nice looking titles right inside Premiere using the Essential Graphics panel. [MUSIC] Essential Graphics panel was added to Premiere a few years ago. And since then, it has had some updates, which really make the functionality quite nice, and you can do a lot of things from very simple titling in texts and graphic elements to things that are really pretty complex without ever having to go to After Effects. Now the cool thing about the Essential Graphics panel is it does have a link with After Effects. So you can build some really complex looking graphics and lower thirds and titles in After Effects and templatize them so that they work with the Essential Graphics panel. And I'm gonna show you that in an upcoming lesson. But for now let's look at how to get the Graphics panel out here so you can start working with it. If you come up here to the Menu and go to Window, you can find the Essential Graphics panel right down here. There's also a dedicated graphics workspace which you can find right here. And that should pull out the Essential Graphics panel as well. I'm just gonna switch back to my botie workspace because it's a little less cluttered. Now the Essential Graphics panel has two tabs on it. There's a Browse tab here, and this is where you can store and search all of the templates that you wanna use for titles and other kind of graphic treatments that you might have. Some of these you can create and make inside of Premiere. And a lot of the ones that you're seeing here actually came from Envato elements, and those have been designed in After Effects. And a lot of them are quite a bit more complex than what you could do easily in the Essential Graphics panel by itself. But this is a really nice way to get some really, really high end looks very, very simply. And I'm gonna show you more about these sort of templates and how you can use them in an upcoming lesson. But for right now let's look at how to get some basic titles into our project. I wanna do a really simple lower third for my skater man here. So, I'm just gonna grab the type tool here, the keyboard shortcut is T. And if I click in the program Window. I'll make a little title here Johnny Smith. If I hit Escape, and then V I can switch back to the selection tool. Unlike After Effects, you can't use the Enter key on the numeric keypad to kind of enter in your text. But you can just switch back to the selection tool. And then you can grab your text and position it here visually. You can scale it up and down however you want. And if you look over here in the Edit tab, you can see we have a ton of options for modifying this text. We have a whole align and transform set of tools here, where we can align this to various parts of the frame or the horizontal and vertical centers. You can also see that as I move the text around the program monitor, it's snapping, now you may not have snapping enabled but to enable it, you can just click on the Wrench icon here. And then you can enable and disable snap in program monitor. Without snapping enabled, you'll see as I move it around, it's not going to snap anywhere. However, if you hold Down+Control, you can temporarily enable snapping, which I think is perhaps a little bit more useful so you don't have it snapping to things all of the time. That's how I prefer to use it. So over here, these are your basic kind of transformative controls. We get scale, rotation, anchor point, position, opacity here. In the next section down here, we can store and recall or what Adobe calls master text styles, and that's basically a style that includes your font, your font style, and all this other jazz that you can find below here. So if you create a look for your text that you'd like and you wanna reuse it and be able to recall it very quickly, you can create a master text style and then name that and recall that any time you like. So we have a full drop down here of all of the fonts that you have on your system. Those are all available. You can adjust the tracking, the lettering, the line spacing, the whole thing. Down here, under the Appearance section, you have a bunch of options to adjust a fill color, maybe you want this a light blue. We can drop a stroke on this, we can adjust the stroke with, you can also enable multiple strokes to create some more interesting or unique sort of styling for your texts here. And if you click on the Wrench icon, we have stroke styles that we can use. So we can change the line join from mitre to round. You can also change the cap type although for this text, it's not going to make any difference but you can see as I change that to round joint now it's got more round and puffy sort of look to it, which is kind of nice. I actually prefer the mitre join, I think, but I'll get rid of those to show you the next option, which is background. This is a really cool option that creates a bounding box or a background box here that is linked to your text layer. And you have control over the color, the opacity, and the padding, which is really cool. So you no longer have to use another element like you did in the past in the Essential Graphics panel to create a link to background box for your text. And this will auto update or act in a responsive way. So maybe we want to add a second line here, Pro Skater. And you can see that the background box there Updated exactly like it should have. And if we adjust the maybe the font size here and the style and the line spacing or lettering here, you can see that it acts exactly like you would expect. It's really cool and really, really fast to create some nice looking titles here with a cool little background. You can change the color here and maybe we want this to be orange, blue and orange. Well, okay, that was a terrible idea, [LAUGH] Who thought of that? Maybe a dark orange. Maybe we'll just set this back to black. Yeah, that works pretty well. Finally, you can throw a shadow on and you have a bunch of controls over the shadow here. I'll let you explore that and you can mask things with your text layer, which is pretty cool. So you can pull in graphics and video. So for example, I have a piece of footage here that I got from Envato elements, and I can just drop this in underneath my text here. And if I select my text and I choose mask with text. Now it's gonna essentially make the text a track mat, or it's gonna mask this layer here with the text, that doesn't work perfectly with this layer. I don't think this is a great example but I just wanted to show it to you so you can get an idea of what it can do. So you can create all kinds of nice, maybe big bold text. If we changed our text here to something, maybe just a single line. You select that text again, let's double-click here. And I'll just make this a single line. I'll hit Escape, and just make some adjustments over here. Maybe I'll center this up and put it in the middle. Make the text quite big. Something like this, maybe I'll recenter that in the middle there. You can see you can create some really nice looking effects. We can have this kind of blow right up to reveal the background layer and use that as maybe a transitional element. And a lot of these properties here, if not all of them can actually be animated as well. I'm not gonna show you that in this lesson, because that's gonna be too much to cram in. But you can create some really nice looking animated text treatments or graphic treatments right inside Premiere Pro without ever having to jump over to After Effects, which is really neat. Finally, I wanna show you, you can add effects to any of these layers. Now I don't know if all of the effects work but a great many of them do. And for something like this, I might want to maybe adjust this video layer here by throwing a curves on it. Now this is still listed as an obsolete effect, but it'll work just fine. And that should help this to look a little bit nicer. Maybe pull some of the greens out of it to give it some more contrast. Push up some of the reds here, I don't know something like that. Pretty cool. In addition, you can create some basic shapes in here, you can add a rectangle, and we can actually use this as a background box for the text if you wanted to. So, let me just get this right here, and I'll recenter up this anchor point. Maybe center it here, pull it down to the bottom. It's not quite centered on the text but that's kind of in the neighborhood. If you hold Down+Shift+Alt, you can use the Arrow keys here to position things a little bit more easily. So I'm gonna take my shape layer here, and it looks like it's actually being masked by the text because we can't see it. So, I'm gonna take all of these layers here. I'm gonna put them in their own group and I can rename this, Text and that works fine. And now I can change my fill color here, maybe do a white or something and I can see now. Yeah, I'm gonna have to reposition that just a little bit here. But the cool thing about these shapes is, I can actually pin this to my text layer here. So I just selected that from the drop down, and I can select which signs I want to pin it to. But now if I go and change my text, so I'll select my text here. Marc Cole, check that out, my background box changed with the text. And it'll also follow it along if I wanna animate it or move it around, really, really cool. And you can also load graphics here from a file as well. You can even grab the pen tool and start drawing a maybe more abstract shape here and you have a bunch of controls over that as well. We can pull that down in the layer stack, change the color of this, I don't think that was a great shape for a demo, but I think you get the idea here. And you can maybe make this a stroke only, if you make this really bright red. Perfect, look at that. Excellent, [LAUGH] There you can see that with any of the shape layers you can also make those a mask as well. So maybe you want to take, Let's get rid of this guy here, we'll call this, Rectangle. Maybe you want to duplicate your bubbles footage, pull it down here. And then set your rectangle to mask that, then maybe throw an RGB curves on that and then push this up, so you get this sort of effect here. You can see I'm just kind of messing around here. But you can do a lot of really nice things in this Essential Graphics panel over here and make some really great looking text treatments. So that about wraps it up for this lesson. Coming up in the next lesson, I'm gonna show you how to make some nice animated lower thirds right inside the Essential Graphics panel. So check that out coming up next. [MUSIC]


